This step-by-step guide explains how to configure load balancing for Parallels RAS on Microsoft Azure using Azure-native load-balancing capabilities and resources. This configuration allows load balancing of HTTPS traffic to the Parallels RAS User Portal and TCP/UDP traffic to the Parallels RAS Secure Gateways. There are different methods to achieve this. This guide focuses on scenarios in which Azure Firewall is required or used.
The procedure described in this guide will give you the ability to load balance Parallels RAS traffic for the following scenarios:
-
Browser access: Users log in to Parallels User Portal from their web browser and use the built-in Web Client (HTML5) to launch Parallels virtual apps and desktops.
-
Installed Parallels Client access: Users log in using the platform-specific Parallels Clients installed on end-point devices and launch Parallels virtual apps and desktops directly through the Parallels Client app, desktop shortcuts, or the start menu.
-
A mix between browser and installed Parallels Client access: Users log in to Parallels User Portal from their web browsers and use platform-specific Parallels Clients installed on endpoint devices to launch Parallels virtual apps and desktops.
Prerequisites and assumptions
It is assumed that the reader has a basic understanding of the Azure Portal, Azure resource deployment, and Parallels RAS. It is assumed that the Parallels RAS environment is already deployed and configured, including the Parallels RAS Secure Gateway roles. It is advised to test the connection flow from within the internal network towards the internal IP addresses of the Secure Gateway servers to confirm successful connections before following this guide to start publishing your Parallels RAS resources publicly. This guide uses the Azure Portal for all configuration steps, but you can, of course, also use automation such as Bicep templates, PowerShell, or REST API to achieve the same configuration.
Process flow
This step-by-step guide follows the flow as illustrated below:
-
Configure networking.
-
Create and configure an Azure Load Balancer.
-
Create and configure an Azure Application Gateway.
-
Create and configure Azure Firewall.
-
Configure Parallels RAS.
-
Test and evaluate load balancing.
Architecture
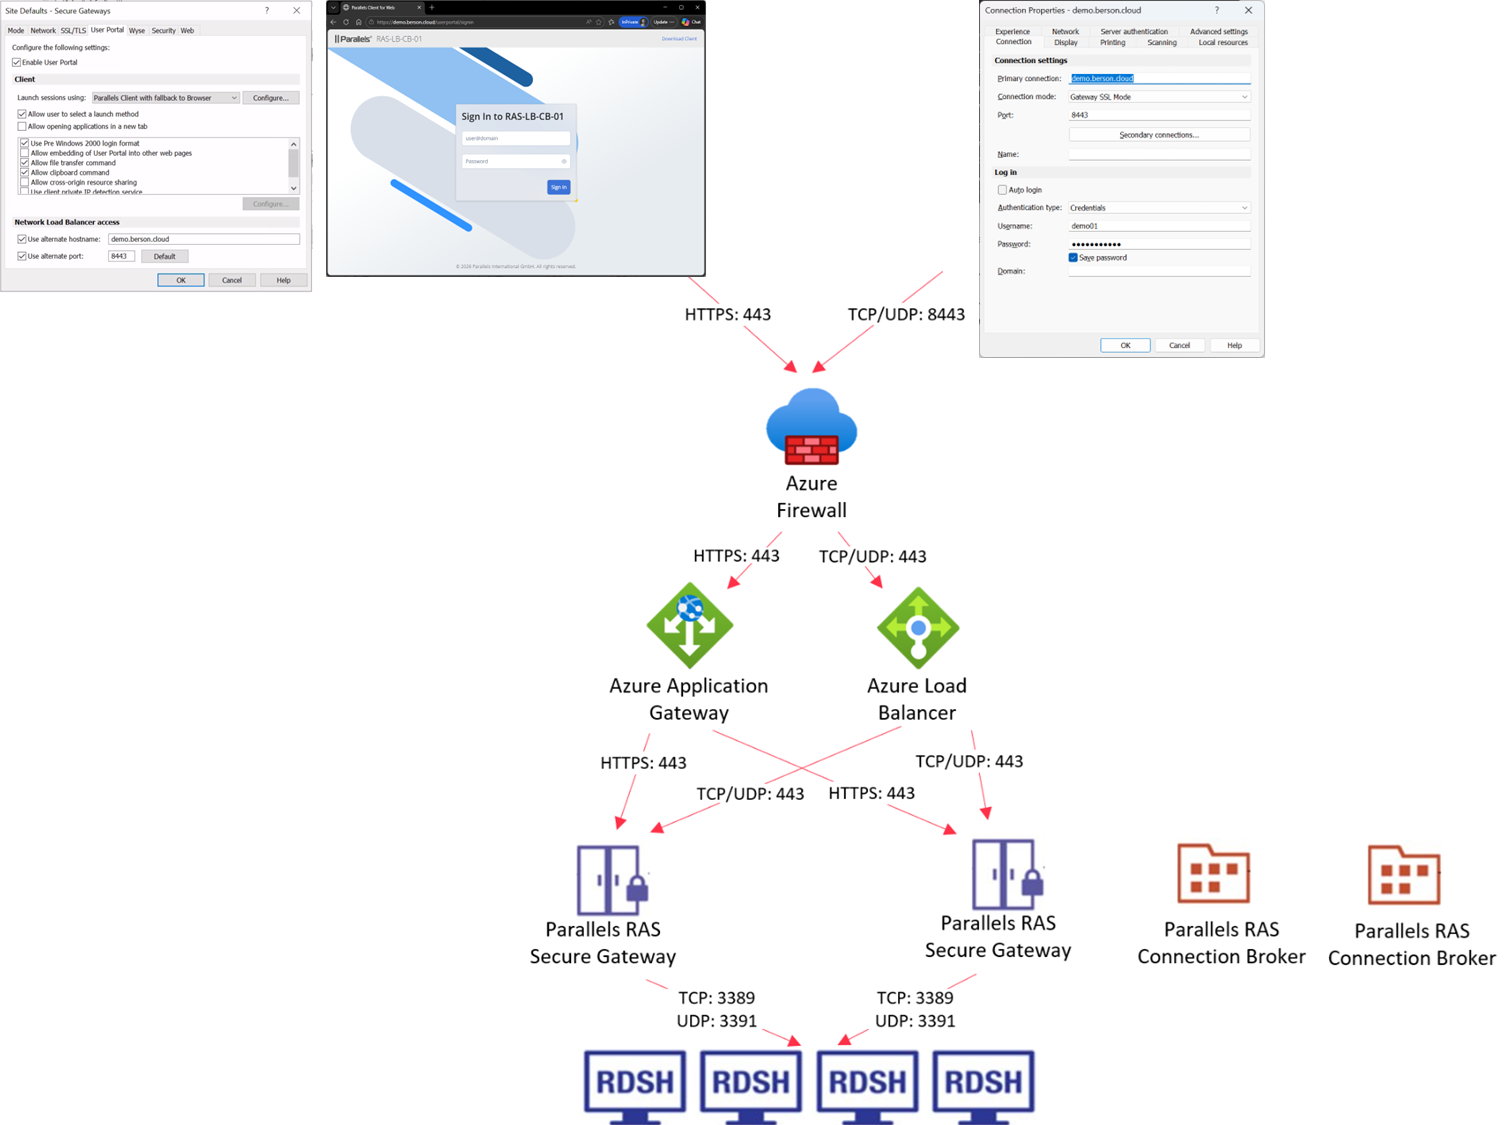
The diagram below shows the architecture of Parallels RAS published through Azure Firewall. The Azure Firewall contains a single public IP and is configured with 2 DNAT rules. One rule allows listening on TCP/UDP port 8443, and another allows listening on TCP port 443. The DNAT rule for TCP (443) forwards connections to the Azure Application Gateway, which load-balances HTTPS (443) traffic to the Secure Gateway servers, providing access to the Parallels RAS User Portal. The DNAT rule for TCP/UDP (8443) forwards connections to the Azure Load Balancer based on TCP/UDP(443) to provide access to the Parallels RAS Secure Gateway.
Step 1: Configure networking
This guide assumes you already have a Virtual Network (VNet) in Azure. In most scenarios, you will use the VNet that contains the Parallels RAS infrastructure servers. You can also use another VNet or create one now. In those cases, make sure that VNet peering is configured to allow peering connectivity towards the VNet where the Parallel RAS and Active Directory VMs are located. For more information on setting up VNet peering, follow this Microsoft guide on Virtual Network peering. For production deployments, Microsoft recommends a hub-and-spoke model in which the firewall is in its own VNet. The Parallels RAS servers should be in peered VNets within the same region, each with one or more subnets. Both the Azure Firewall and the Azure Application Gateway require a dedicated Subnet.
Open the Azure Portal at https://portal.azure.com.
-
Navigate to Virtual networks.
-
Click on the VNet where the Azure Firewall and Azure Application Gateway are to be deployed.
-
Go to Subnets.
-
Create a new /26 Subnet named AzureFirewallSubnet. More information on Azure Firewall subnet sizing is available here.
-
Create a new /24 Subnet named ApplicationGateway. Having a /24 subnet isn't required for the Application Gateway deployment, but it is highly recommended. More information about Azure Application Gateway Sizing is available here.
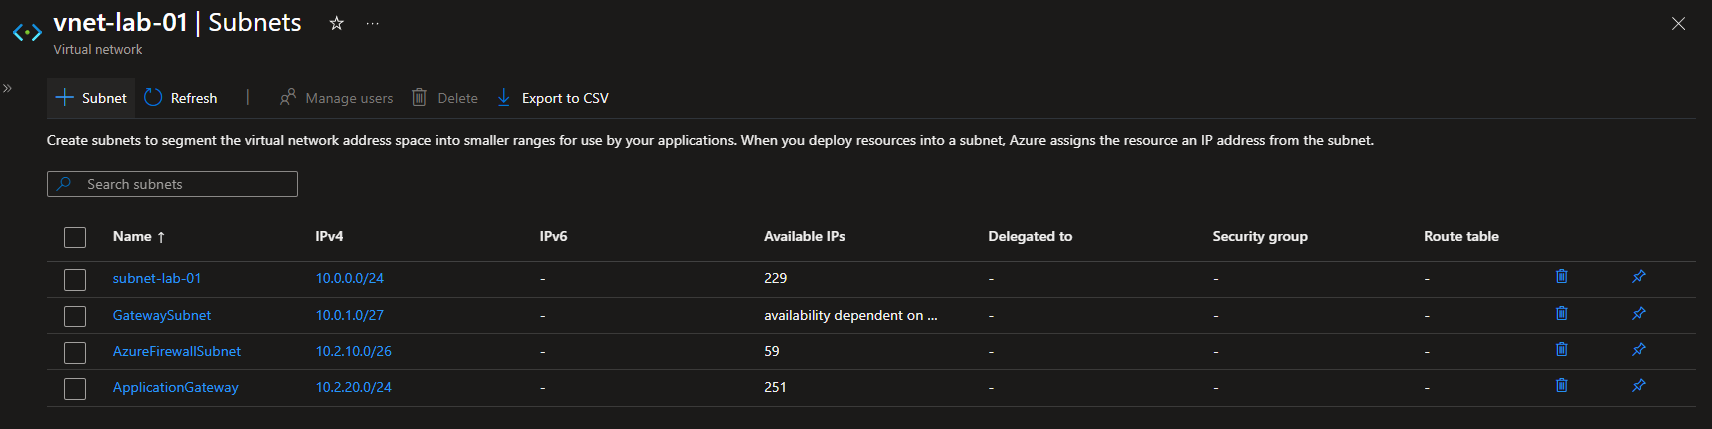
For this environment, we used the following values.
|
Subnet name |
IP Range |
|---|---|
|
AzureFirewallSubnet |
10.2.10.0/26 |
|
ApplicationGateway |
10.2.20.0/24 |
|
Subnet-lab-01 |
10.0.0.0/24 |
Step 2: Create and configure Azure Load Balancer
-
Open the Azure Portal at https://portal.azure.com and navigate to Create a Resource.
-
Search for Load Balancer.
-
Create a new Load Balancer.
-
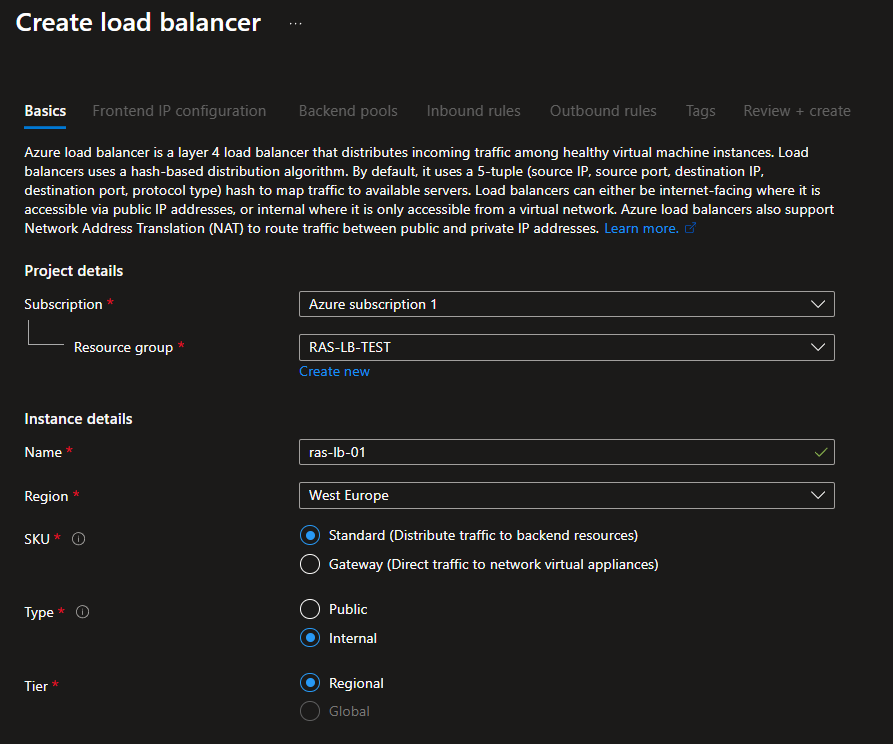
On the Basic tab:
-
Select the subscription and resource group.
-
Specify the name and region.
-
In the SKU section, select Standard.
-
In the Type section, select Internal.
-
In the Tier section, select Regional.
-
Note: In this example, the Standard SKU is used, but you can select any SKU type required for your environment. For more information on Azure Load Balancer SKUs, visit this link.
The result will look similar to the screenshot below.
-
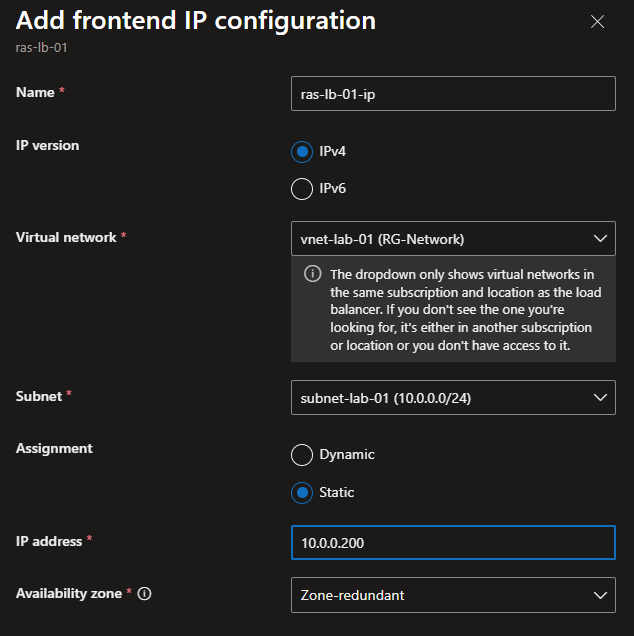
On the Frontend IP configuration tab, click the Add a Frontend IP Configuration button.
-
Specify the name for the frontend IP.
-
Select IPv4 as the IP version.
-
In the Virtual Network drop-down menu, select the virtual network that you have created.
-
In the Subnet drop-down menu, select the subnet where the Parallels resources reside.
-
For the Assignment, select Static.
-
Specify the IP address you want to use and make sure it is available.
-
In the Availability zone drop-down menu, select Zone-redundant.
-
Click Add to save the frontend IP.
-
The result will look similar to the screenshot below.
-
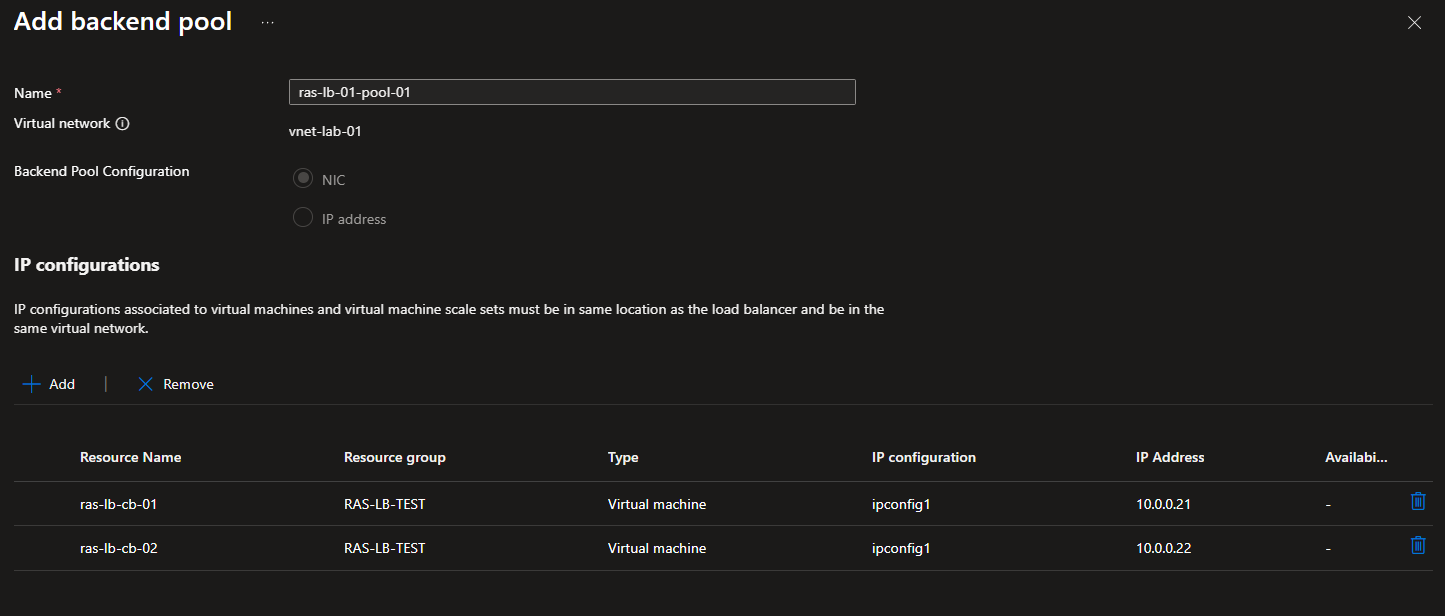
On the Backend pools tab, click Add a backend pool.
-
Provide a name for the backend pool.
-
In the Backend Pool Configuration section, select NIC.
-
Add all Parallels RAS Secure Gateway servers by clicking Add.
-
Click Save to continue.
-
The result will look similar to the screenshot below.
-
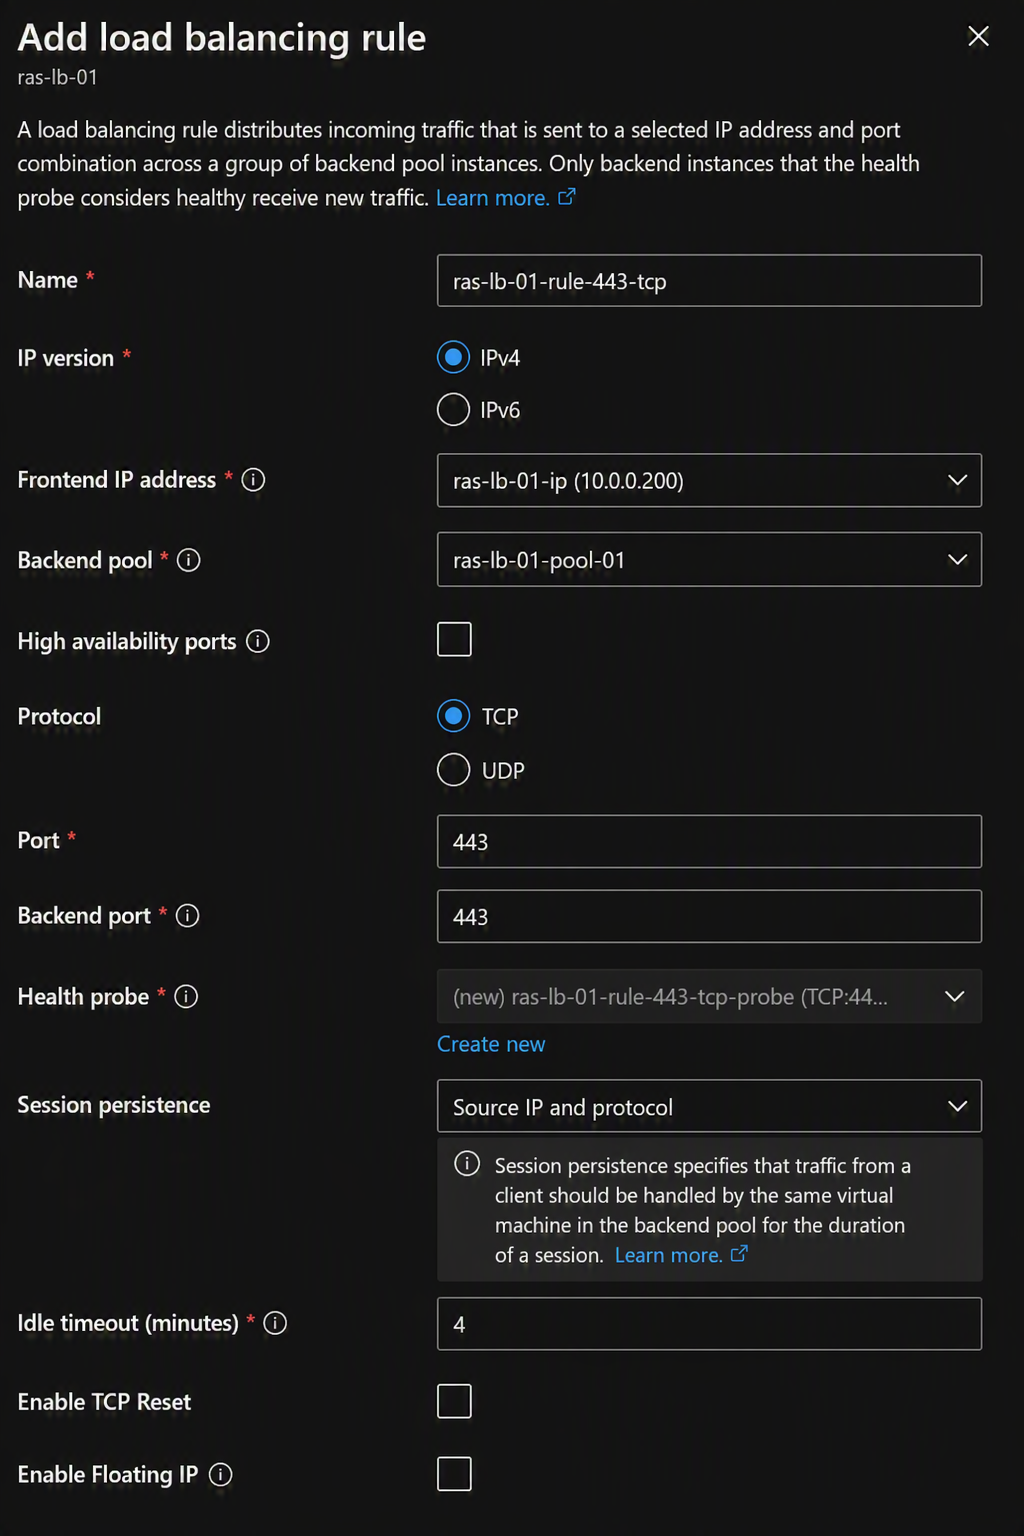
On the Inbound Rules tab, add two load-balancing rules.
-
Click the Add a load balancing rule button.
-
Provide a name for the rule that allows TCP traffic.
-
In the IP version section, select IPv4.
-
In the Frontend IP address drop-down menu, select the Frontend IP address you created in the previous step.
-
In the Backend pool drop-down menu, select the backend pool you created in the previous step.
-
Disable the High Availability ports option.
-
In the Protocol section, select TCP.
-
In the Port and Backend port fields, specify 443.
-
In the Health Probe section, click the Create New link. Specify the following properties:
-
Provide a name for the Health probe.
-
Set the protocol to TCP.
-
Set the port to 443.
-
Set the interval to 5.
-
Click Save.
-
-
In the Session persistence drop-down menu, select Client IP and protocol.
-
In the Idle timeout field, specify 4.
-
Disable the Enable TCP reset.
-
Disable the Enable Floating IP option.
-
Click Save.
-
-
Click the Add a load balancing rule button.
-
Provide a name for the rule that allows UDP traffic.
-
In the IP version section, select IPv4.
-
In the Frontend IP address drop-down menu, select the Frontend IP address you created in the previous step
-
In the Backend pool drop-down menu, select the backend pool you created in the previous step.
-
Disable the High Availability ports option.
-
In the Protocol section, select UDP.
-
In the Port and Backend port fields, specify 443.
-
In the Health probe drop-down menu, select the Health probe you created before.
-
In the Session persistence drop-down menu, select Client IP and protocol.
-
Disable the Enable Floating IP option.
-

-
From a machine in the same subnet, test access to the individual RAS Secure Gateway Servers as well as the Azure Load Balancer front-end IP on TCP port 443.

-
Test access to the Azure Load Balancer front-end IP using a Parallels RAS client in Gateway SSL mode, and confirm that published resources are available.

Step 3: Create and configure Azure Application Gateway
-
Open the Azure Portal at https://portal.azure.com and navigate to Create a Resource.
-
Search for Application Gateway.
-
Create a new Application Gateway.
-
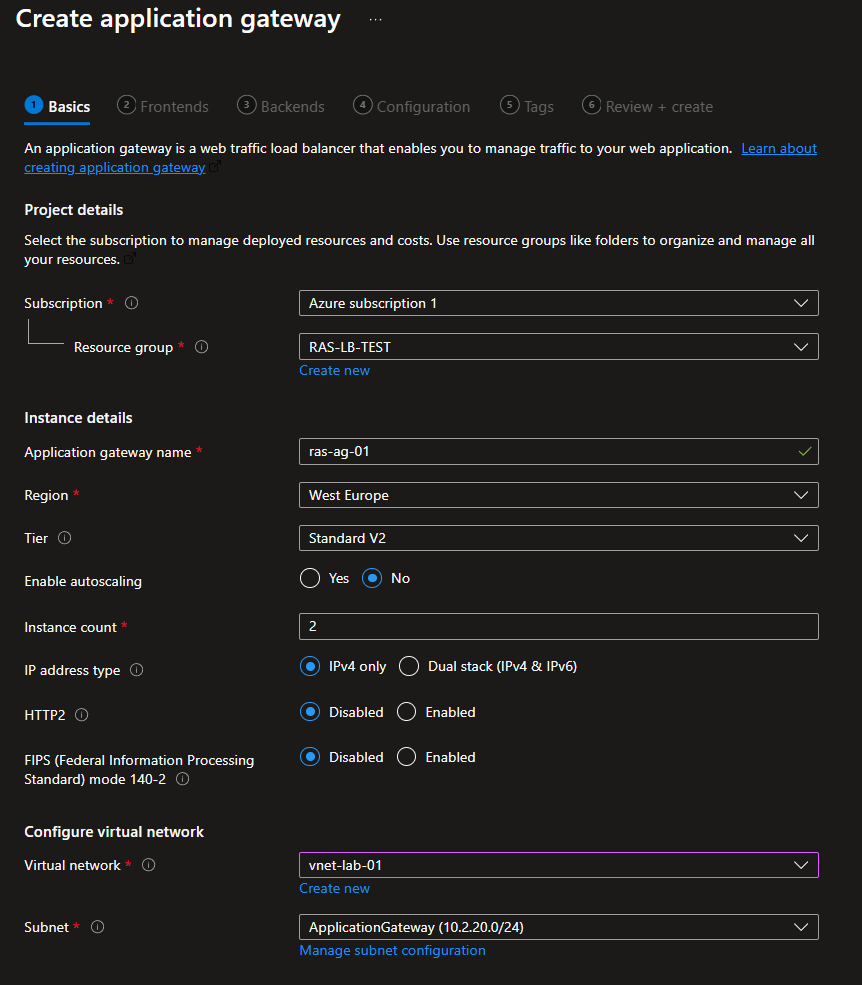
On the Basic tab:
-
Select the subscription and resource group.
-
Provide a name for the Application Gateway.
-
Select the region you used before.
-
In the Tier drop-down menu, select Standard V2.
-
Enable autoscaling if needed.
-
Specify an instance count matching your requirements.
-
Select IPv4 only for the IP address type
-
Disable HTTP2.
-
Disbale FIPS
-
Select the Virtual Network you created or used before.
-
In the Subnet drop-down menu, select the Application Gateway subnet you created before.
-
-
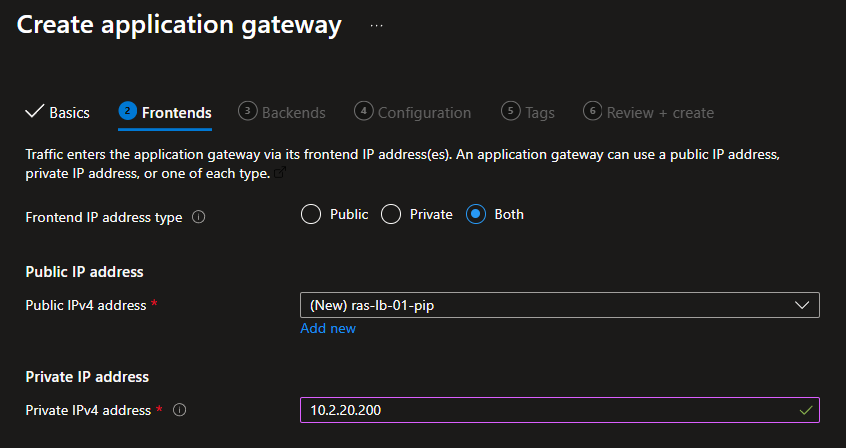
On the Frontends tab:
-
In the Frontend IP address type section, select Both (although we will not use the public IP).
-
Create a new public IP address and provide the name for it.
-
Select a private IP address to use and make sure it is available.
-
Note: Application Gateways with a Standard_v2 tier don’t support private IP addresses only for the front end. The supported SKU tiers are Standard and WAF.
The result will look similar to the screenshot below.
-
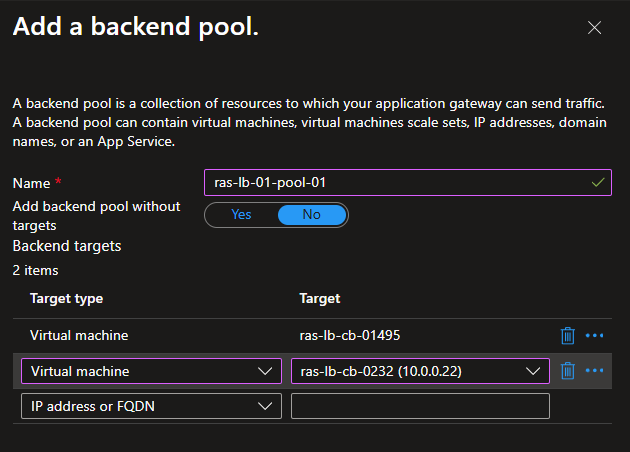
On the Backends tab, click Add a backend pool.
-
Provide a name for the backend pool.
-
Add all Parallels RAS Secure Gateway servers as a Virtual Machine Target.
-
The result will look similar to the screenshot below.
-
On the Configuration tab, click Add a routing rule.
-
On the Lister tab:
-
Provide a name for the routing rule.
-
Set a priority.
-
Provide a name for the new listener.
-
Set the frontend IP to Private IPv4.
-
Set the protocol to HTTPS.
-
Set the port to 443.
-
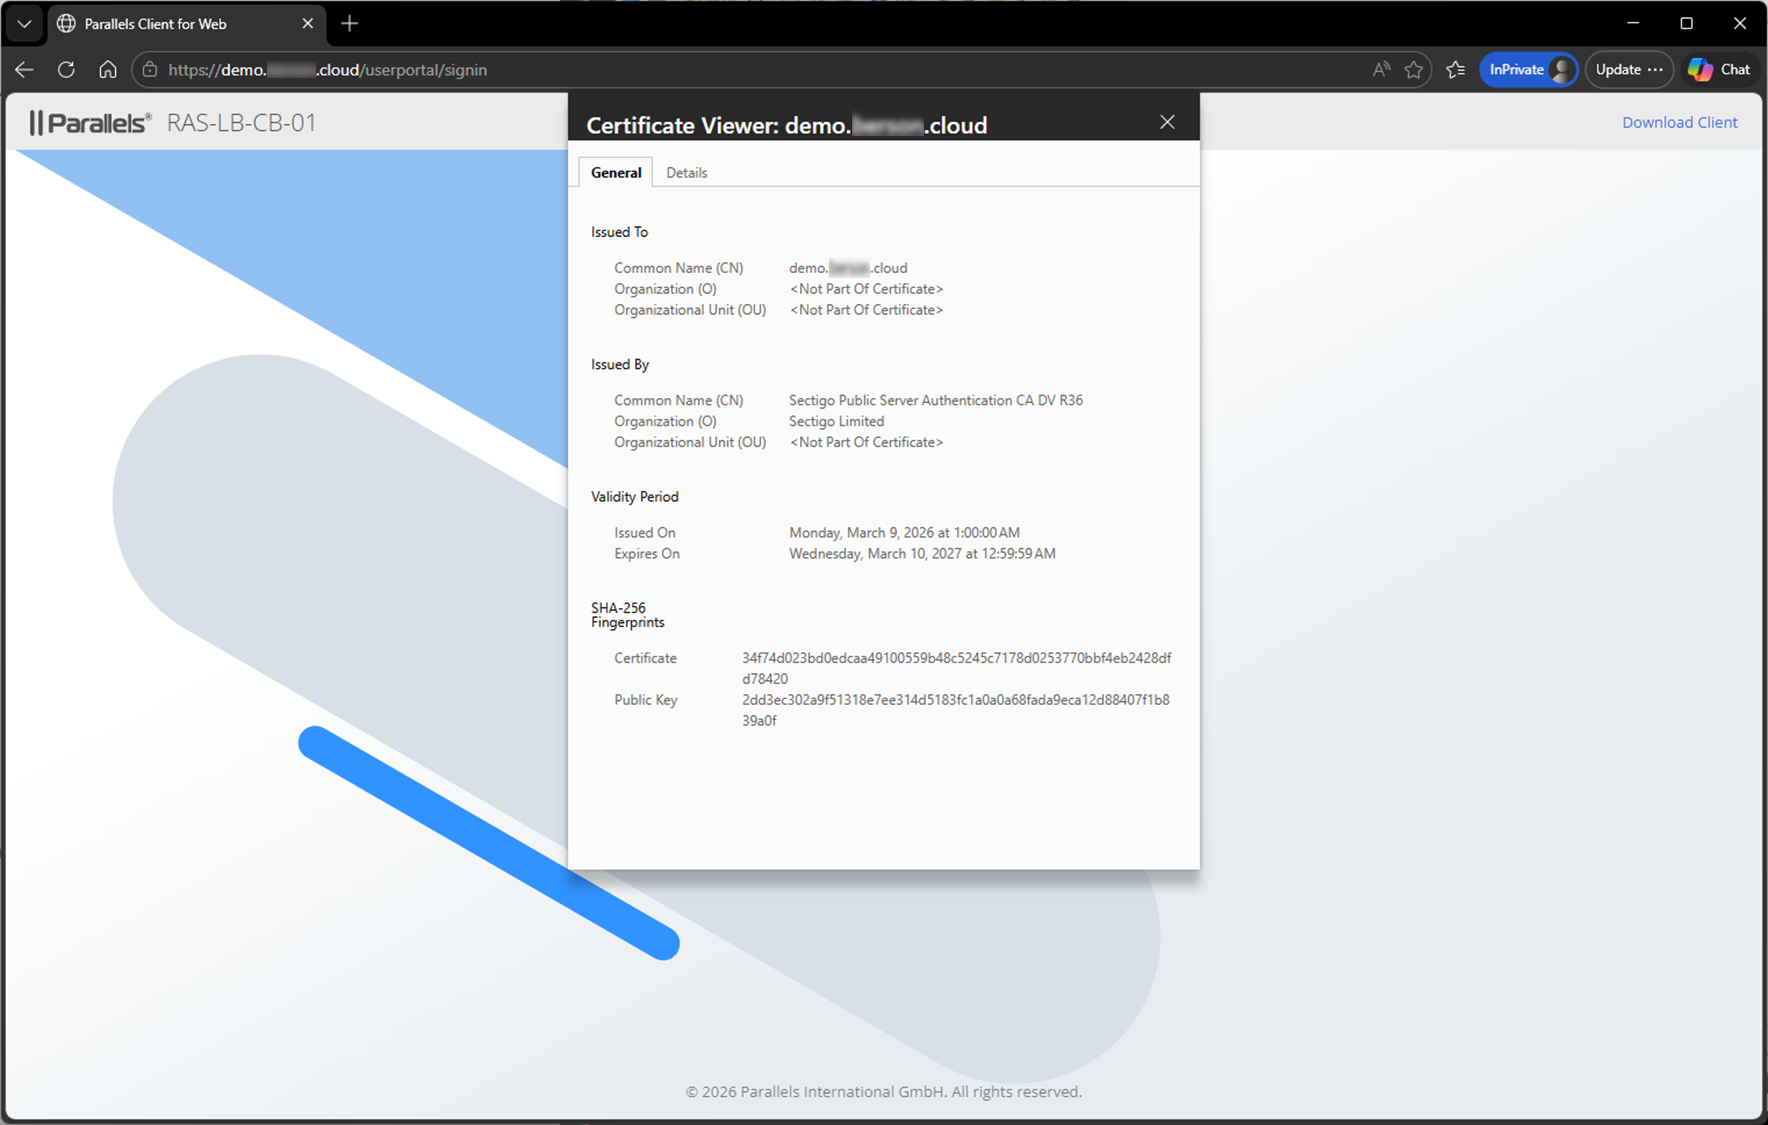
Provide the PFX certificate you want to use by uploading it or pointing to a certificate stored in Azure Key Vault. This certificate needs to match the FQDN you will use to access Parallels RAS. Eventually, this FQDN should resolve to the public IP address configured on the Azure Firewall in step 4.
-
Provide the password that matches the PFX.
-
Set the listener type to Basic.
-
Optionally, configure the custom error pages.
-
-

- On the Backend targets tab, select Backendpool and create new Backend settings.
- On the Backend settings page:
-
Provide a Backend settings name.
-
Set the protocol to HTTPS.
-
Set the port to 443.
-
Set Backend certificate validation type to Complete validation
-
If, in the previous step, a certificate issued by a publicly trusted CA was used, set the backend server certificate issuer to Public CA. If a certificate issued by a private CA was used in the previous step, set the backend server certificate issuer to Private CA. When using Private CA, upload the Root certificate (.CER). This root certificate allows the application gateway to complete the certificate chain validation.
-
Enable the Cookie-based affinity option.
-
Specify the name for the cookie. This can be anything, but this should match the cookie name provided in the User Portal tab of the Parallels RAS configuration as part of step 5. In this case, the default name ApplicationGatewayAffinity was used.
-
Set Connection draining to disabled
-
Set Dedicated backend connection to disabled
-
In the Request time-out field, specify 40. Note: the default value 20 is less than RAS Userportal keep alive 30s, thus an idle session might be disconnected.
-
Leave the override backend path empty.
-
Enable Override hostname section:
-
Select the override with specific domain name option
-
Specify the FQDN as the hostname
-
-
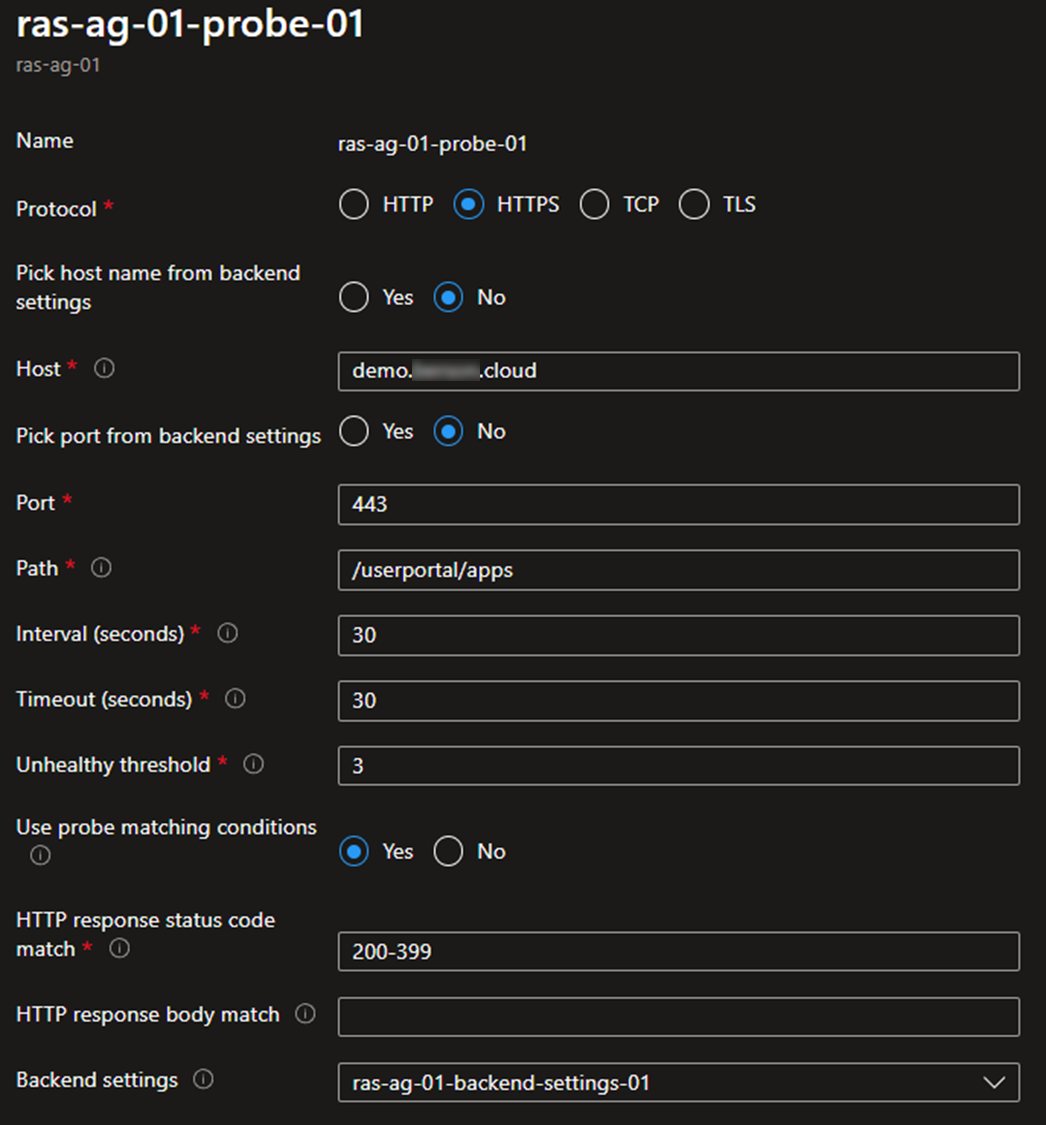
Set use custom probe to No if you enabled override with new hostname option
-

Optional: If you want to use custom probes, disable the override using the new hostname option in the backend settings, create a custom probe, specify the hostname and other probe properties as shown below, and test the probe before applying it.
-
Click Add.
-
On the Tags tab, optionally add any tags you wish to configure.
-
On the Review and Create tab, click Create to deploy the Application Gateway.
-
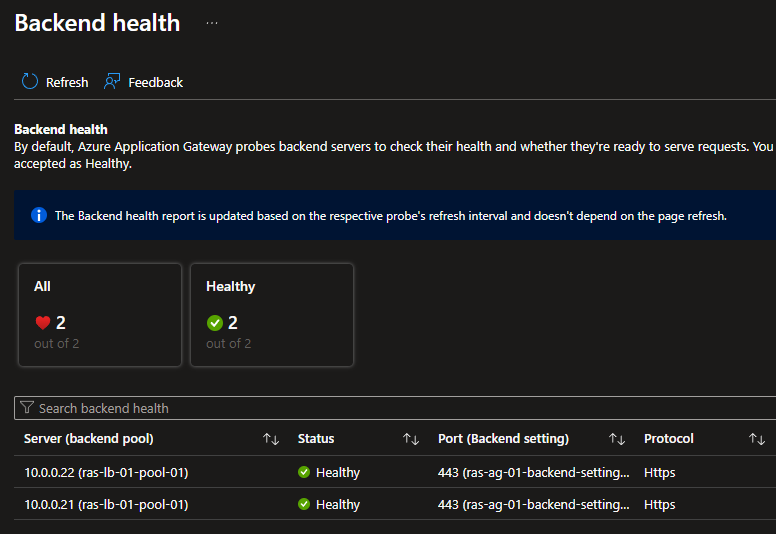
Go back to backend settings, click Backend health, and confirm all Secure Gateway servers are healthy.
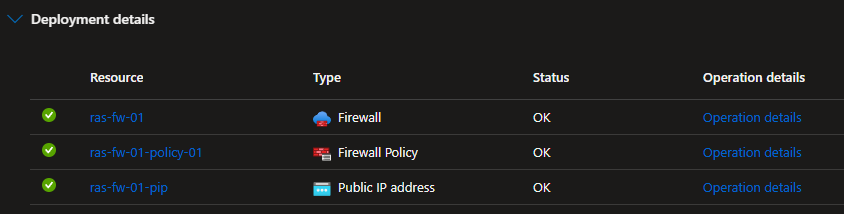
Step 4: Create and Configure Azure Firewall
-
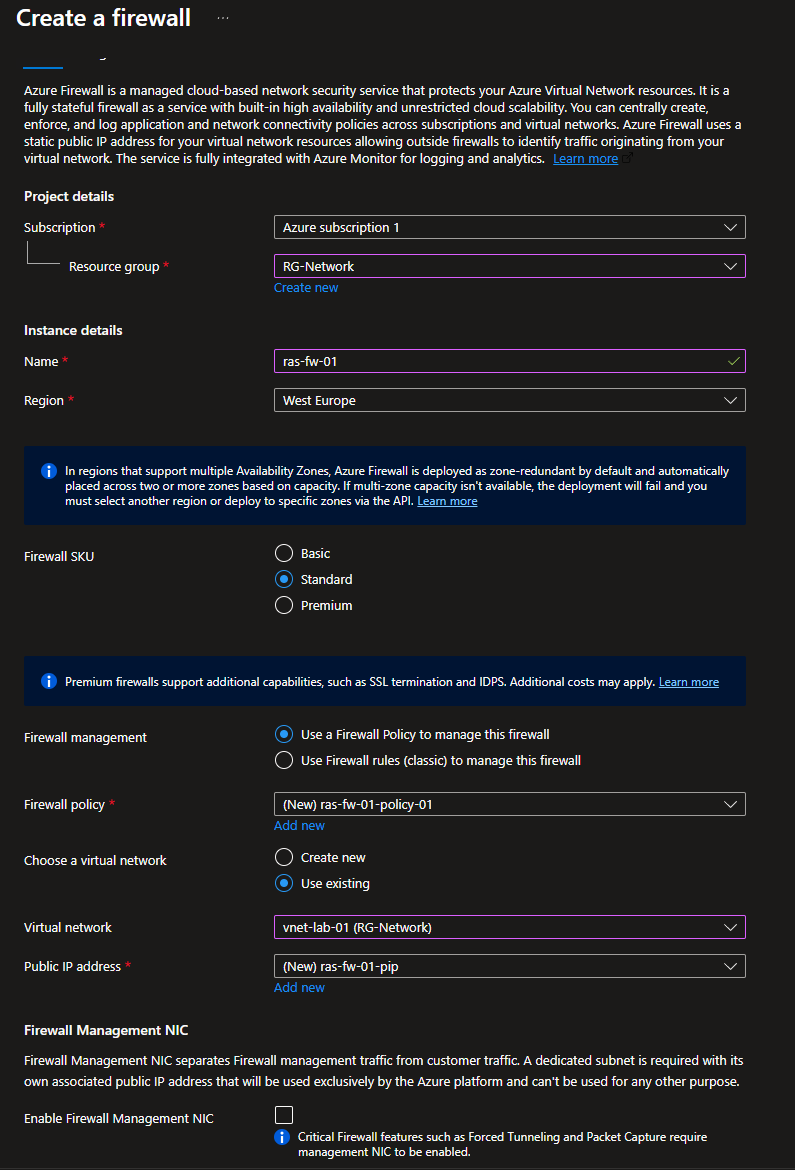
Open the Azure Portal at https://portal.azure.com and navigate to Create a Resource.
-
Search for Firewall.
-
Create a new Firewall.
-
On the Basic tab:
-
Provide the subscription and resource group.
-
Provide a name for the Firewall.
-
Select the region you used before.
-
In the Firewall SKU section, select Standard.
-
Note: SKU type can be configured as required; in this example, the Standard SKU is used. For more information on Azure Firewall SKUs, visit this link.
-
In the Firewall Management section, select Use a Firewall Policy to manage this firewall.
-
In the Firewall policy section, click the Add new link.
-
Provide a name for the policy.
-
Select the region you used before.
-
Select Standard as the policy tier.
-
-
In the Virtual Network drop-down list, select the existing Virtual Network you created before.
-
In the Public IP address section, click Add New.
-
Provide a name for the public IP address.
-
-
Disable the Firewall Management NIC option.
-
On the Tags tab, optionally add any tags you wish to configure.
-
On the Review + Create tab, click Create to deploy the Firewall.
-
Once the resource creation is complete, open the newly created firewall policy.
-
Go to DNAT rules and click Add a rule collection.
-
Provide a name for the rule collection.
-
Select DNAT as the rule collection type.
-
Specify a priority (e.g., 100).
-
Select DefaultDnatRuleCollectionGroup as the rule collection group.
-
Create a new rule
-
Specify parallels-ras as the name.
-
Set source type to IP Address.
-
Set the source to *.
-
Select TCP and UDP as the protocol.
-
Set the destination port to 8443.
-
Set destination type to IP Address.
-
Configure the Firewall's public IP address as the destination.
-
Set the Translated type to IP Address.
-
Set the translated address to the internal IP address of the Load balancer.
-
Set the translated port to 443.
-
-
Create another rule.
-
Provide parallels-ras-portal as the name.
-
Set source type to IP Address.
-
Set the source to *.
-
Select TCP and UDP as the protocol.
-
Set the destination port to 443.
-
Set destination type to IP Address.
-
Configure the Firewall's public IP address as the destination.
-
Set the Translated type to IP Address.
-
Set the translated address to the Internal IP address of the Application Gateway
-
Set the translated port to 443.
-
-
-
Click Add to save the configuration.

-
Create a public DNS A record that matches the certificate's FQDN and points to the Azure Firewall's public IP address. For example, the following DNS entry was created.
|
Type |
Name |
Values |
|
A |
demo.domain.cloud |
20.101.139.189 |
Step 5: Configure Parallels RAS
-
Open the Parallel RAS Console.
-
Browse to Secure Gateways, and in the properties of each Secure Gateway (or in Site Settings), perform the actions described below.
-
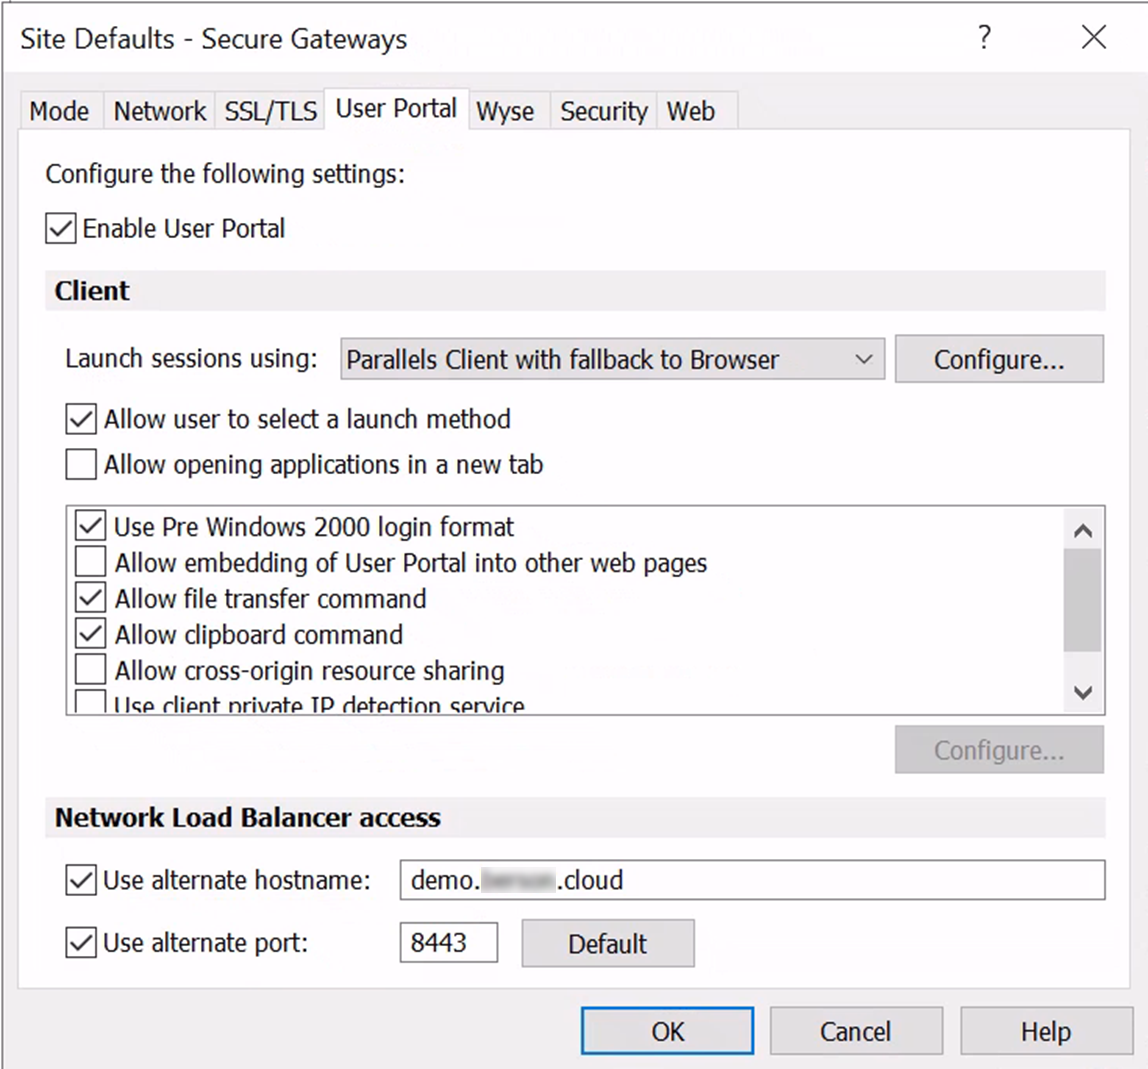
On the User Portal tab:
-
Enable the Use alternate hostname option and provide the public DNS record that resolves to the Azure Firewall's public IP address. This name should also match the SSL certificate configured earlier on the Azure Firewall.
-
Select Use alternate port and specify 8443, as configured in the Azure Firewall rule that points to the Azure load balancer. This tells the Parallels RAS web client to use port 8443 upon launching a published resource.
-
-
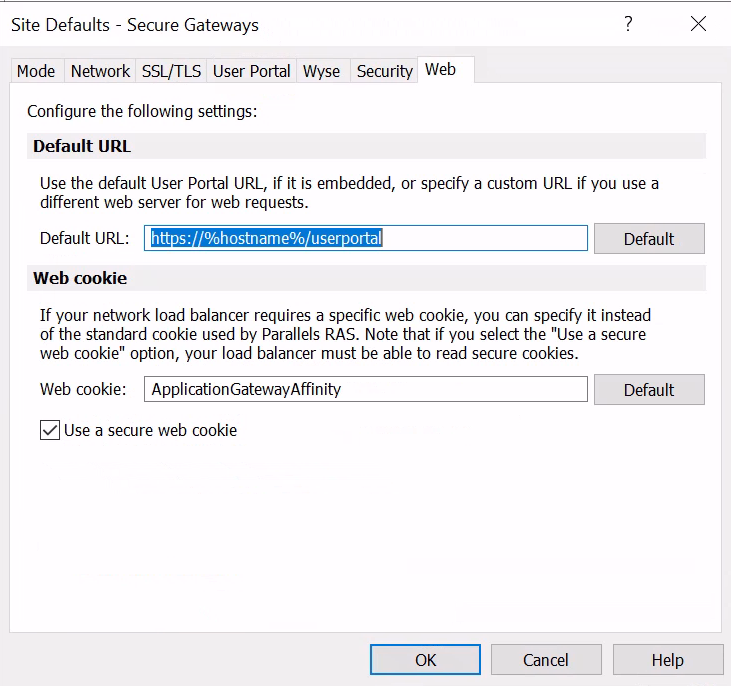
On the Web tab:
-
In the Web Cookie field, specify a web cookie name. This can be anything, but this should match the cookie name configured earlier on the Backend Settings tab of the Azure application gateway. In this case, the default name ApplicationGatewayAffinity was used.
-
Enable the option Use a secure web cookie to encrypt the cookie that Parallels RAS creates to provide session affinity.
-
-
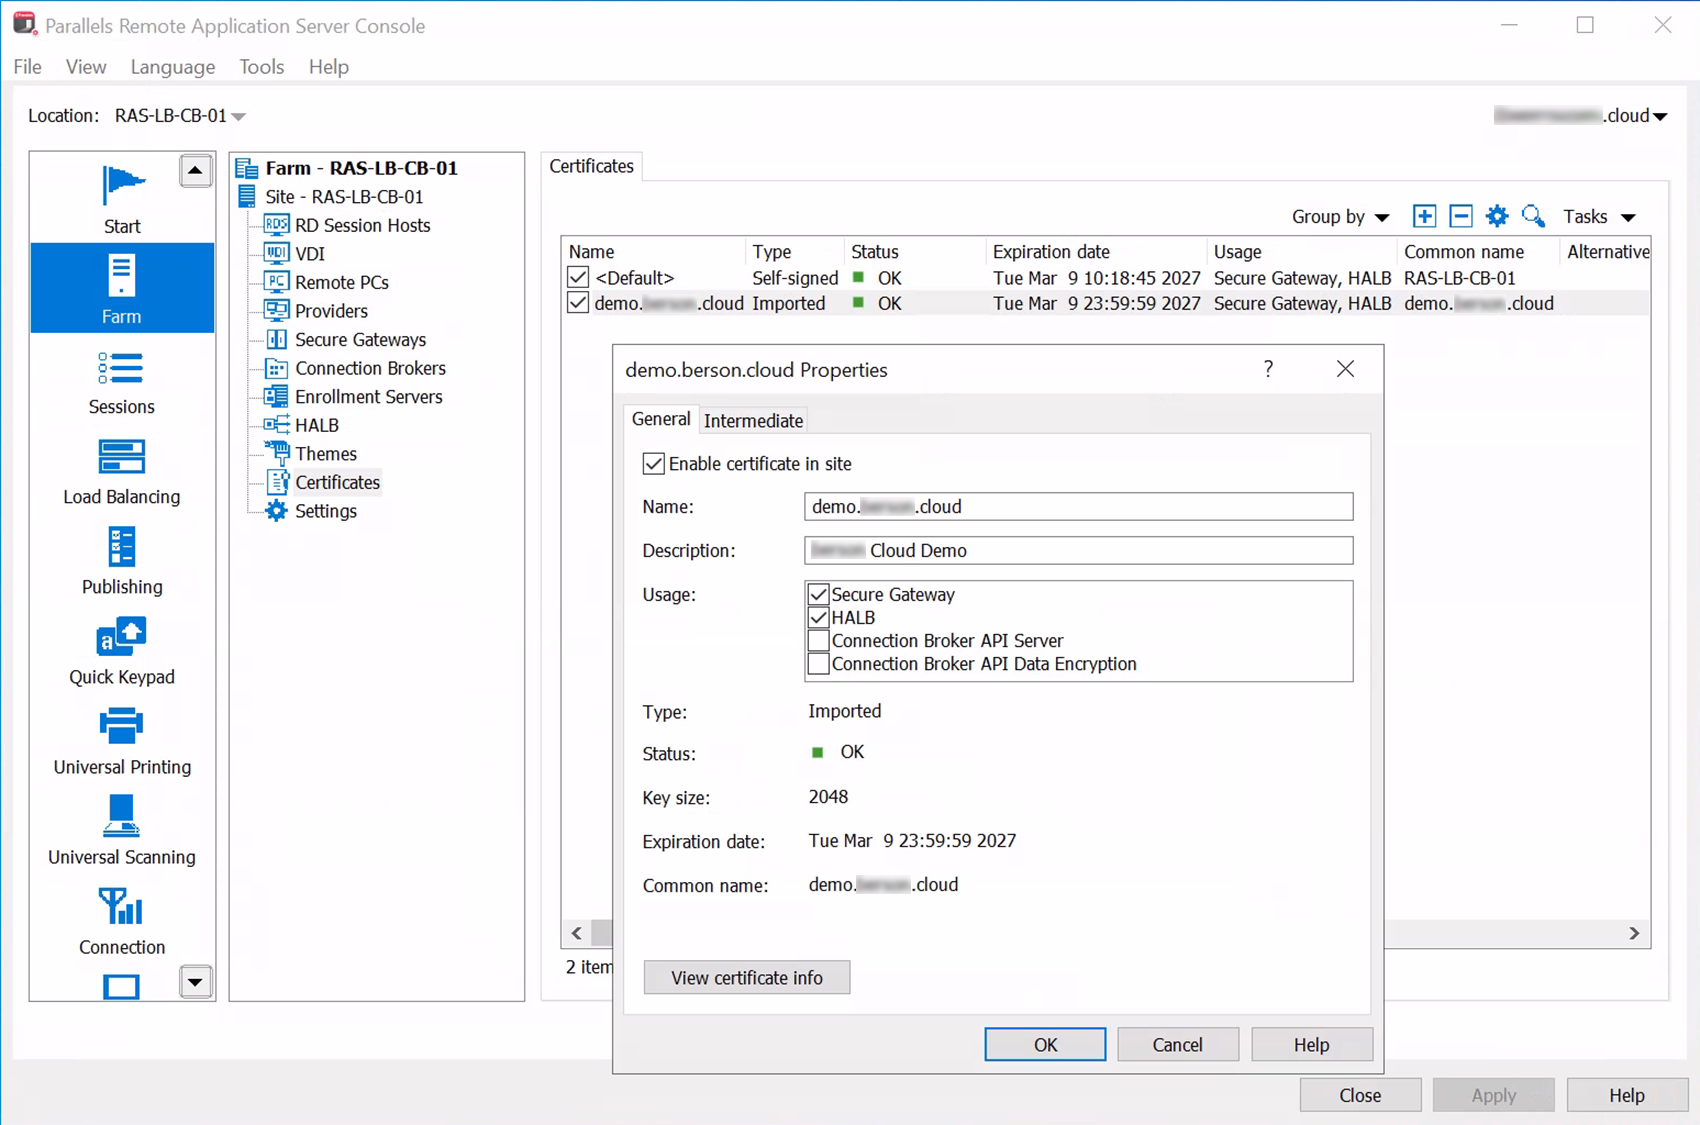
Open the Certificates section, import the same certificate used in the application gateway, and make sure Secure Gateway is selected under Usage.
Step 6: Test and evaluate load balancing
-
Test access using the Parallels RAS Web Client by browsing to the public DNS name configured in a previous step and providing credentials of a test user account.
-
Confirm that the correct certificate shows.
-
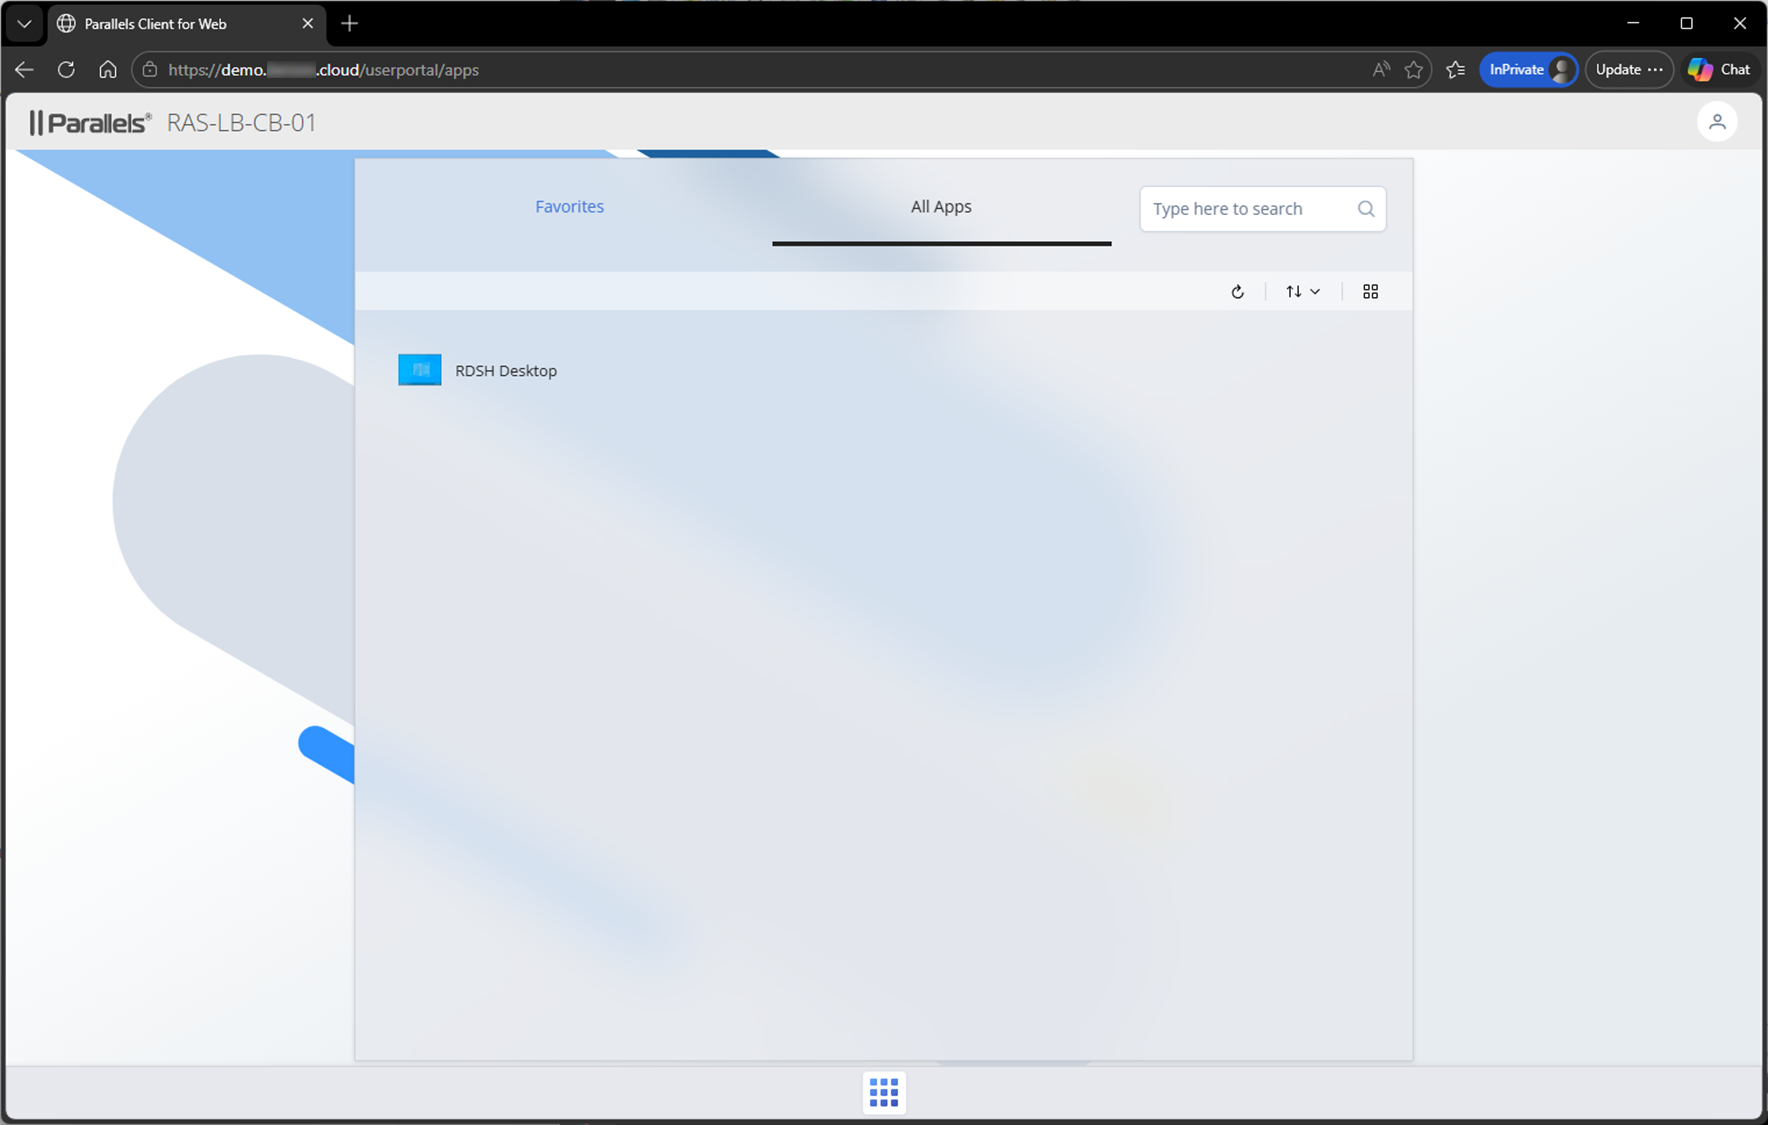
Confirm that you can log in and that a published resource appears.
-
Confirm that you can launch a published resource using the Parallels RAS web client.
-
Repeat the same test sequence as before to test access using a Parallels RAS client.
-
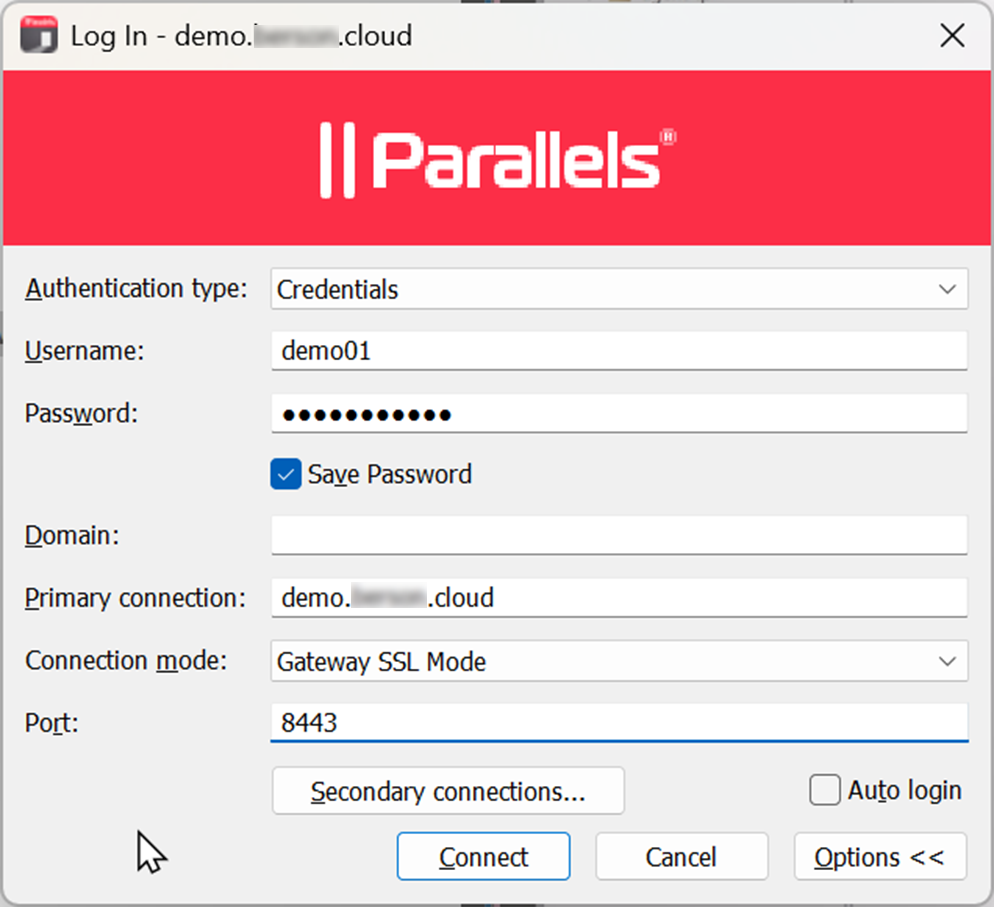
Open the Parallels RAS client and configure a new connection by specifying the public DNS you have configured before.
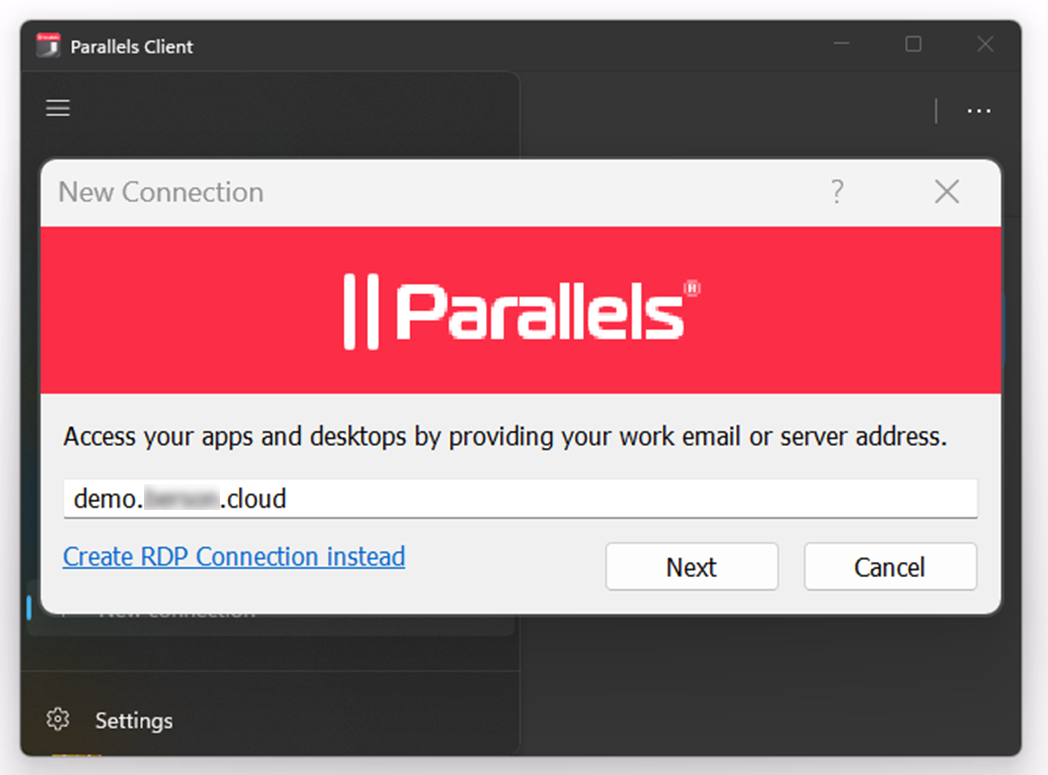
-
Provide the information to connect through the Azure Firewall. For the Primary connection, use the public DNS name configured in a previous step, and for the port, use 8443.
-
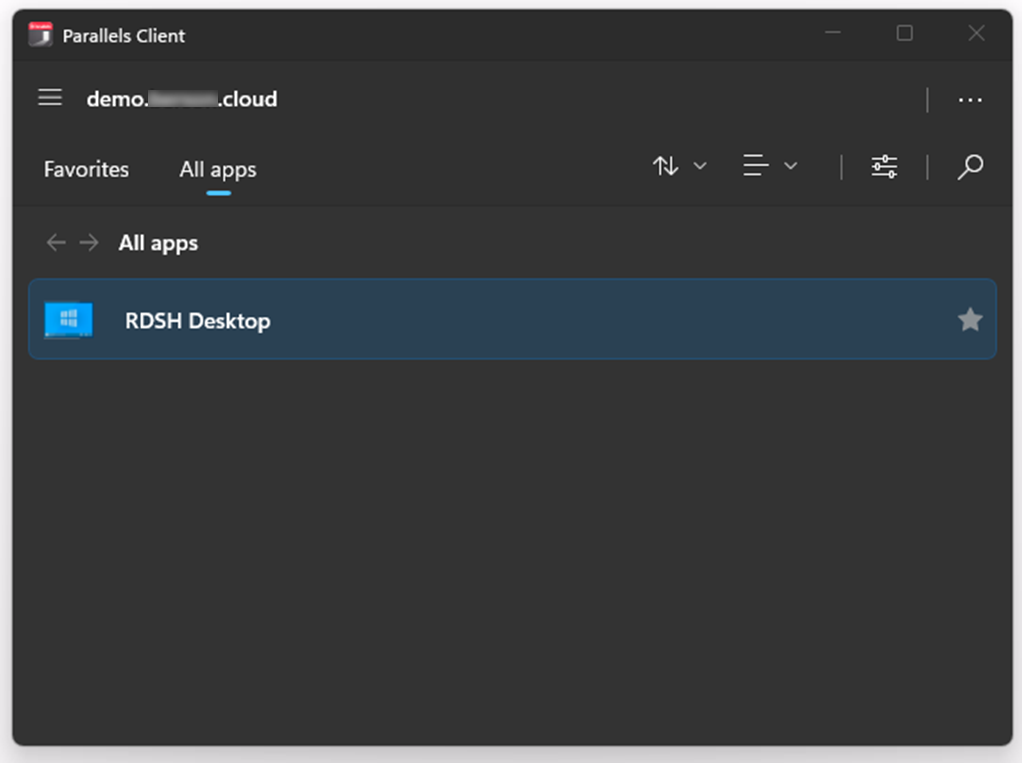
Upon connecting, confirm that the same published resources are visible, and you are able to connect.
-
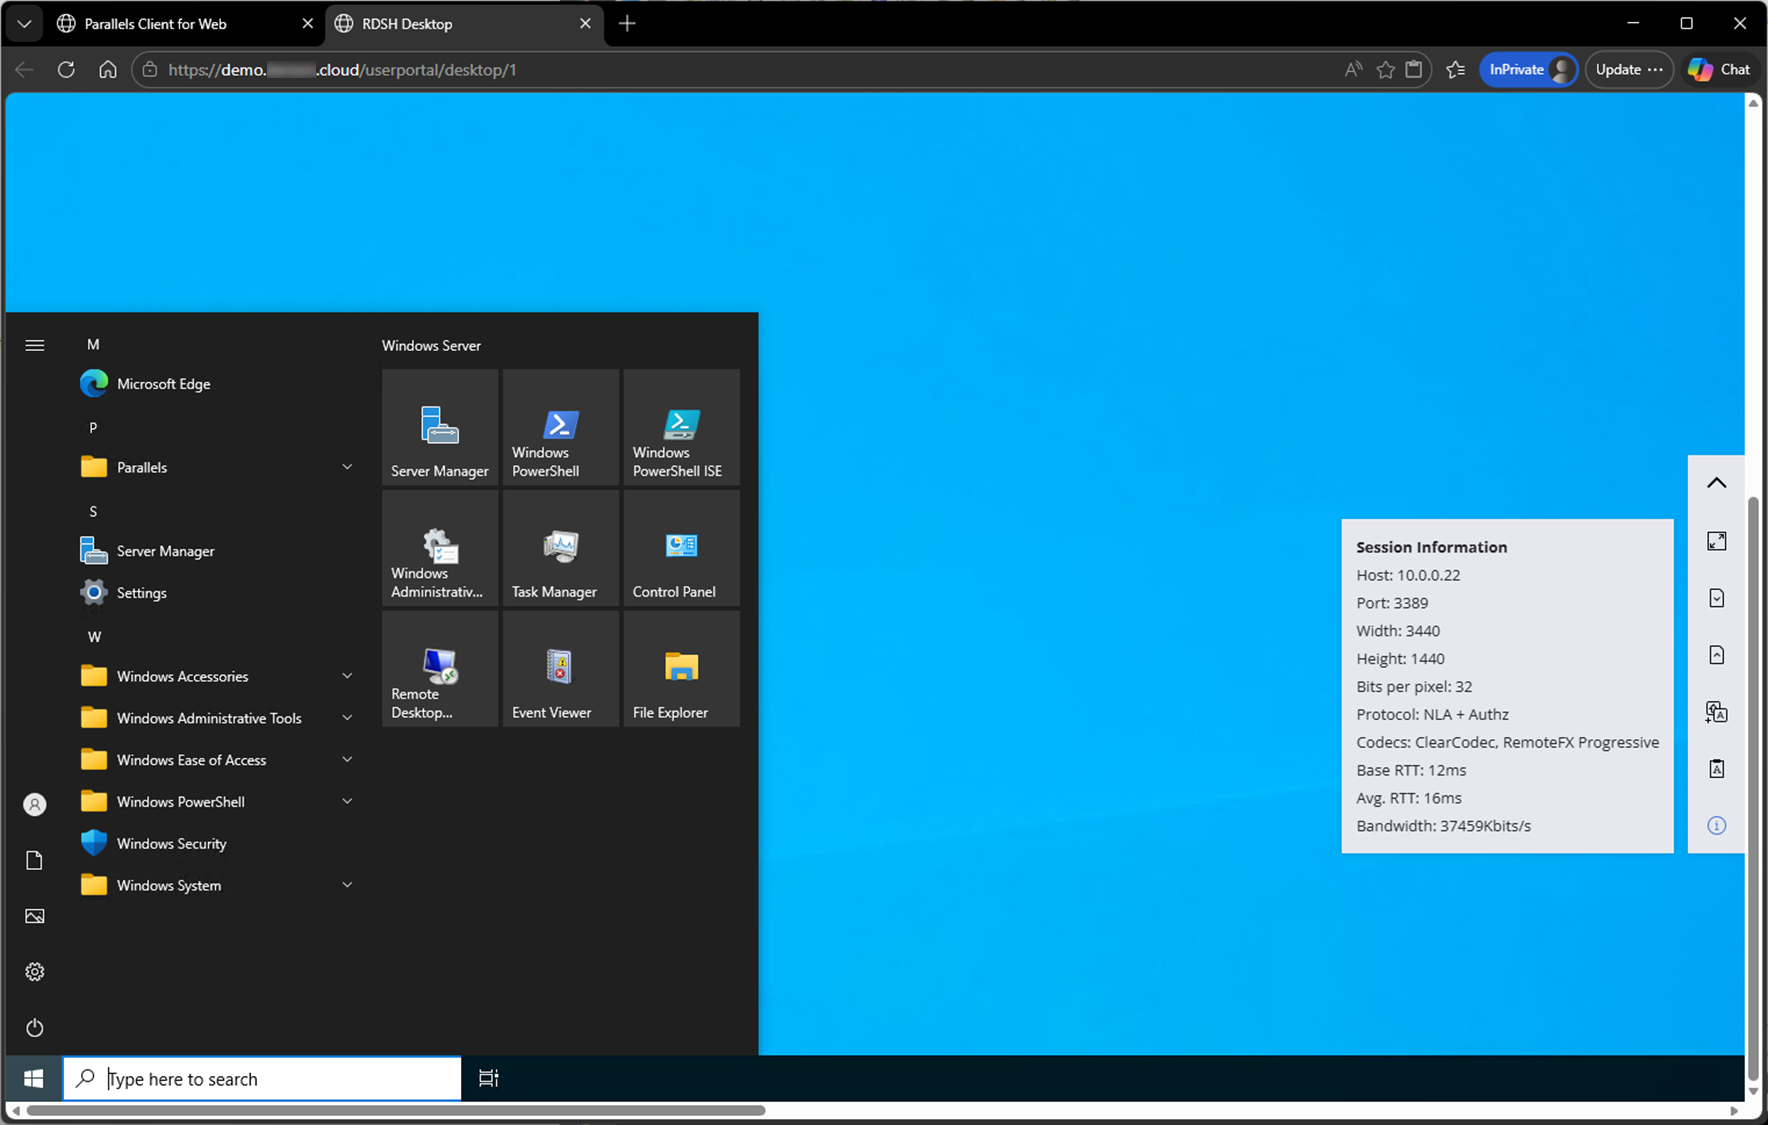
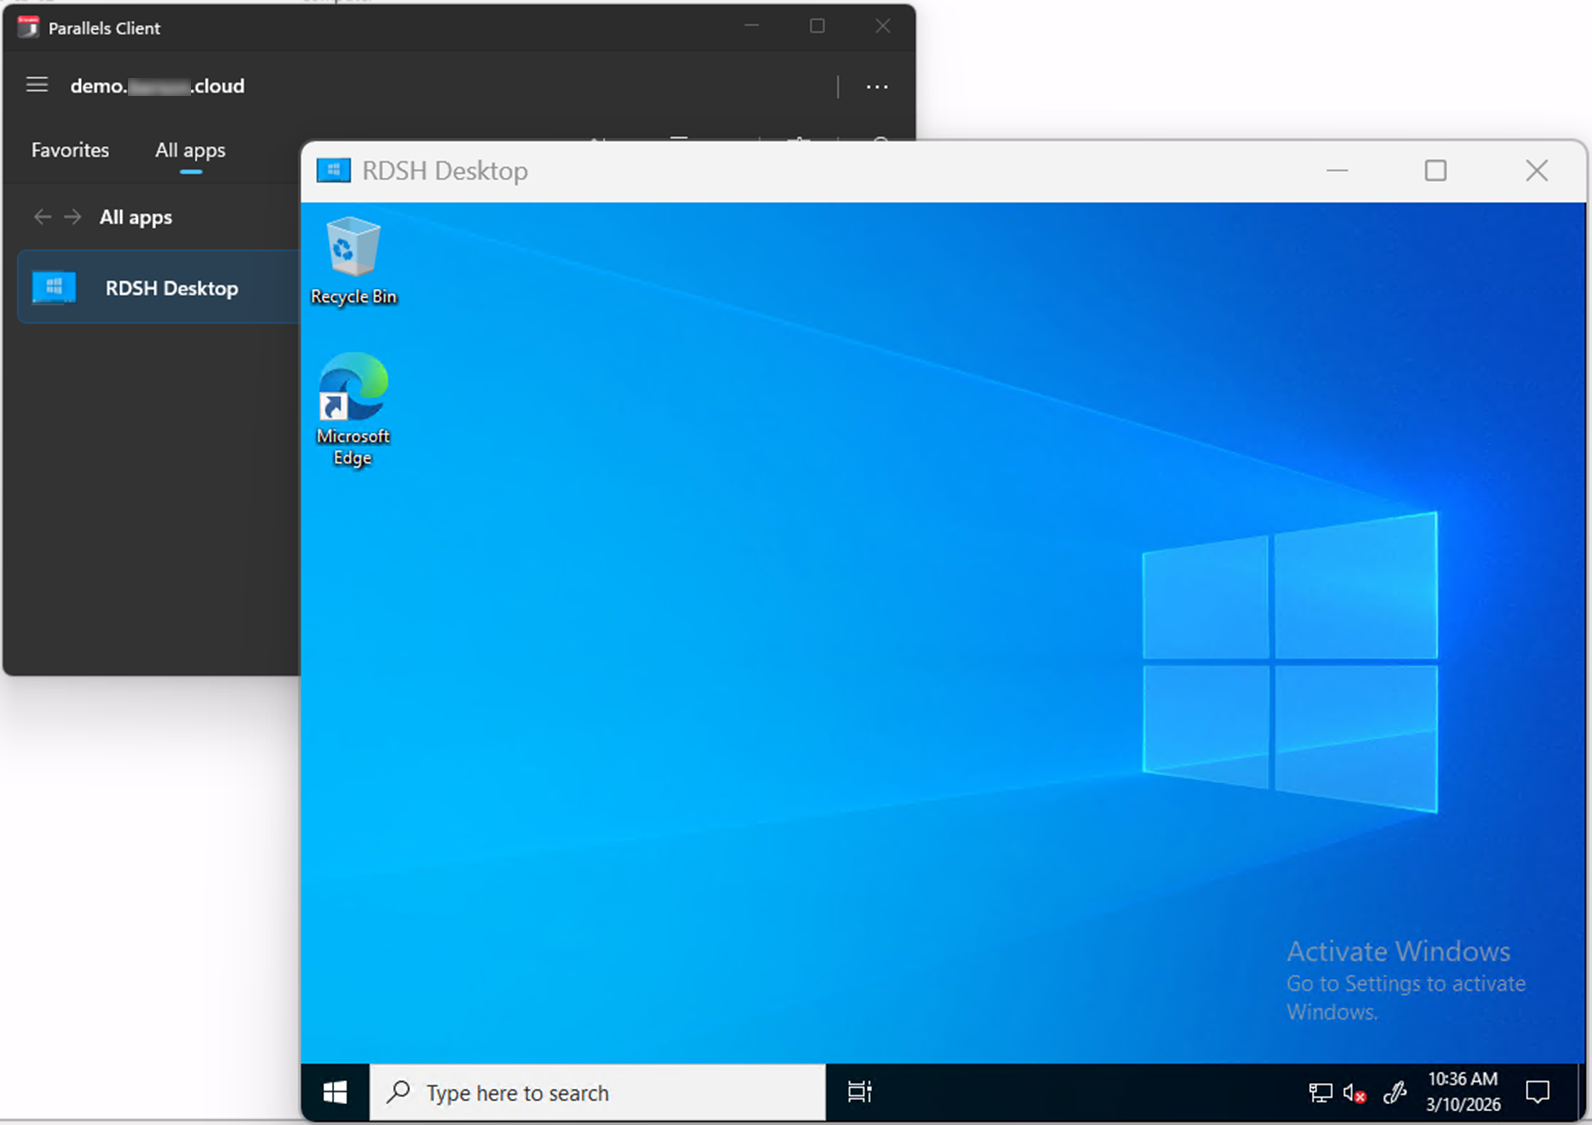
Confirm that the session starts successfully. In this example, it is a published desktop.
-
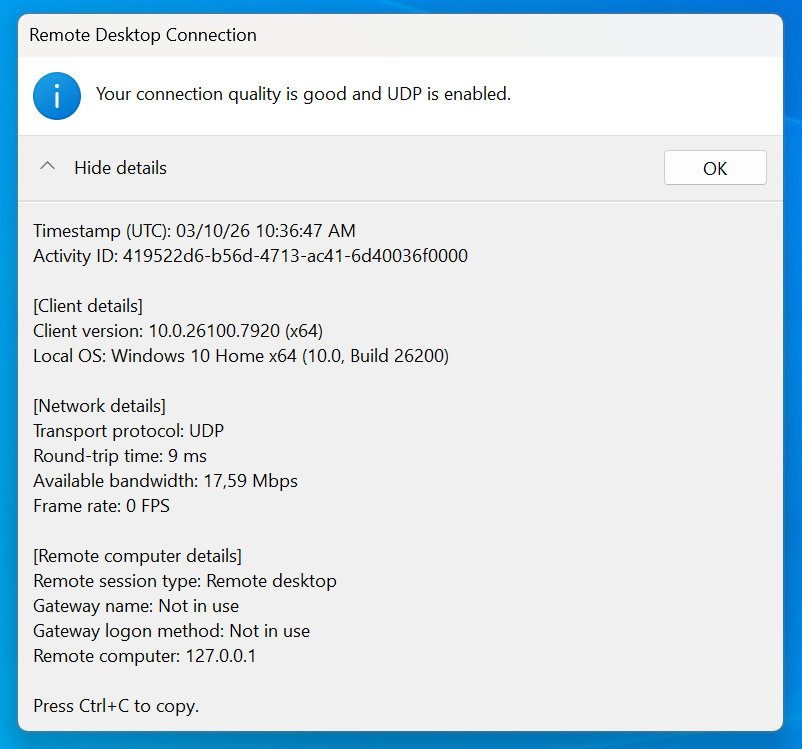
Click the connection icon in the top bar to confirm that the UDP protocol is also in use.
-
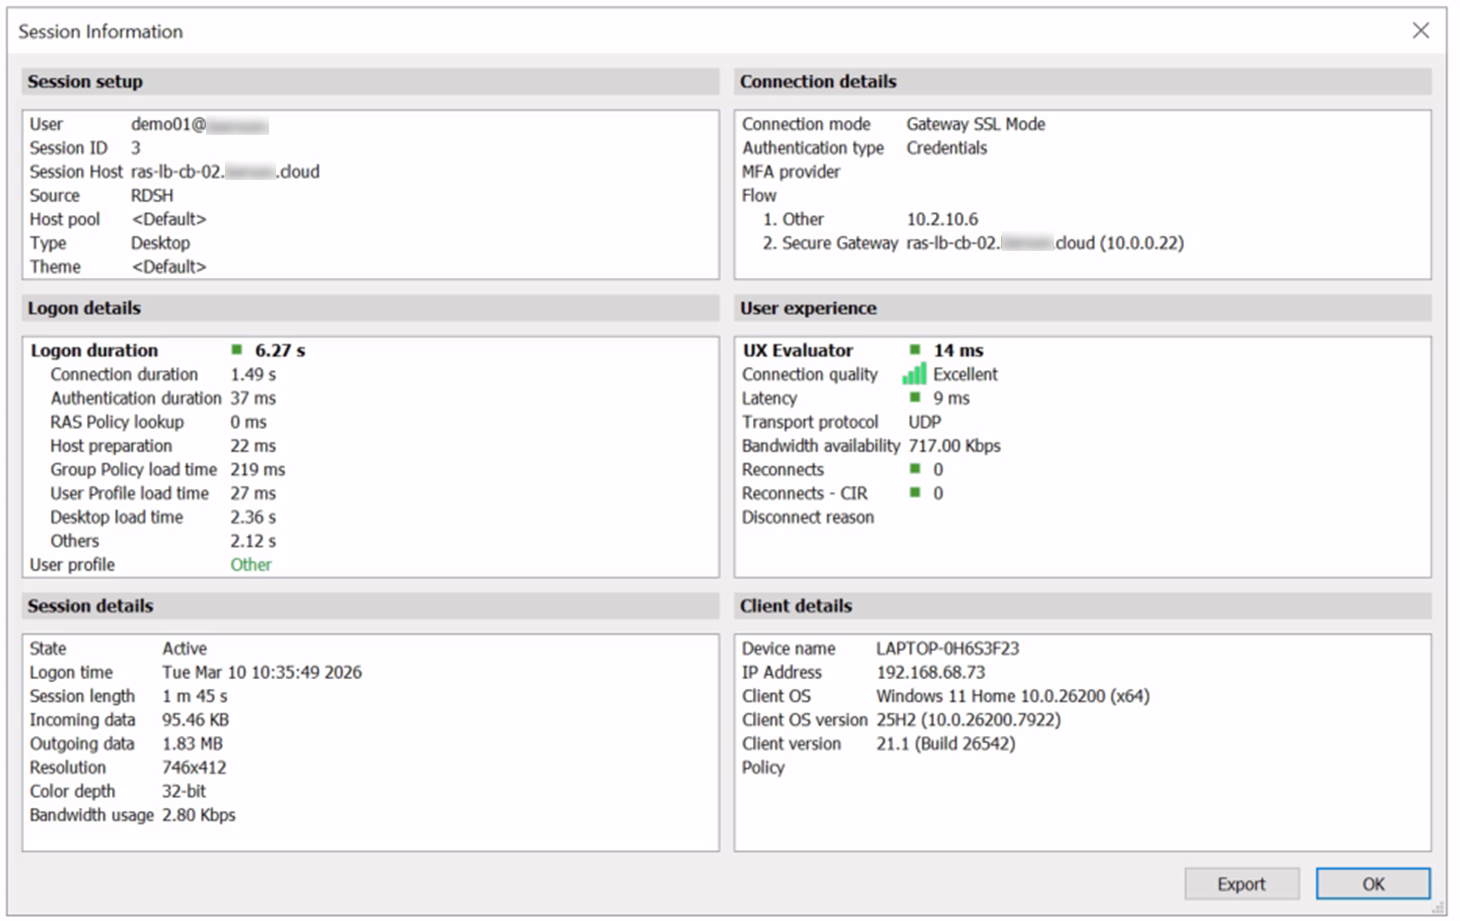
Switch back to Parallels RAS Console, go to the Farm > Session tab, and confirm that there is an active session. Opening the session properties also shows information such as the Secure Gateway server name, protocol, and session quality.
Summary
This article covers how to publish Parallels RAS resources securely on Microsoft Azure.
Azure Firewall is a cloud-based network security service offered by Microsoft Azure. It is designed to protect Azure Virtual Network resources from unauthorized access and threats. Azure Firewall acts as a perimeter firewall, providing secure, controlled access to resources. In this scenario, the Azure Firewall provides secure access to an internal Azure Application Gateway and an internal Azure Load Balancer.
Azure Application Gateway is used to load-balance the Parallels RAS User Portal and provide HTTPS load balancing, SSL offloading, and session persistence.
Azure Load Balancer is used to load-balance RDP sessions through the Secure Gateways. It offers TCP and UDP traffic for the optimal user experience.
Was this article helpful?
Tell us how we can improve it.