This Knowledge Base article will help you to address the issue with Windows being stuck at a black screen.
Such issues might also happen on a real PC; it's a Windows-related issue caused by the hanging of vital system processes or malfunctioning drivers.
1. Reset the virtual machine
Force restart Windows in Parallels Desktop: click Actions on Mac menu bar > Reset.
If you use a virtual machine in Full Screen view mode move the mouse to the top of the screen and wait for 1-2 seconds to open the Mac menu bar. To release the mouse input and access the top menu bar easier, press Control + Option shortcut.

Note: To avoid such issues in the future, we recommend disabling Windows built-in fast startup feature.
2. Change your virtual machine hypervisor
Prior to changing your virtual machine's hypervisor, we recommend making a backup of your virtual machine.
Note: Parallels hypervisor is not available in Parallels Desktop for Mac computers with Apple M1/M2 chips.
1. Shutdown your virtual machine. At this point, to do this, in the top menu bar, click Actions > Stop.
2. Open virtual machine's configuration. Please see KB117287 for detailed instructions.
3. Navigate to Hardware tab > CPU & Memory.
4. Open Advanced > Change hypervisor type to Apple.
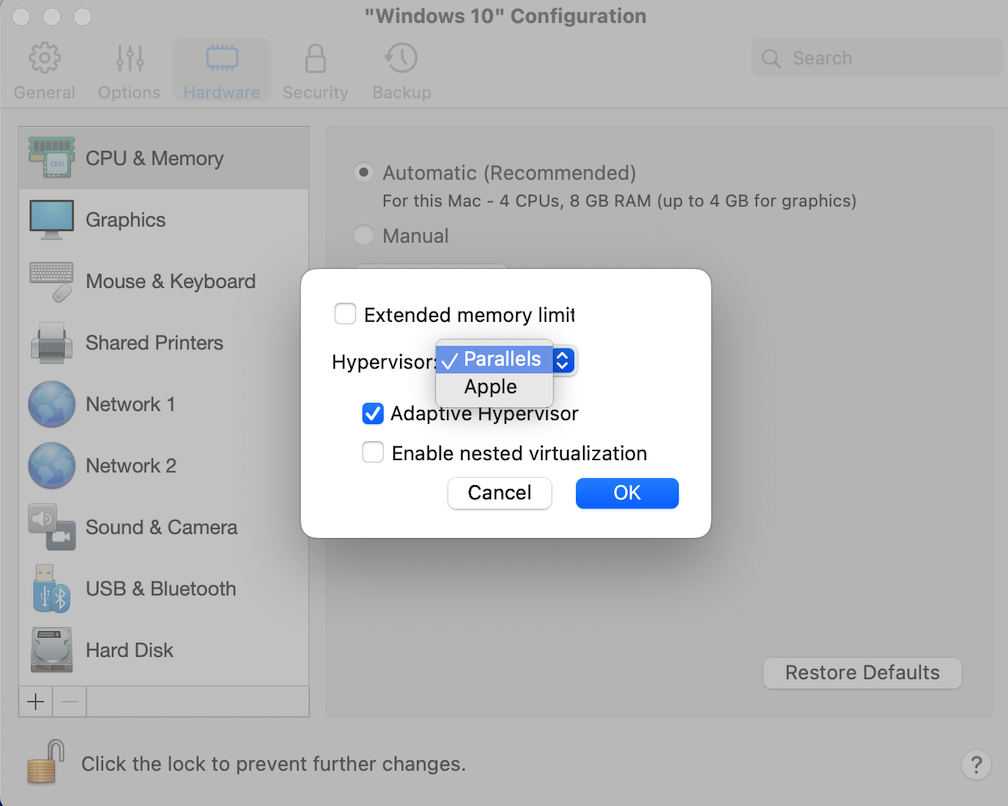
5. Close the configuration, and start your virtual machine.
3. Add a TPM module to your Windows virtual machine
In case you need to make use of Nested virtualization which is only available with the Parallels hypervisor, you could try adding a TPM module to your virtual machine. If you have not yet made a backup of your virtual machine yet, please make a backup before proceeding with the below.
Note: This option is only applicable to virtual machines that do not run Legacy BIOS, so the option might not be present if that is so, please default to "Change your virtual machine hypervisor" method.
1. Shutdown your virtual machine. At this point, to do this, in the top bar, click "Actions" > "Stop."
2. Open virtual machine configuration. Please see KB117287 for detailed instructions.
3. Navigate to the Hardware tab.
4. At the bottom of the list, click on the "+" icon > select TPM Chip.
5. Start your virtual machine.
4. Boot into Safe Mode and reinstall Parallels Display Adapter
If the above still has not worked, the next troubleshooting step would be the same as on a real PC: try booting Windows to Safe mode. When in Safe mode:
- Open Command Prompt as Administrator and execute the commands below:
REG ADD "HKLM\SYSTEM\CurrentControlSet\Control\SafeBoot\Minimal\MSIServer" /VE /T REG_SZ /F /D "Service"
REG ADD "HKLM\SYSTEM\CurrentControlSet\Control\SafeBoot\Network\MSIServer" /VE /T REG_SZ /F /D "Service"
net start msiserver
- Press Command (Win) + R buttons > in the appeared search bar type in devmgmt.msc > click OK; it will get you to Device Manager.
- Unwrap the Display adapters tab, locate Parallels Display Adapter (WDDM), right-click it, and select Uninstall.
- Reboot to normal mode and reinstall Parallels Tools.
5. Create a new virtual machine
If Windows cannot boot even into Safe mode or the steps above didn't help, Windows is considered beyond repair and a new virtual machine is required. Once a new virtual machine is created, you can attach the broken virtual machine hard disk to the new one to transfer personal data stored on the C drive.
Note: Only files can be copied; Applications should be installed from scratch in the new virtual machine due to Windows architecture peculiarities.
Was this article helpful?
Tell us how we can improve it.