Architecture & Prerequisites
1. Supported Scenario
Parallels RAS acts as the SAML Service Provider (SP), while AD FS acts as the Identity Provider (IdP). Users authenticate via a browser and are redirected back to Parallels RAS after successful authentication.
SAML authentication is browser based and therefore requires HTTP/HTTPS accessibility between the user, AD FS, and the RAS Secure Gateway.
2. Prerequisites Checklist
Before starting, ensure the following requirements are met:
-
Parallels RAS is already deployed and functional
- Active Directory is healthy and accessible
- Domain Controllers have Domain Controller Authentication certificates that support smart card authentication
- Certificates created using the Microsoft CA “Domain Controller Authentication” template are required
- A dedicated Enrollment Server will be required.
- Must be a standalone, secure server with no other RAS roles installed
- Why an Enrollment Server Is Required?
When using SAML authentication with smart card or certificate‑based authentication, Parallels RAS requires an Enrollment Server to request user certificates on behalf of authenticated users.
- A web browser is available for users (SAML cannot be used with non‑browser authentication)
- Prerequisites are in place as described in Setting up Windows Server side to comply RAS SAML pre-requisites
Prepare Parallels RAS – Enrollment Services
1. Add the Enrollment Server Agent
-
Open RAS Console
-
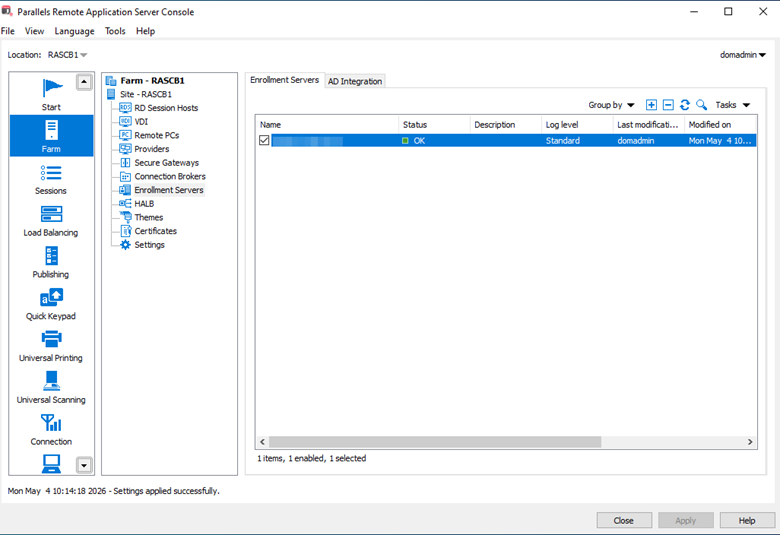
Navigate to Enrollment Servers
- Click the + icon to add a new Enrollment Server agent
2. Configure AD Integration
In RAS Console → Enrollment Servers → AD Integration:
-
Specify:
- Certificate Authority
- Enrollment Agent account
- NLA user account
- Click Validate AD Integration settings

- If all checks pass:
- Apply the settings
- Confirm the Enrollment Server status is OK on the Enrollment Servers Tab
Create the Identity Provider in Parallels RAS
At this stage, RAS is prepared to act as a SAML Service Provider.
1. Add a New SAML Identity Provider
-
Open RAS Console → Connection → SAML
-
Click Add
- Provide a name (e.g. ADFS)
- Select Manually enter the IdP information
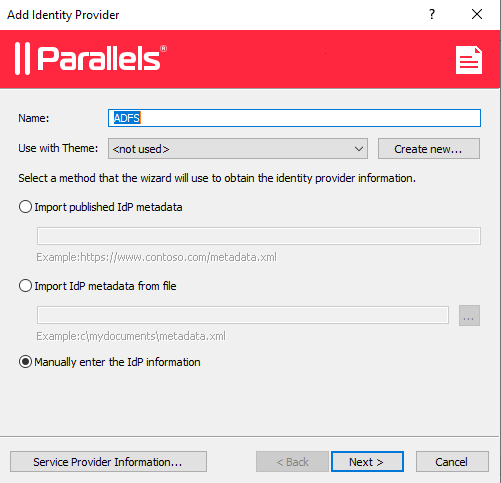
- Click Next
On the next page:
- Enter placeholder values (they will be replaced later via metadata import)
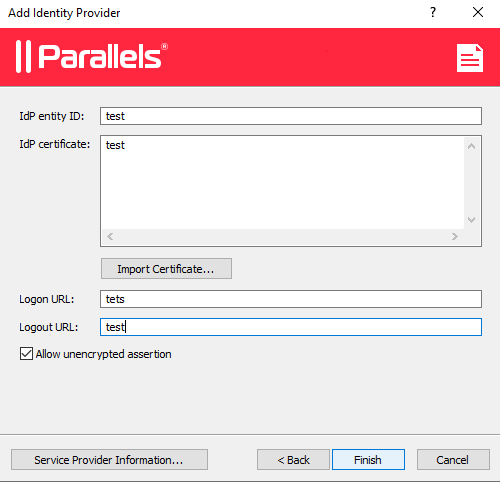
- Click Finish
Click Apply to save the configuration.
Export Parallels RAS Service Provider Metadata
1. Configure SP Properties
-
Open the newly created ADFS IdP properties
-
Switch to the SP tab
- Specify the external FQDN or public IP of the RAS farm
- This is the address users return to after authentication
- Typically the public FQDN of the RAS Gateway or load balancer

2. Export SP Metadata
-
Click Export Parallels RAS Service Provider Metadata to file
-
Save the generated .xml file
This file will be imported into AD FS when creating the relying party trust.
Prepare Active Directory Federation Services (AD FS)
- This section is optional and is provided for completeness if AD FS has not been installed.
1. Install the AD FS Role
On the Windows Server designated for federation services:
-
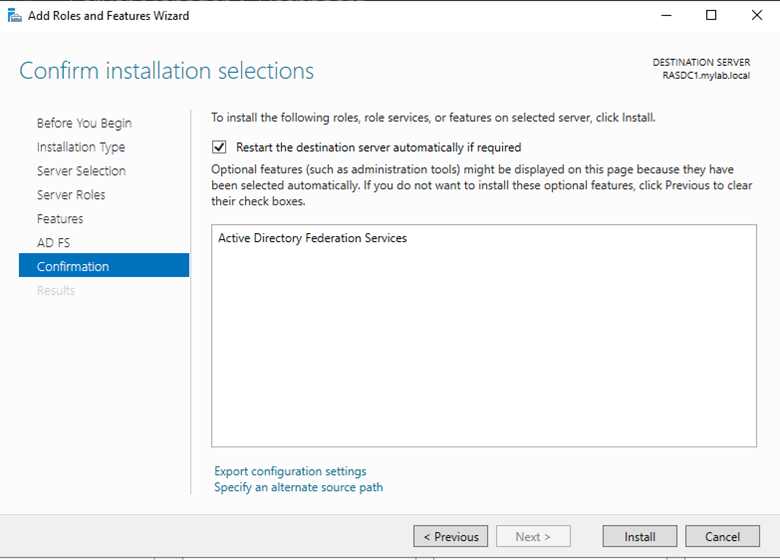
Open Server Manager
- Select Add Roles and Features
- Choose the target server
- Install the Active Directory Federation Services role
Refer Microsoft’s official documentation: Install the AD FS Role Service
Configure AD FS – Relying Party Trust
1. Create Relying Party Trust
-
Open AD FS Management
-
Right‑click Relying Party Trusts and select Add Relying Party Trust
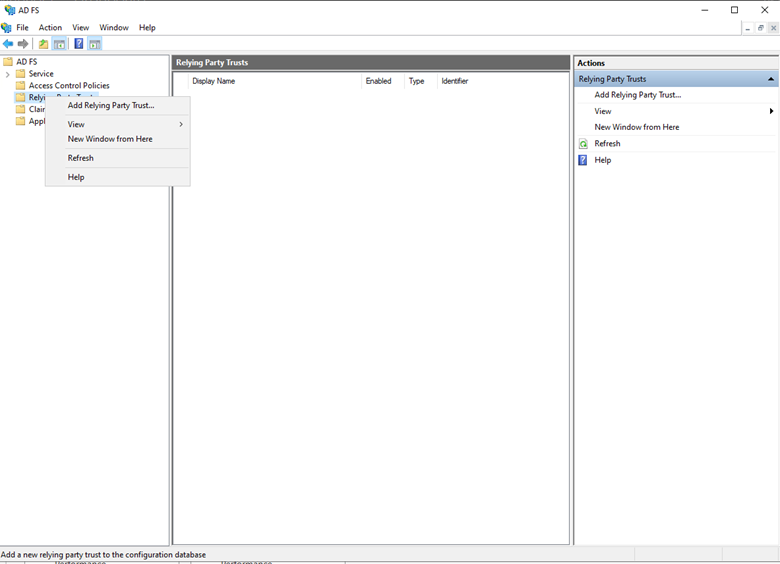
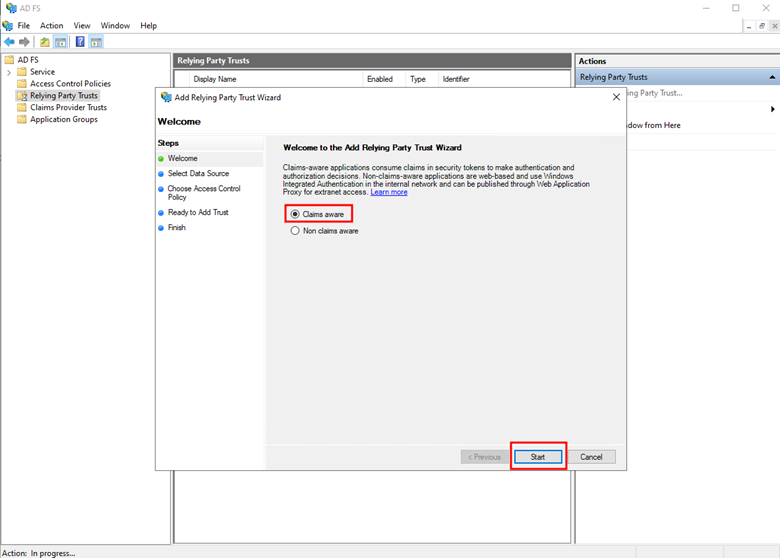
- In the wizard:
- Select Claims aware
- Click Start
2. Import SP Metadata
-
Select Import data about the relying party from a file in the Select Data Source section
-
Browse to the exported SP metadata XML from section Export Parallels RAS Service Provider Metadata.

- Click Next
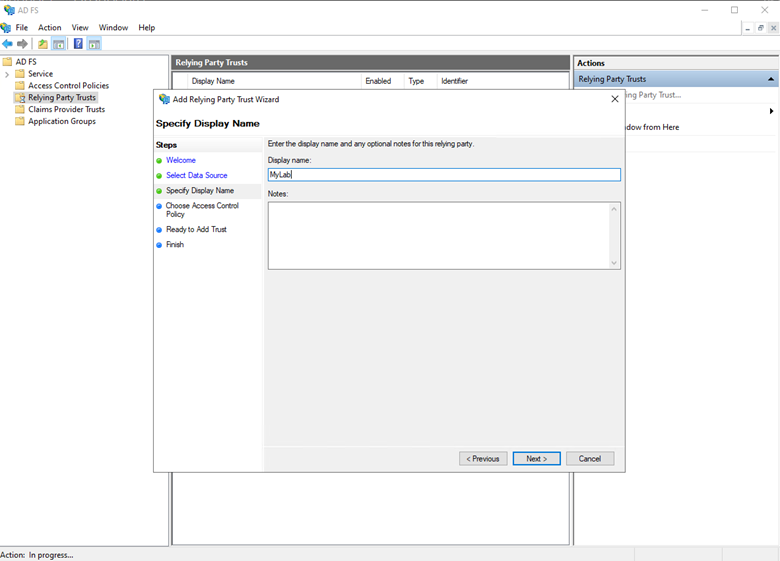
On the Specify Display Name section, set:
- Display Name (will be shown on the AD FS login page)
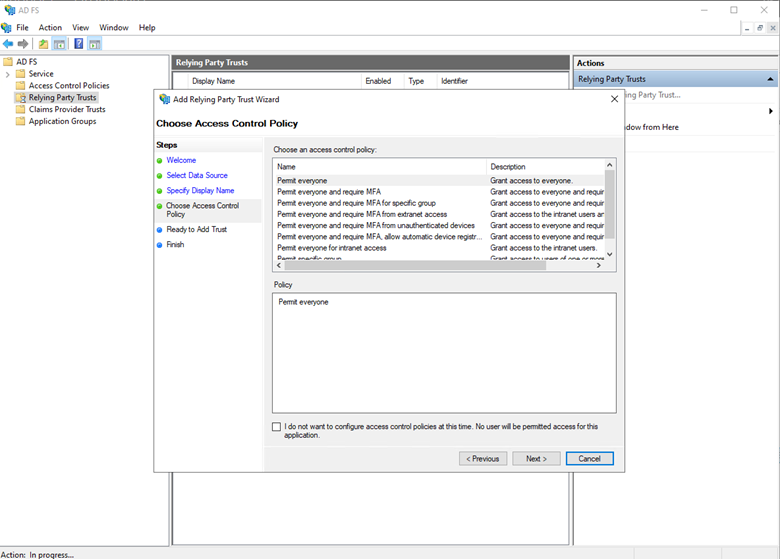
- On the Choose Access Control Policy section, choose an appropriate Access Control policy, then finish the wizard (select permit all if unsure).
- In the “Ready To Add Trust” Section, review the configuration, click Next, and then click Close on the Finish page.
Configure AD FS – Claim Issuance Policy
1. Add LDAP Claims Rule
-
Right‑click the new Relying Party Trust
-
Select Edit Claim Issuance Policy
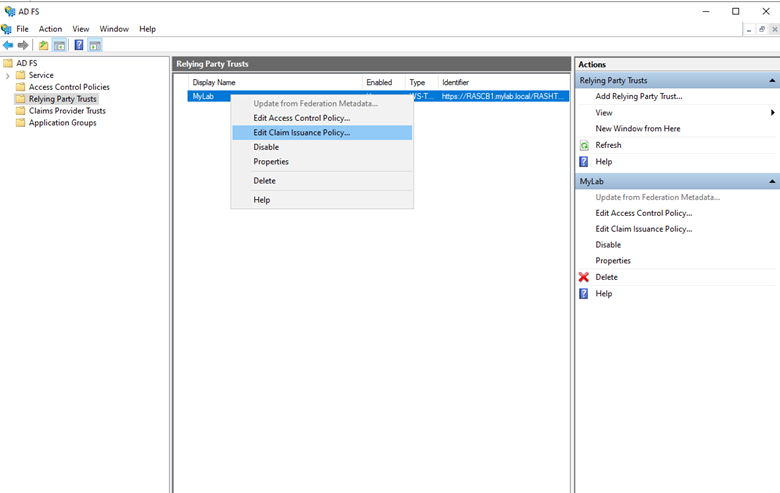
- Click Add Rule
- Choose Send LDAP Attributes as Claims
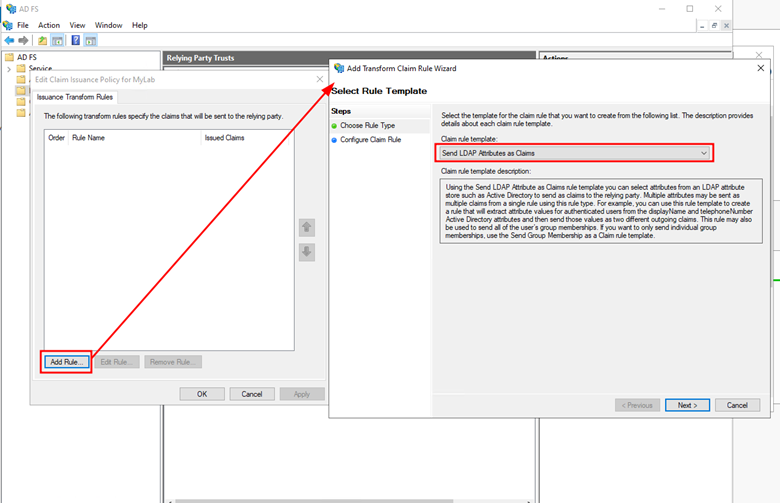
- Click on Next
Configure AD FS – Map AD Attributes
In Configure Claim Rule:
-
Attribute Store: Active Directory
-
Map required attributes (example):
- User Principal Name (UPN)
- Email Address
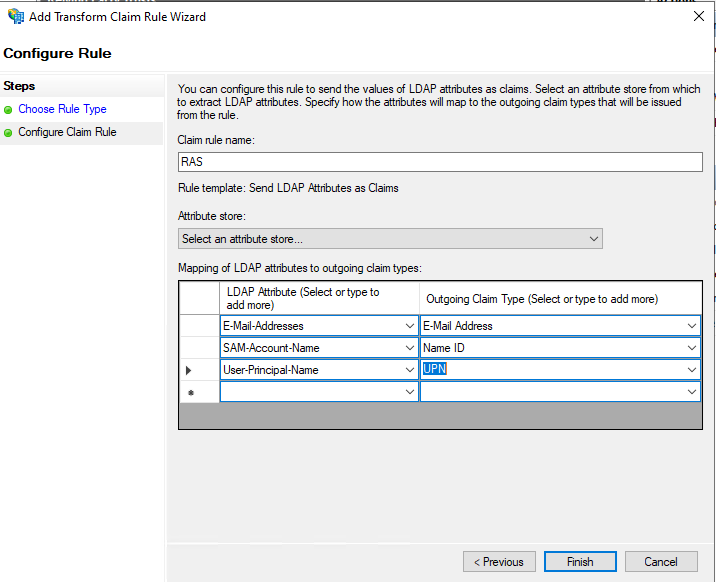
- Click Finish, then Apply and OK.
Retrieve AD FS Federation Metadata URL
In AD FS Management:
-
Navigate to Service → Endpoints
-
Locate the Federation Metadata endpoint
- Copy the URL
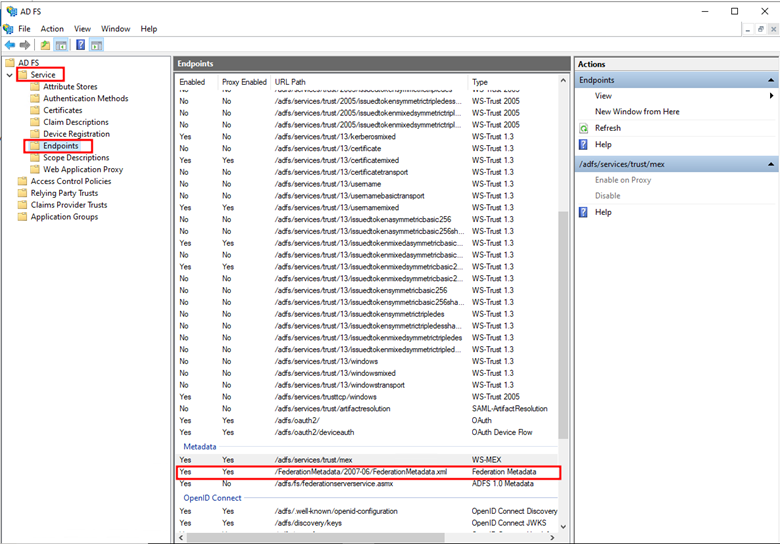
- Append the copied URL to the public FQDN of your AD FS server, for example:
https://adfs.yourdomain.com/FederationMetadata/2007-06/FederationMetadata.xml - We will use this URL in the next section below.
Completing Parallels RAS SAML Configuration
Open RAS Console → Connection → SAML
Edit the ADFS Identity Provider
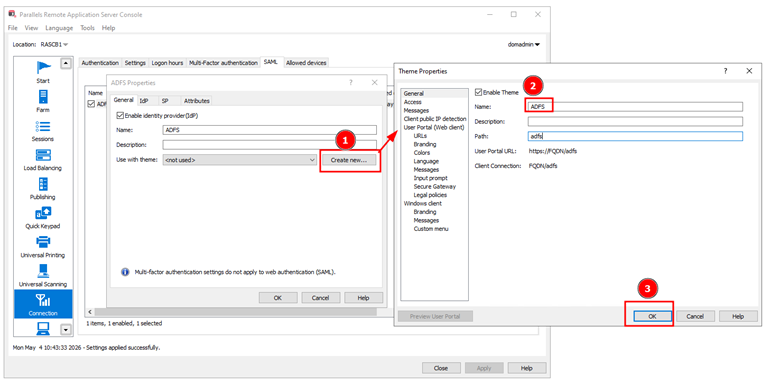
1. Configure the Login Theme
In the General tab:
-
Select an existing theme or create a new custom theme
- Note the login URL format: https://publicFQDN/ThemeName
2. Import IdP Metadata
-
Switch to the IdP tab
-
Click Import IdP Metadata
-
Select Import published IdP metadata
-
Paste the Federation Metadata URL from Retrieve AD FS Federation Metadata URL
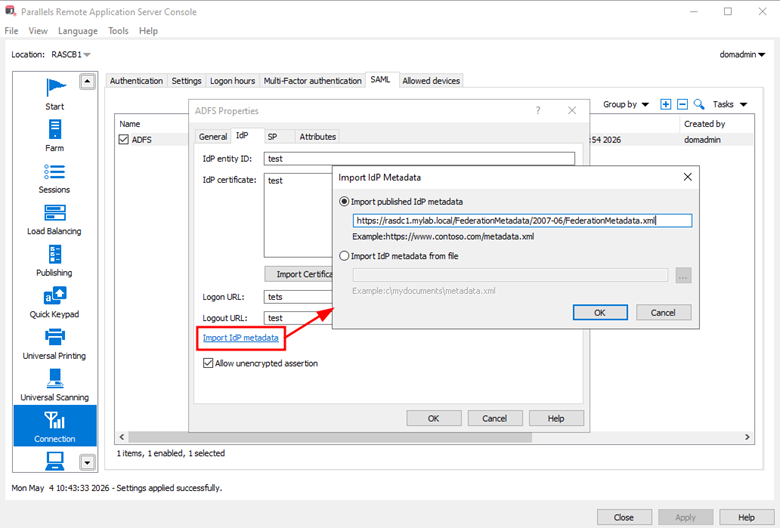
If URL import fails:
- Download the XML manually via browser by going to the metadata URL we got in Section Retrieve AD FS Federation Metadata URL and save as an xml file
- Import using Import IdP metadata from file

3. Configure Attributes Mapping
-
In the Attributes tab, specify which SAML attributes will be used to identify users as configured in section Configure AD FS – Map AD Attributes
-
At least one unique identifier (typically UPN) must be mapped.
- Email address and sAMAccountName can be optionally configured as well.
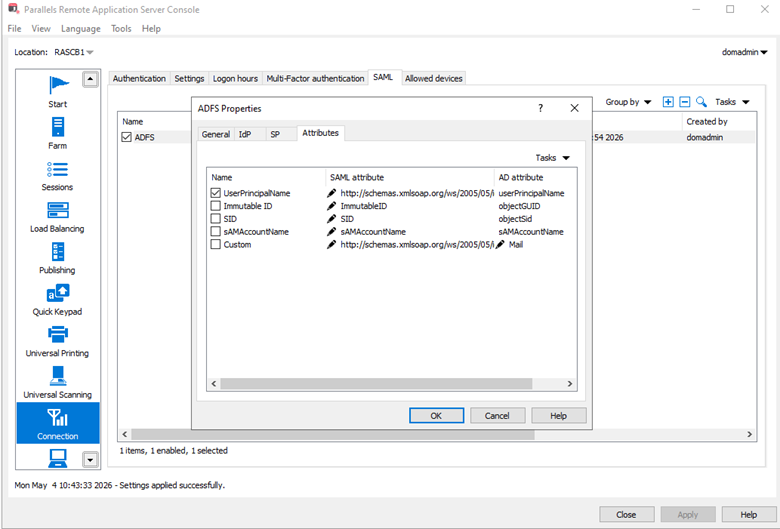
- Note:
-
To identify the correct SAML attributes for each Active Directory attribute, refer to AD FS Management → Service → Claim Descriptions.
-
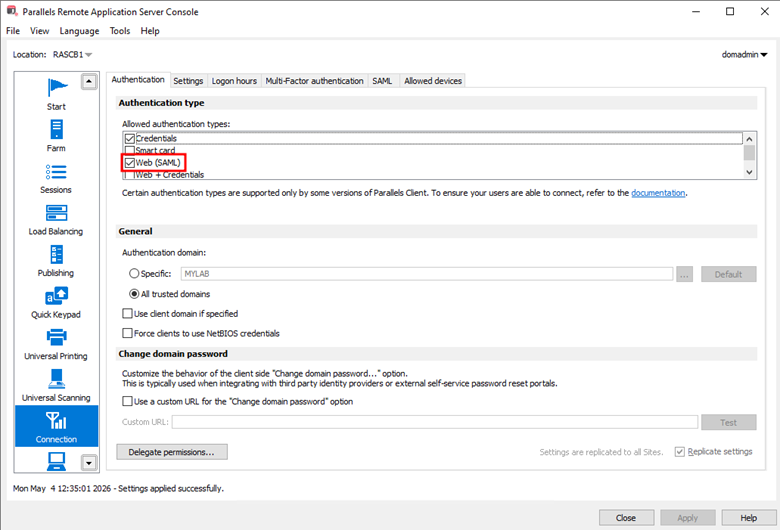
Enable SAML Authentication
As the last configuration step:
-
Go to RAS Console → Connection → Authentication
-
Enable Web (SAML) authentication
- Click Apply
Validation
1. Test browser access to the SAML login URL, for example, https://publicFQDN/ThemeName
-
You should be redirected to authenticate on AD FS similar to the following:
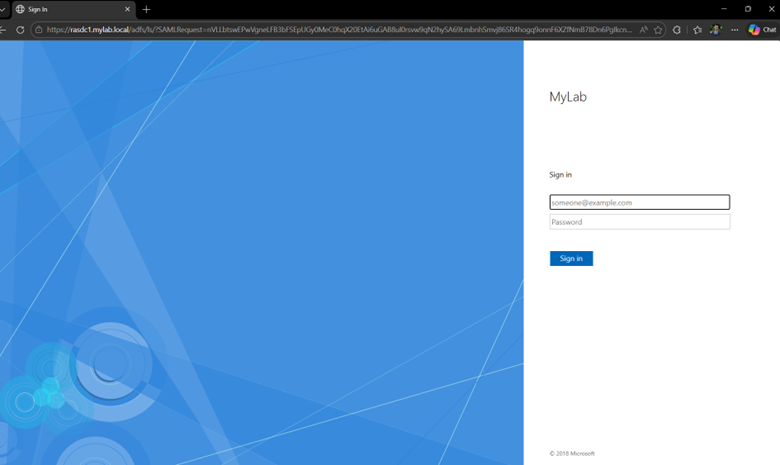
- After logging in, you should be redirected back to the Native client or the userportal, without needing to re-authenticate
Was this article helpful?
Tell us how we can improve it.