Note: To enable HTML5 support on a gateway, SSL/TLS should be enabled and configured. When HTML5 support is enabled on a Remote Application Server Secure Client Gateway, users can launch and work with published applications inside an HTML5-enabled web browser (no Remote Application Server client software is needed).
HTML5 Gateway Requirements
The following requirements need to be met in order to successfully implement the HTML5 gateway:
- Deployment of a Secure Client Gateway
- The Secure Client Gateway is secured by importing an SSL certificate
- Access to the HTML5 gateway needs to be enabled using an HTML5-capable browser.
Enabling SSL Encryption on Secure Client Gateway
SSL encryption can be enabled on the Secure Client Gateway. Two different kinds of SSL certificates can be imported:
- A self-signed certificate
- A commercial certificate signed by a certificate authority
To import a self-signed certificate, follow these steps:
- Navigate to the SSL/TLS tab in the gateway properties.
- Tick the option Enable SSL on Port and configure a port number (default is 443).
- (Optional) Tick the option Allow Only SSL v3 to only allow SSL v3 connections. By default, the Secure Client Gateway supports both version 2 and version 3 SSL.
- (Optional) Tick the option Allow only strong ciphers to only allow the usage of certificates using strong encryption algorithms.
- Click on Generate new certificate and enter the required details.
- Click Save to save all the details and generate a new self-signed certificate. The private key file and certificate file will automatically be populated.
- Click OK to save the options.
Importing a commercial certificate is also possible by importing the private key and actual certificate in the configuration.
Enabling HTML5 Support on the Gateway
To enable HTML5 support on a gateway:
- Select the Enable HTML5 Connectivity option on the HTML5 tab.
- You can also specify the Port which the gateway uses to connect to the HTML5 module.
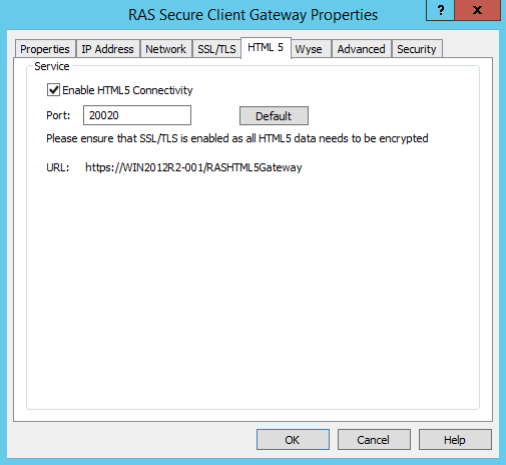
Once done, the HTML5 gateway is all setup and ready to go.
Accessing the HTML5 Interface
To connect to the HTML5 interface of a gateway and to access published resources:
-
Open the following URL in an HTML5-enabled web browser:
https://[Hostname]/RASHTML5Gateway
- On the login page, specify your user name and password and click Login.
- Your published resources are displayed on the virtual desktop in the browser.
- To launch an application, double-click on its icon. The application will run inside a browser and will look no different than if run in an RDP environment or locally.
-
You can copy and paste text between the remote application and the local computer. To do so:
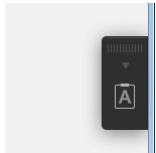
- Click the toolbar on the right side of the browser window.
- This will open the Remote Clipboard window.
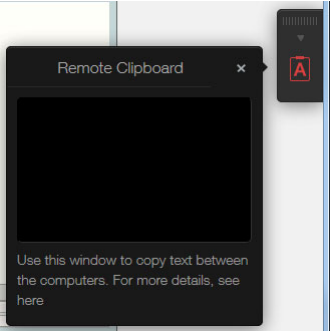
- To copy text from the local computer to a remote application, type (or paste) it in the Remote Clipboard. The typed (or pasted) text is automatically saved in the remote computer clipboard, so you can use a standard paste command (e.g., Ctrl+V) to paste it into a remote application.
- To copy text from a remote application to the Remote Clipboard, highlight it and use the standard copy command (e,g, Ctrl+C). The text will appear in the Remote Clipboard from where you can copy it to any application locally.
- The main menu of the Remote Application Server HTML5 interface includes the following menu items:
- Settings: Allows you to change the sound, redirection, and keyboard compatibility settings.
- Change Password: Allows you to change your password.
- The door-with-arrow icon disconnects from the HTML5 gateway.
Was this article helpful?
Tell us how we can improve it.