If you are running a macOS virtual machine on a Mac with Apple silicon, in Parallels Desktop 18 you may notice a lack of a cogwheel configuration icon.

Note: If you're running Parallels Desktop 19 and above, the approach is slightly different, and some options have changed. Please visit the Parallels Desktop 19 configuration article.
This is because currently, adjusting the configuration of such a virtual machine is only possible by editing a configuration file inside the virtual machine package .
Note: you may see a virtual machine configuration cogwheel icon in the Control Center. Please note that the feature to modify configuration using UI is yet to be implemented, hence the icon is grayed out.

The following settings of a macOS virtual machine on a Mac computer with Apple silicon can be adjusted:
- virtual machine's display resolution and pixel density;
- number of CPU cores allocated to the virtual machine;
- amount of RAM allocated to the virtual machine;
- network mode (Shared/Bridged) and the MAC address of the network adapter.
Note: macOS ARM VM's disk size is 60 GB by default. It can be set to a different value during the manual installation process for Parallels Desktop 18, but once the virtual machine is created, disk size cannot be changed.
Display resolution
Adjusting display resolution To adjust the displays, please perform the following steps:
Note: If you're running macOS Sonoma virtual machine on a Mac with macOS Sonoma, resolution is dynamic, and is no longer affected by these settings. If your Mac or virtual machine are running macOS below Sonoma, they will still apply.
- Shut down your virtual machine.
- Locate the virtual machine .macvm file: click on Parallels icon > Control Center > right-click on the virtual machine > Show in Finder.
- Right-click .macvm bundle > Show package contents.
- Locate config.ini file. If it doesn't exist, open Terminal (Applications > Utilities > Terminal) and execute the following command:
touch ~/Desktop/config.ini
This will create a config.ini file on your Mac Desktop. Drag and drop it inside the .macvm bundle.
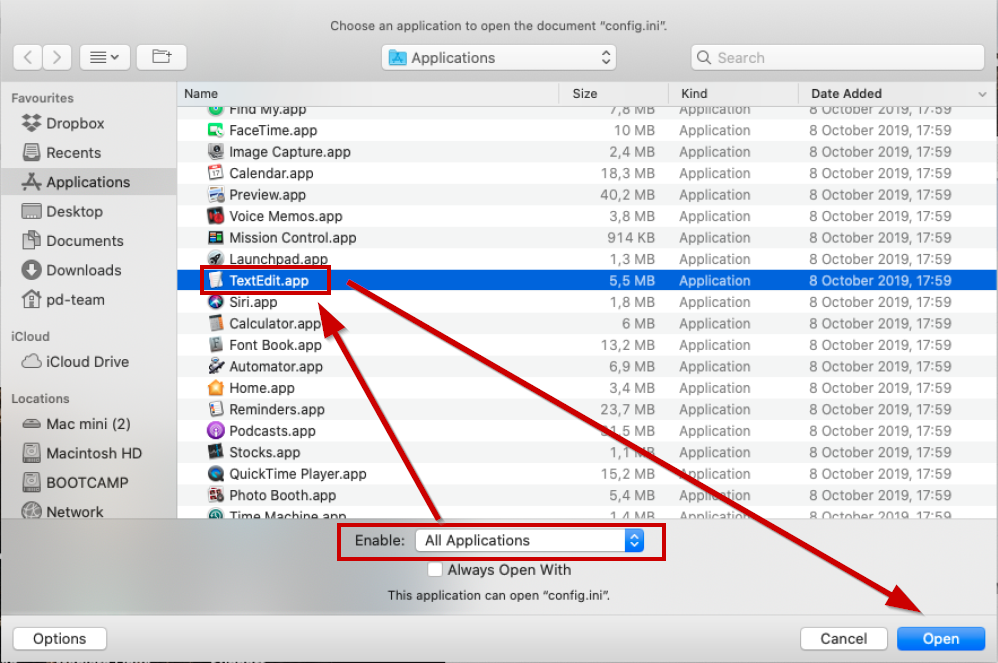
- Open the file in TextEdit: right-click config.ini > Open With > Other, check Enable All Applications select Text Edit, and click Open.
- Add the following text:
[Hardware]
Display.Width=1312
Display.Height=824
Display.DPI=226
You can change the resolution by adjusting Display.Width and Display.Height and pixel density by changing Display.DPI.
Memory
To changle the amount of RAM allocated to the virtual machine, open Terminal and execute the following command:
prlctl set <vm_name> --memsize <megabytes>
A command to allocate 4GB of memory to a virtual machine called "macOS 13" would looke like this:
prlctl set "macOS 13" --memsize 4096
CPU
Similarly to memory, a command to set the nuber look like this:
prlctl set <vm_name> --cpus <number>
e.g.:
prlctl set "macOS 13" --cpus 4
Network
List Network Adapters
prlctl list "<vm_name>" -i | Grep -E 'net[0-9] \('
e.g.:
prlctl list "macOS 13" -i | Grep -E 'net[0-9] \('
The output would looke like this:

Toggle Shared/Bridged Mode
prlctl set "vm_name" --device-set <network_adapter_id> --type <bridged/shared>
e.g.:
prlctl set "macOS 13" --device-set net0 --type bridged
Change MAC Address
prlctl set "vm_name" --device-set <network_adapter_id> --mac <mac_address>
e.g.:
prlctl set "macOS 13" --device-set net0 --mac 123456789ABC
Add Network Adapter
prlctl set "vm_name" --device-add net --type <bridged/shared> --mac <mac_address>
e.g.:
prlctl set "macOS 13" --device-add net --type bridged --mac 123456789ABC
Sample output:

Share Mac files with the virtual machine
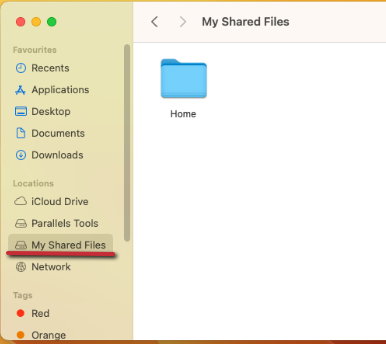
File Shared Folder is enabled by default for new macOS Ventura virtual machine running on macOS Ventura.
This means that on your virtual machine side, you will see "My Shared Files" location providing you the access to your Mac's Home folder.
If you're running a previous macOS version, we suggest sharing files between the virtual machine and the Mac using the native macOS file sharing feature as you would between two physical Mac computers.
Note: only Parallels Desktop Pro and Business editions support the prlctl command-line utility. If you run Parallels Desktop Standard Edition, you can change most settings by directly editing the config.pvs file. To do that:
- Shut down your virtual machine.
- Locate the virtual machine .macvm file: click on Parallels icon > Control Center > right-click on the virtual machine > Show in Finder.
- Right-click on the .macvm bundle > Show package contents.
- Locate the config.pvs file and open it in TextEdit: right-click config.pvs > Open With > Other, check the Enable All Applications option, select Text Edit, and click Open.
- Locate any required parameters using the Cmd + F keyboard shortcut to open the search bar and change them as you see fit:
- To change the number of CPU cores allocated to the virtual machine, locate the
<CustomCpu dyn_lists="">parameter, and below it, change the number inside the<number>X</number>tag, where X is the currently allocated number of cores. - To change the amount of RAM allocated to the virtual machine, locate the
<RAM>ABCD</RAM>tag, where ABCD is the currently allocated amount of RAM in megabytes.
Important: Make sure that the value of neighboring string:<RamAutoSizeEnabled>0</RamAutoSizeEnabled>is indeed 0. If not, change it from 1 to 0, otherwise the new RAM amount won't apply. - To toggle the virtual network adapter mode between Shared and Bridged, locate the
<EmulatedType>N</EmulatedType>tag, where N = 1 for Shared mode and 2 for Bridged. - To assign a specific MAC address to the virtual machine, locate the
<MAC></MAC>tag and insert the required MAC address inside the tag, removing the colon marks. E.g., to assign 1A:2B:3C:4D:5E:6F, use<MAC>1A2B3C4D5E6F</MAC>. - To disable sharing the host's home folder with guest VMs, locate the
<ShareUserHomeDir>X</ShareUserHomeDir>parameter and change it from 1 (enabled) to 0 (disabled).
- To change the number of CPU cores allocated to the virtual machine, locate the
Add a secondary virtual hard drive
As an advanced step, you may connect an .dmg or .img disk image as a secondary virtual hard drive.
It may be useful for example to transfer large amounts of data between two macOS ARM virtual machines or when you need to extend the storage capacity of a virtual machine without having to recreate it.
Create an empty image
To create an empty .dmg image, open Terminal (Applications > Utilities > Terminal) and execute the following command:
hdiutil create -size <size_in_bytes> -fs APFS -type UDIF -volname <volume_name> <output_img_path>
E.g.,
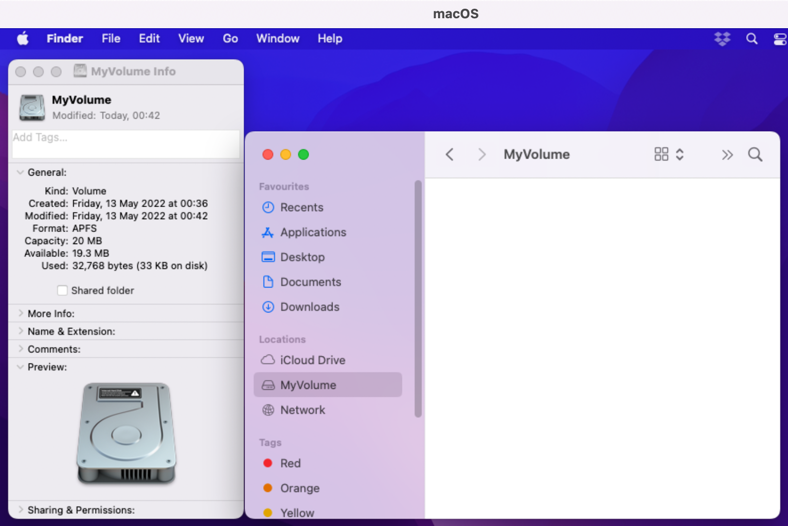
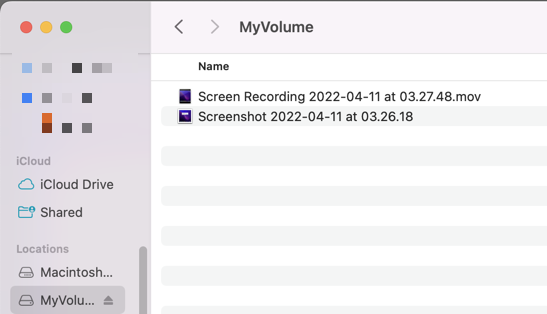
hdiutil create -size 20000000 -fs APFS -type UDIF -volname "MyVolume" ~/Desktop/mydisk.dmg
will create a 20-megabyte mydisk.dmg file on the Desktop. When connected, the volume will show up as "MyVolume".
Create a read-only image from a directory
To turn a macOS directory into a read-only .dmg image, open Terminal and execute the following command:
hdiutil makehybrid -hfs -hfs-volume-name <volume_name> -o <output_img_name> <directory_path>
E.g.,
hdiutil makehybrid -hfs -hfs-volume-name "MyVolume" -o ~/Desktop/mydisk1.dmg ~/Desktop/EmailTemplates
Connect image
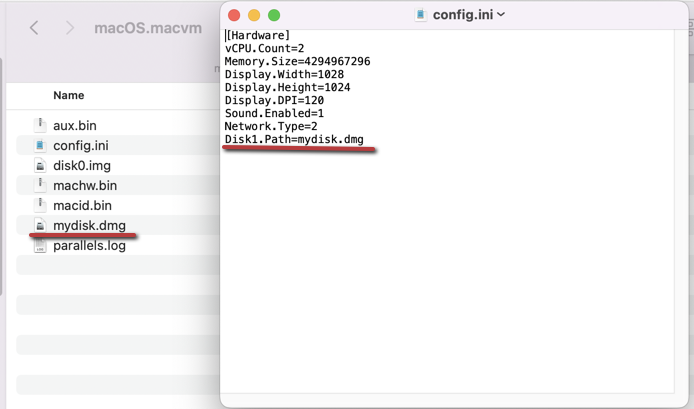
To connect such an image, put it inside the .macvm bundle next to the config.ini file, and in the config.ini add the following line:
Disk1.Path=<name_of_image_file>
In the case of the example above, that would be:
Disk1.Path=mydisk.dmg
Once you run the virtual machine, and it boots up, you will see the image available in the virtual machine's Finder.
And in case of an empty image, you can transfer data to it.

Once the virtual machine is shut down, you can mount the image to your main system by double-clicking on it.
Change the name of the virtual machine
To change the name of your macOS virtual machine open Terminal and execute the command below:
prlctl set "macOS 13" --name "macOS 13 New Name"
where macOS 13 is the current name of your virtual machine.
Additional functionality added in Parallels Desktop 18
Please note that starting with Parallels Desktop 18 you can register your macOS virtual machine in Control Center which will bring additional functionality to the operations with the virtual machine:
- create clones of the VM;
- use prlctl start, stop, register, destroy, and clone commands to work with the virtual machine from Terminal.
Was this article helpful?
Tell us how we can improve it.