Symptoms
I am running out of free space on my virtual machine (VM), and I want to increase the size of the virtual hard disk.
Resolution
Warning! We strongly recommend that you check your VM hard disk for errors and back up your VM before following the steps below.
Note: This article does not apply to Boot Camp-based VMs, where the primary partition size cannot be increased as its size is predefined by Boot Camp Assistant.
In case you increased the size of the disk in the VM configuration, but Windows shows the same disk size, please refer to KB 123372.
Starting from version 14, Parallels Desktop® will periodically check free disk space left in the virtual hard disk and offer to increase (resize) hard disk via macOS® notifications.
Increasing virtual hard disk size
-
Start Parallels Desktop and do not start your virtual machine. Shut it down if it is either suspended or running.
-
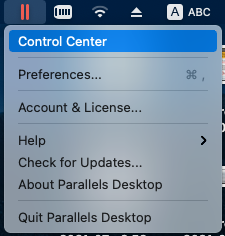
Click on the Parallels icon on Mac menu bar and select Control Center:
-
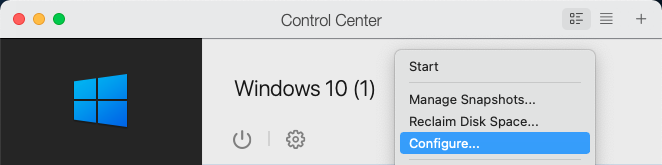
Right-click on your virtual machine and choose Configure to open its configuration.
-
For Parallels Desktop 17 and above:
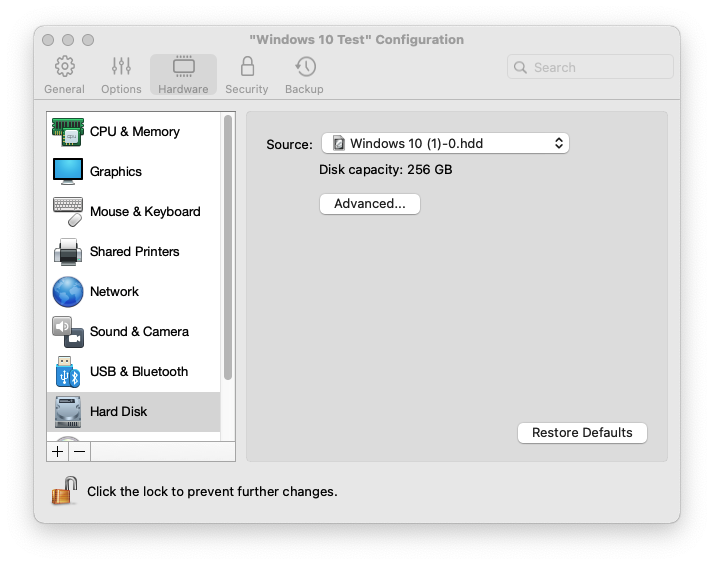
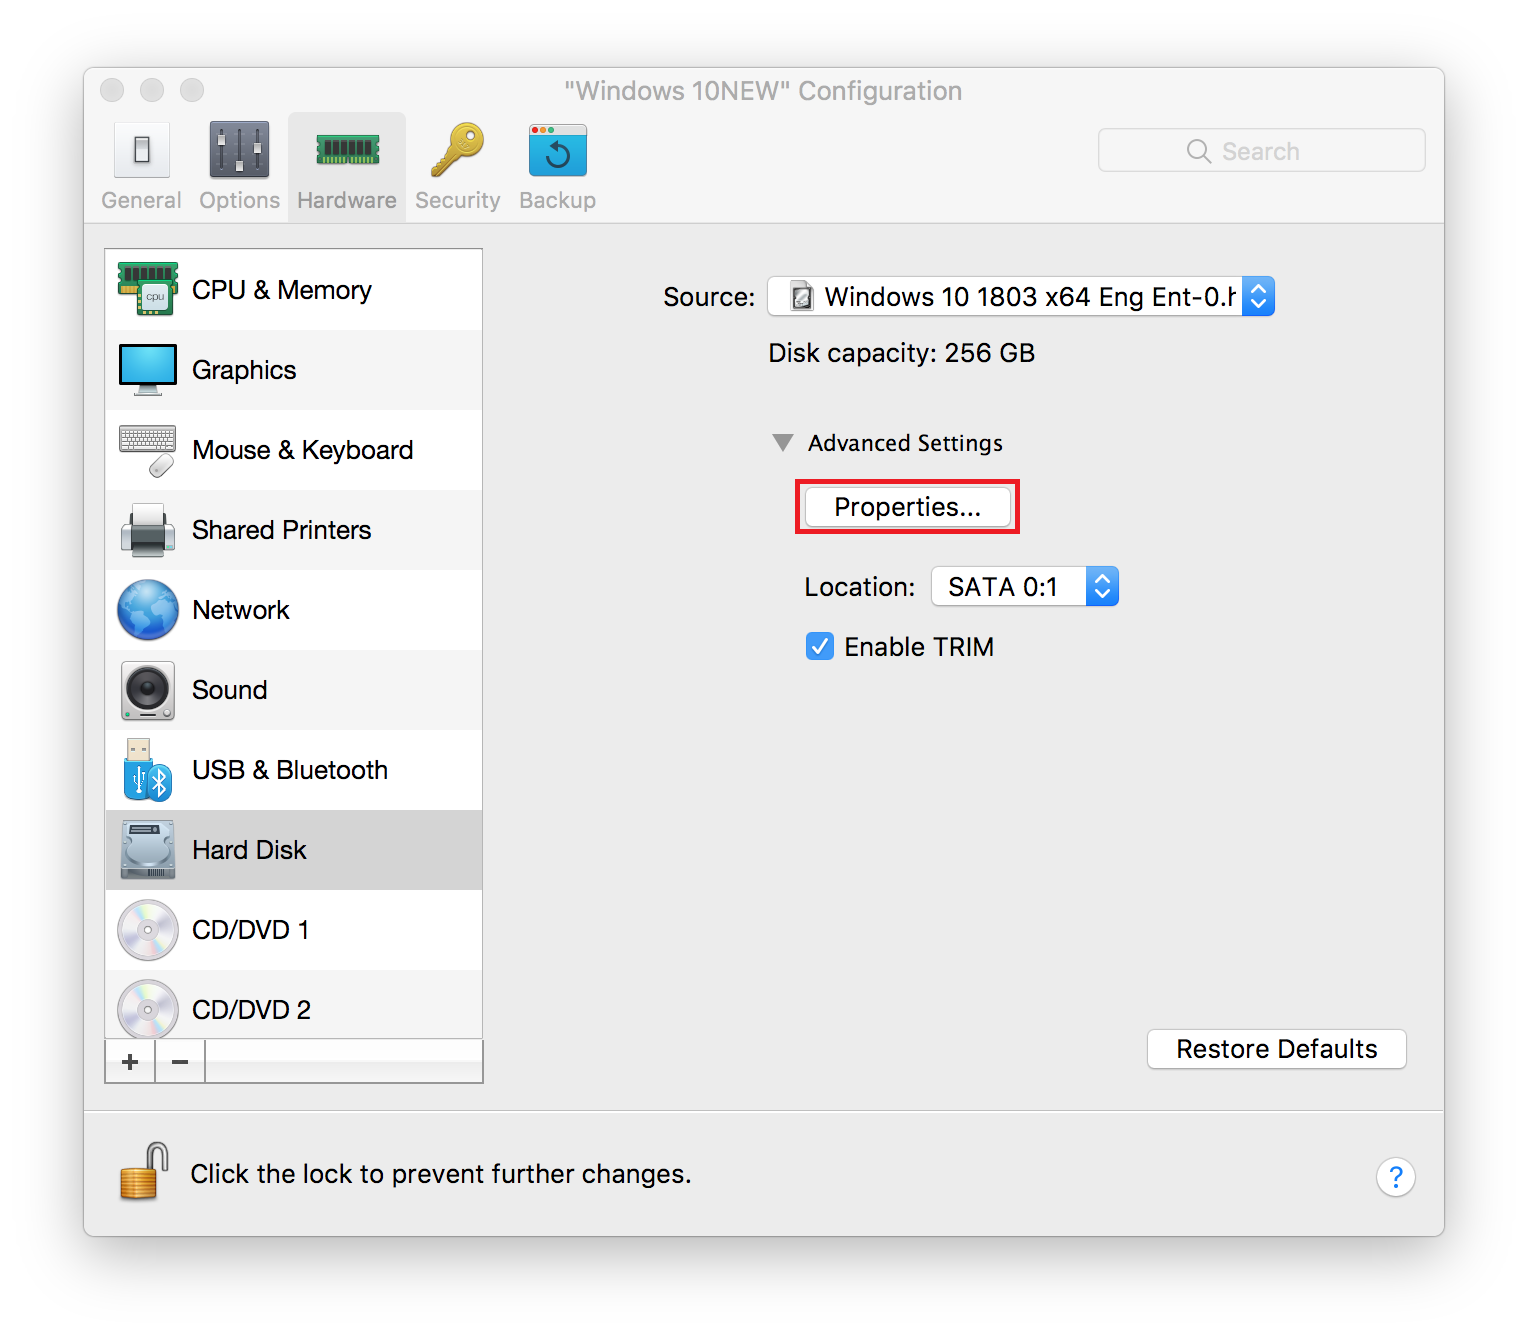
Go to the Hardware tab, select Hard Disk which requires increasing the size then click Advanced... > Properties...
For Parallels Desktop 14 - Parallels Desktop 16: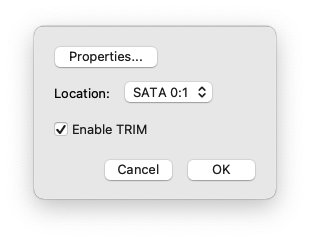
Go to the Hardware tab, select Hard Disk which requires increasing the size then expand the Advanced Settings drop-down menu, then click Properties.
For earlier Parallels Desktop versions (13 and below):
Go to the Hardware tab, select Hard Disk which requires increasing the size then click Properties. -
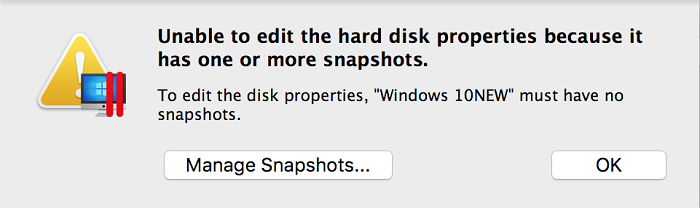
If the VM has Snapshots the following notification window will appear. Press Manage Snapshots... to open the corresponding dialogue window then remove Snapshots to start editing the disk size.
-
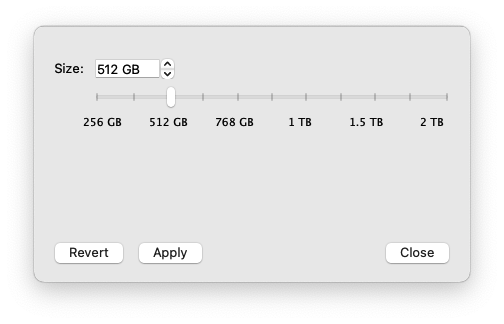
Choose the size you want for the virtual hard disk and click Apply.
-
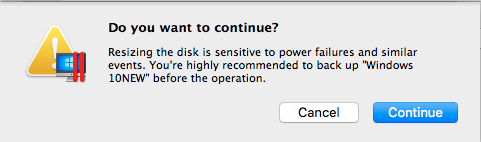
After that Parallels Desktop will suggest creating a backup of the VM. To proceed further click Continue.
Note: as mentioned above, we strongly recommend creating a backup of the VM. In case of power surges/failures with the Mac, Mac's unpredictable restarts or third-party applications interventions, during the operations with the virtual hard drive may result in its corruption result in the inability to use the virtual machine.
Checking the size of the disk in Windows
To make sure the changes were applied successfully, confirm that the size of the virtual hard disk has changed:
- Start the virtual machine.
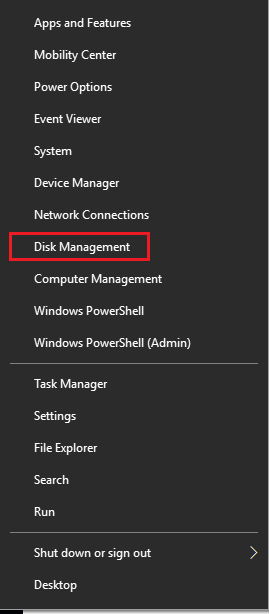
- Right-click on the Start menu > Disk Management or click on the Start menu and type Disk Management
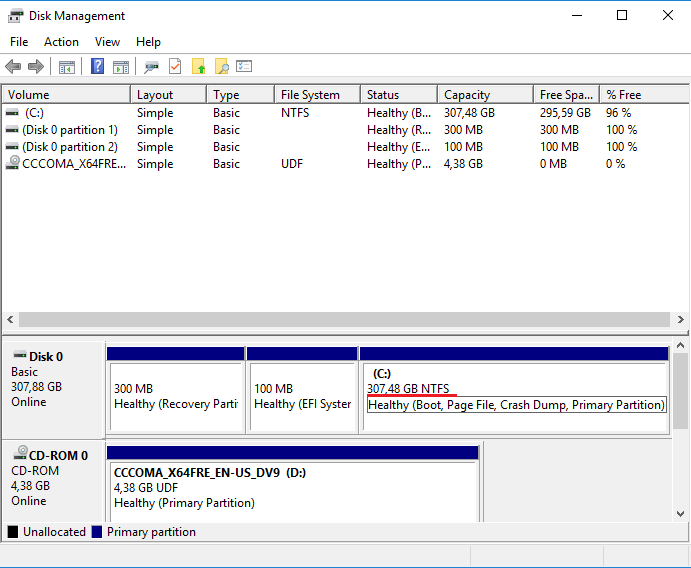
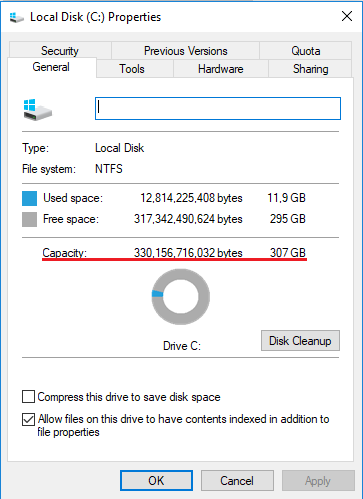
The size of the main partition (the partition where the Windows installation is located — it is local disk (C:) by default) should equal the size of the virtual hard disk (Hard Disk 1).
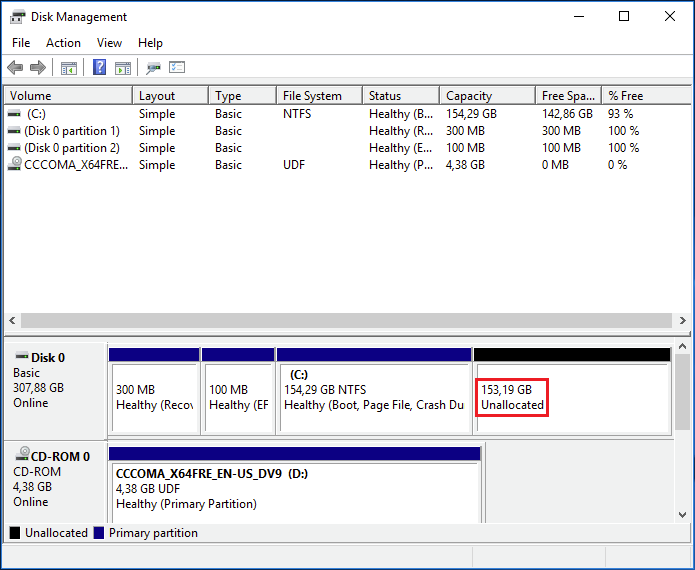
If the size of Hard Disk in the VM’s configuration has changed and at the same time the size of the local disk (C:) in Windows has not, do the following:
- Repeat steps mentioned above to open Disk Management.
-
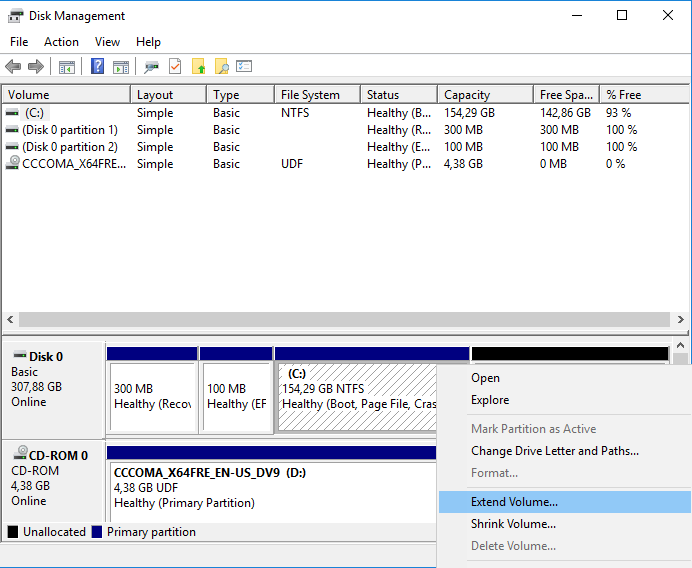
Disk Management will report that you now have an extra partition on the hard drive that’s marked as Unallocated. You can add this Unallocated partition manually to your main disk (C:) partition:
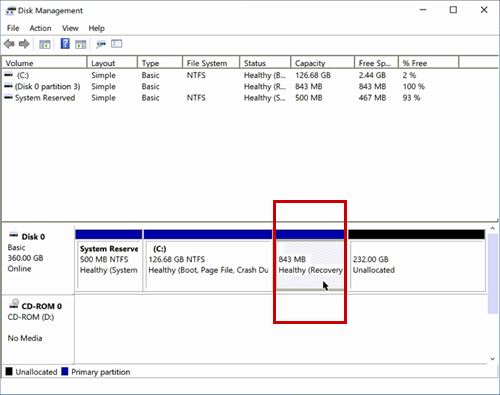
NOTE:If there is a recovery partition located between unallocated space and at the (C:) partition, please refer to this article to delete the recovery partition and expand the disk (if there is not such recovery partition, proceed to step 3).
-
Right-click on the main (C:) partition and select Extend Volume.
-
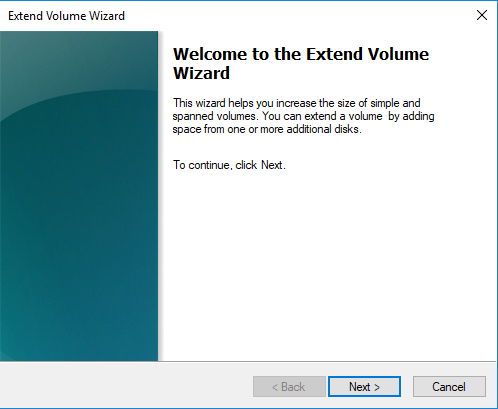
Extend Volume Wizard will open. Click Next.
-
On the Select Disk page, you may choose how much extra space should be added to the main (C:) partition. By default, the whole Unallocated partition will be added. Click Next.

-
Click Finish on the next page, and the Unallocated partition will be added to the (C:) partition.
-
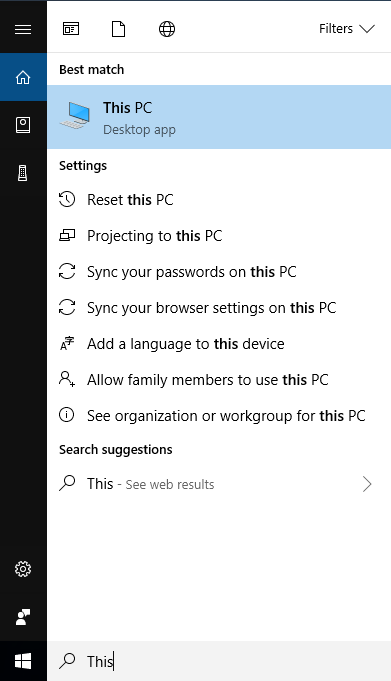
Click Start and type This/this and click on the suggested This PC Desktop app.
-
Right-click on the C: drive and select Properties.
Was this article helpful?
Tell us how we can improve it.