Prerequisites
For deploying Agents on other servers, RAS Powershell module can be installed only on one server that is hosting RAS Publishing Agent. Scripts execution may be performed from the same server or from another machine with RAS Powershell module installed.
Prior to using a script, the following information must be known:
- Server hostnames, FQDNs, or IP addresses that are going to be used for deployment. A mix of those is also fine.
NOTE: We recommend using FQDNs, especially for Cloud-based implementations to avoid issues like the one described in the following article:
https://kb.parallels.com/en/124669
- RAS Admin credentials for the account that is going to create a new ras session.
- Admin credentials for the account that is going to deploy agents. (omit if the account will be the same)
- Site Id number of a site within a particular RAS Farm. It can be obtained from RAS Console > Farm:

Or from the output of Get-Site command:
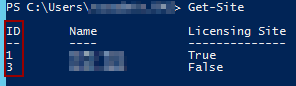
In this article, we will use site ID 1 to specify it later for -SiteId parameter.
NOTE: The farm will be defined automatically by connecting to a specific Publishing Agent that is already a part of the Farm. For this purpose, multiple copies of the script adjusted for specific Farm and Site can be used.
Additional Reference:
RAS Powershell Guide - Offline version (.zip)
Procedure
1. Create a .txt file with the list of server hostnames, FQDNs, or IP addresses as per the following example:
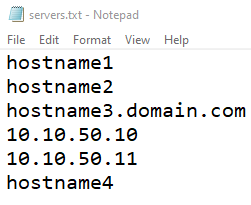
NOTE: Each server mentioned in this file must be unique, existing on your network, and reachable over the network from the machine where the RAS Publishing Agent and RAS Powershell module will be installed for further script execution.
2. Save this file at some location that is going to be used in the script. In this example the file is named servers.txt and it is saved on current users Desktop.
3. Open Powershell, Import PS Admin module and establish a new RAS Session:
$SecretPassword = ConvertTo-SecureString '[password]' -AsPlainText -Force
New-RASSession -Username "[username]@[domain]" -Password $SecretPassword -Server "[server_name]"
Replace the following data in the above syntax:
[password] - RAS Admin account password.
[username] - RAS Admin username.
[domain] - RAS Admin account domain.
[server_name] - RAS Publishing Agent server hostname, FQDN or IP.
4. Read the text file contents and store it in a variable:
NOTE: Ensure to change the path according to the actual location of a text file on your system.
5. Go through each server with the following syntax:
NOTE: New-RDS command as well as the script itself can be adjusted for more flexible use.
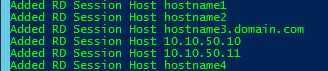
6. The script applies changes to the Farm automatically after adding each server and installing an agent on it. The servers will be added one after another from the start to the end of the provided text file. As soon as the server is added, an output string will be generated for it:
Was this article helpful?
Tell us how we can improve it.