This article describes a specific issue that could occur with macOS virtual machines on Macs with Apple silicon.
The issue root cause is a hard disk disconnection that can possibly occur, in rare cases, as a result of going between older and newer versions of Parallels Desktop, specifically between versions where some changes were introduced to virtual hard drive. This issue is not expected to occur in 19.3 and newer versions going forward.
To try to resolve the issue in this case, please perform the following steps:
Using Command Line interface:
In case you hold a Parallels Desktop Pro or Business license:
To try to resolve the issue, please perform the following steps:
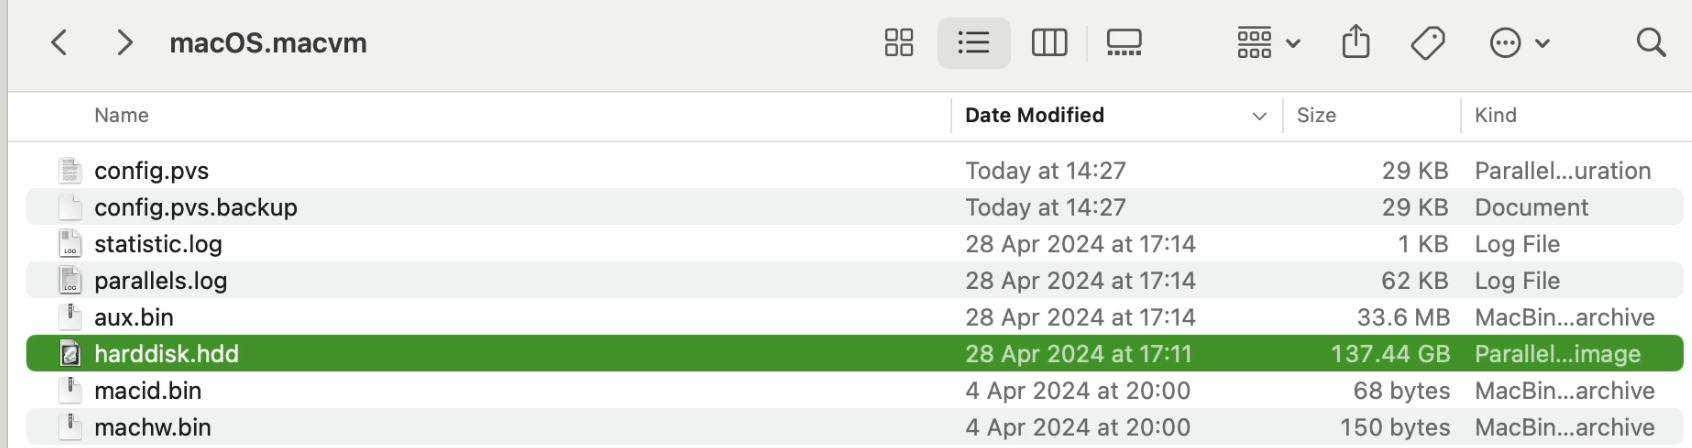
1. Locate the virtual machine as outlined in this article.
2. In the opened Finder window, right-click on the macOS virtual machine bundle -> select "Show Package Contents". Leave this Finder window open.
3. Open Terminal: Finder -> Applications -> Utilities -> Terminal and type in the following:
prlctl set "macOS" --device-add hdd --image
Note: Complete syntax is as follows: prlctl set <vmName> --device-add hdd --image <PathToImage>
4. Now, return to the Finder window opened previously, and drag the .hdd file into the Terminal at the end of the string. The end result will look like this:

5. Press "Enter" to execute the command.
6. Start your macOS virtual machine and check if the issue persists.
Alternative solution
As, prlctl functionality is reserved for Pro and Business licenses, in case you're using a Parallels Desktop standard license and running Parallels Desktop 19.3 or above, you could try doing the following instead, as graphical user interface is available for the macOS virtual machines in later versions:
1. Click on the Parallels Desktop icon in the Mac menu bar -> select "Control Center".
2. Click on the cogwheel under your macOS virtual machine to enter its configuration:

3. Go to "Hardware" tab -> Click on the "+" icon:

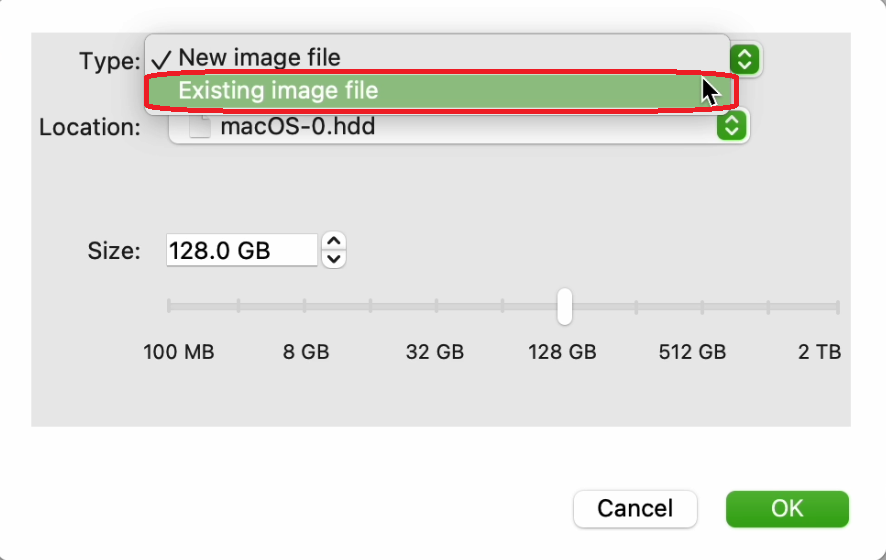
4. In the Type field, select "Existing Image" -> Choose an Image File from the drop-down menu.
5. Locate the VirtualMachineName.macvm and click on the arrow to the left to show contents -> click on HarddiskName.hdd arrow to show contents -> click on HarddiskName.hdd -> Open.
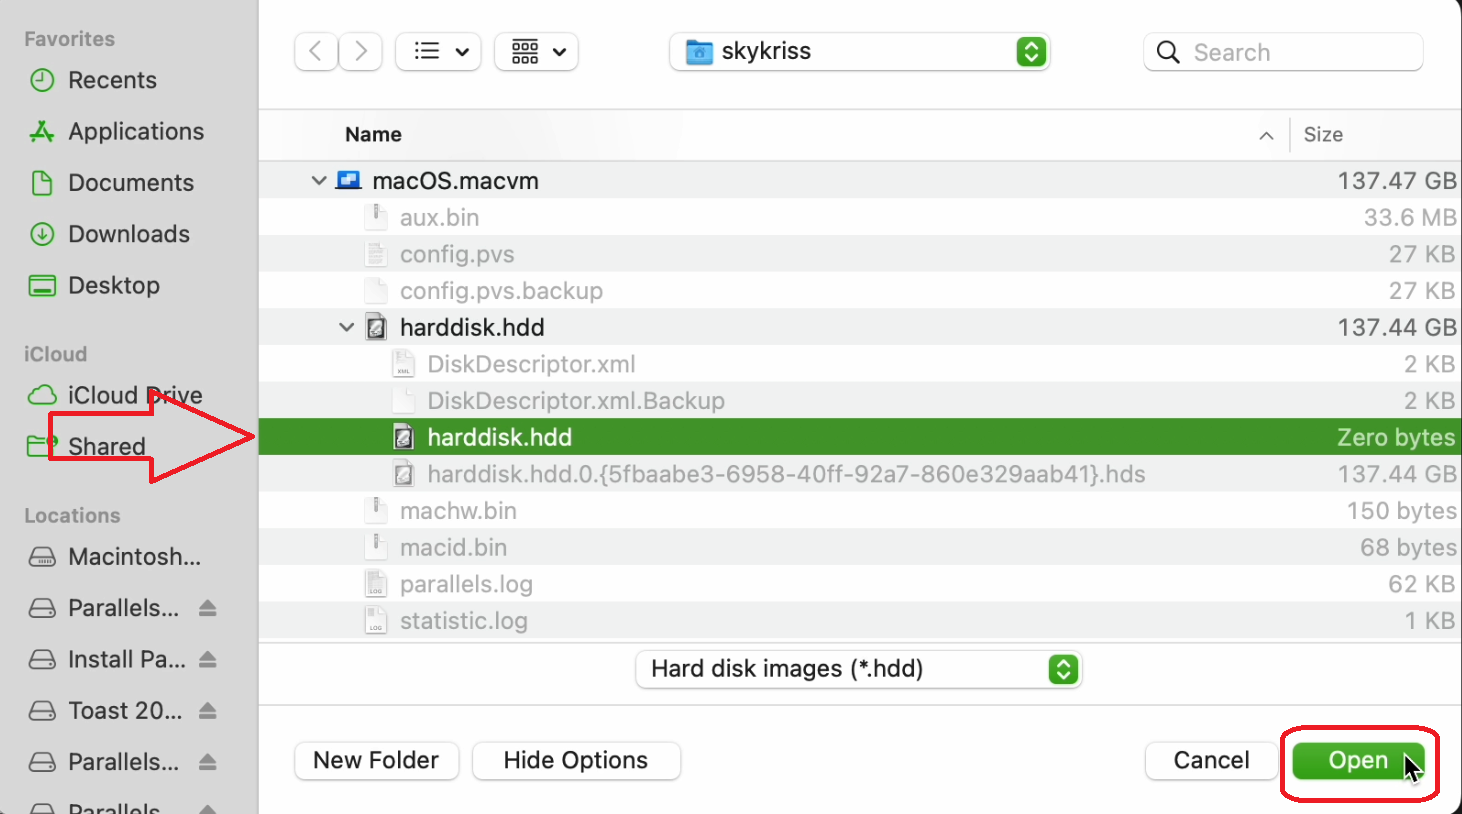
6. Click "Open" -> "Ok". End result will look like this:
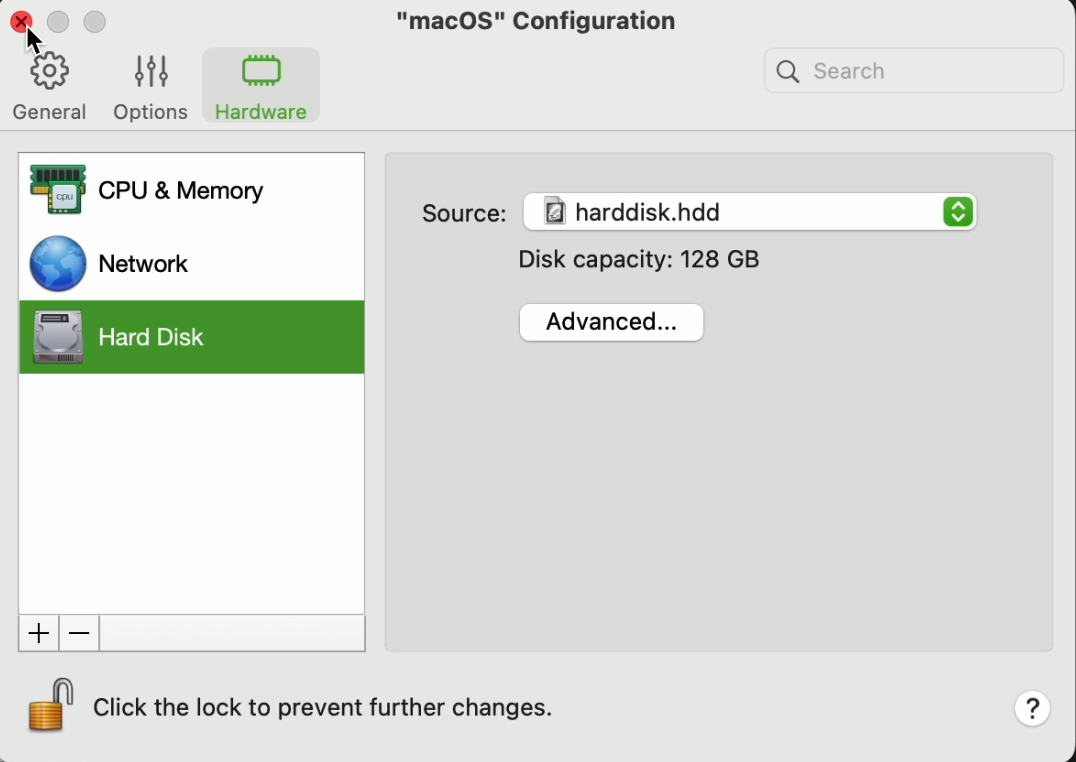
7. Close the configuration window, and try starting your virtual machine.
If neither of those options produce positive results, or if the scenario doesn't match your issue, please reach out to our Support Team for assistance.
Was this article helpful?
Tell us how we can improve it.