When utilizing Parallels Desktop to operate a Windows virtual machine in shared network mode, Cisco AnyConnect VPN on the Mac side can lead to a potential disruption of internet connectivity within the Windows guest OS.
Fix the issue
To address the issue of Windows 11 in shared network mode losing internet connection when the Cisco AnyConnect VPN is turned on the host side, follow the steps below:
-
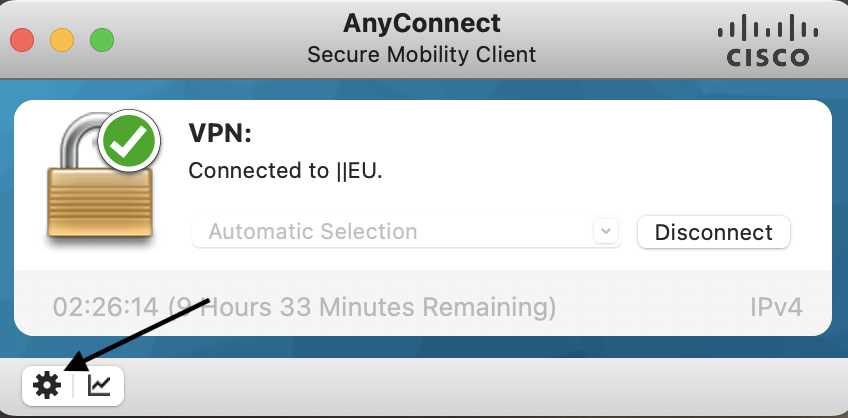
On your Mac, locate and open the Cisco AnyConnect Secure Mobility Client application in the Applications Folder.
-
Within the Cisco AnyConnect client interface, click on the "Preferences" option. You can find this option represented by a cogwheel icon, usually positioned in the bottom left corner of the client window.
-
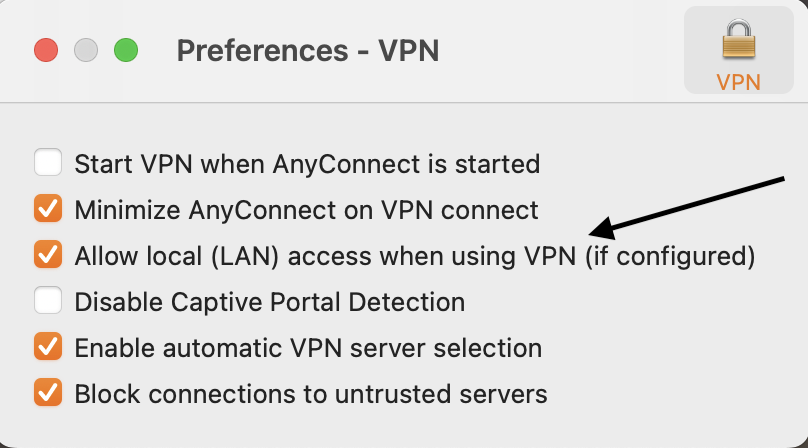
In the Preferences menu, look for the option Allow local (LAN) access when using VPN (if configured) and make sure it is checked.
Enabling this option allows your Windows 11 running in shared network mode to maintain internet connectivity even when the Cisco AnyConnect VPN is active on the host machine.
-
After checking the option, close the Preferences window and proceed to use the virtual machine within Parallels Desktop.
Alternative option
It's also possible, that the root cause of this issue lies in the fact that the Shared Network IPv4 subnet is made routable via the VPN tunnel, leading to connectivity issues with the external network. In which case, please follow these steps:
-
Contact your VPN administrator to suggest a /24 subnet in the subnets 10.0.0.0/8 or 192.168.0.0/16 that is not routed via the VPN tunnel.
Note: This information is crucial and cannot be determined without knowledge of the VPN gateway configuration. -
Shut down all VMs. Make sure that the VMs are shut down. If any of them are in a suspended state, please run it and then shut down (Actions > Shut Down).
- Quit Parallels Desktop (click the Parallels icon on the top Mac menu > Quit Parallels Desktop).
4. Modify the Virtual Network Configuration:
For macOS VMs on Apple Silicon (except the cases when macOS Sonoma is running as a host and VM operating system):
- In your host machine, Open Terminal (Finder > Applications > Utilities > Terminal) and execute the command below:
sudo nano /Library/Preferences/SystemConfiguration/com.apple.vmnet.plist
Note: you will need to enter your Mac password to run the command. No symbols will be shown due to security measures, so just hit the keys and use Return/Enter.
-
Locate the following text and replace the text between <string></string> with the subnet address obtained in step (1):
-
<key>Shared_Net_Address</key><string>192.168.64.1</string>
-
-
Save the file by holding down the Control key on your keyboard (labeled as "Ctrl") and pressing the letter "X". Nano will prompt if you want to save any unsaved changes, press "Y" for "Yes" and then the Enter key.
For Parallels Desktop for AppStore:
- In your host machine, open Terminal (Finder > Applications > Utilities > Terminal) and execute the command below:
open -a TextEdit ~/Library/Group\ Containers/4C6364ACXT.com.parallels.desktop.appstore/Parallels/network.desktop.xml
Note: you will need to enter your Mac password to run the command. No symbols will be shown due to security measures, so just hit the keys and use Return/Enter.
-
In the newly opened TextEdit window, adjust the values of
HostIPAddress,DhcpIPAddress,IPScopeStart, andIPScopeEndforNetworkID = Sharedpresent in thenetwork.desktop.xml fileto match the subnet obtained in step (1). -
Go to the "File" menu at the top left of your Mac menu bar and click on "Save" from the dropdown menu.
For Parallels Desktop for Mac with a Standard License:
- In your host machine, open Terminal (Finder > Applications > Utilities > Terminal) and execute the command below:
open -a TextEdit /Library/Preferences/Parallels/network.desktop.xml
Note: you will need to enter your Mac password to run the command. No symbols will be shown due to security measures, so just hit the keys and use Return/Enter.
-
In the newly opened TextEdit window, adjust the values of
HostIPAddress,DhcpIPAddress,IPScopeStart, andIPScopeEndforNetworkID = Sharedpresent in thenetwork.desktop.xml fileto match the subnet obtained in step (1). -
Go to the "File" menu at the top left of your Mac menubar and click on "Save" from the dropdown menu.
For Other Cases:
- Start Parallels Desktop.
- Click on the Parallels Desktop icon in the Mac menu bar and select Preferences.
- Configure the Shared subnet using the dialog Parallels Desktop > Preferences... > Network > Shared > IPv4.
- Modify the fields to match the subnet address obtained in step (1).
Was this article helpful?
Tell us how we can improve it.