Intro
This article provides a comprehensive overview of what can be accomplished with virtualized resources and how to set up Parallels Remote Application Server (RAS) to work with said virtualized resources.
By adding the Virtual Desktop Infrastructure (VDI) host to the RAS, you can manage the virtual machines on it, create guest clones, and publish virtual desktops and applications from virtual guests.
The following hypervisors are supported:
• Microsoft Hyper-V (Windows Server 2012 R2 up to Windows Server 2022);
• Microsoft Hyper-V Failover Cluster (Windows Server 2012 R2 up to Windows Server 2022);
• VMware vCenter 7.x, 6.7.0, 6.5.0;
• VMware ESXi 7.x, 6.7.0, 6.5.0;
• Scale Computing HC3 8.9, 9.1;
• Nutanix AHV AOS 5.15, 5.20.
The special VDI provider type Remote PC allows publishing from on-premise PCs or Virtual Machines (VMs) without hypervisor involving. To know more, please follow this KB How to create Remote PC Pool
RAS also supports Cloud providers such as Azure and AWS.
Adding a VDI Host
In this article setting up RAS VDI using Microsoft Hyper-V will be an example, other hypervisors are adding in the same way.
1. In the RAS Console, go to Farm>Providers. Click Plus icon or Tasks>Add. Choose Microsoft Hyper-V.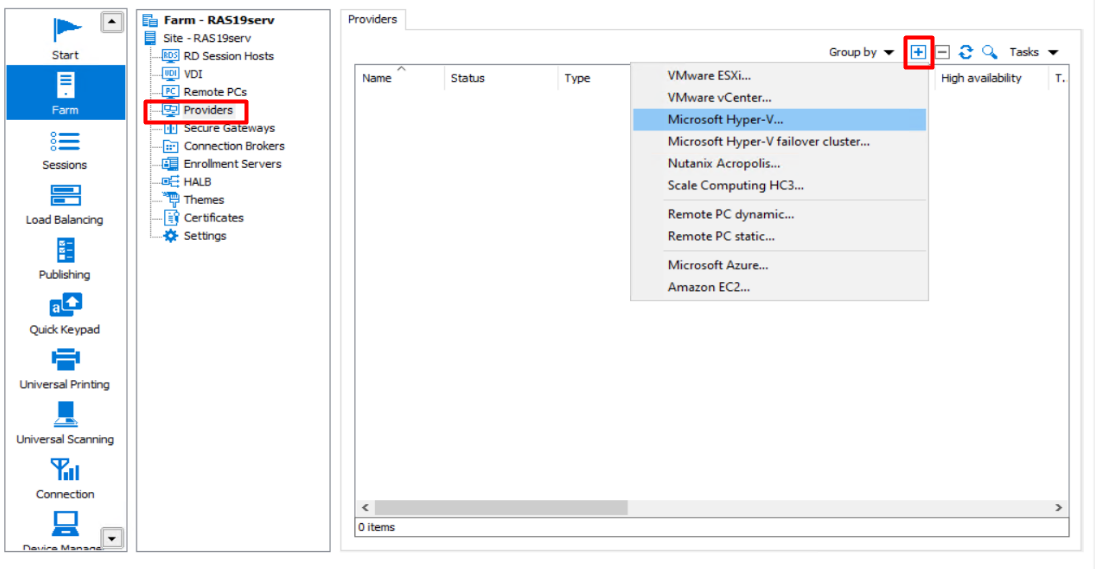
2. The configuration wizard will appear, specify the parameters:
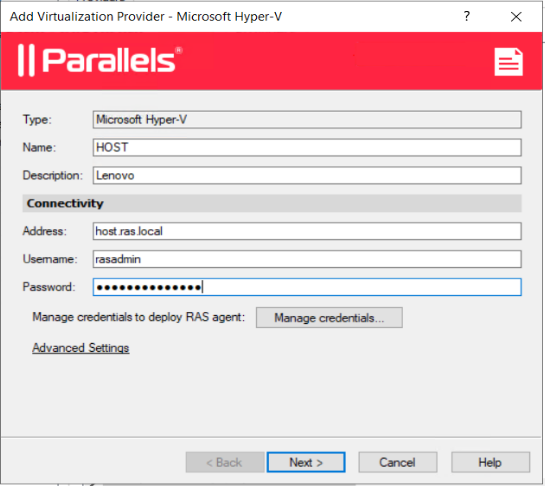
Tip: we do recommend using full permission account for VDI provider, but it could be also limited service account.
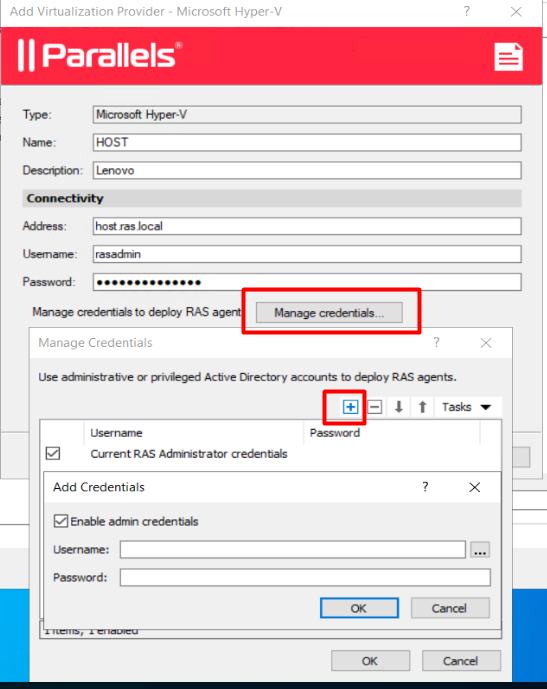
In case you're using a different user account to deploy RAS Agent on Guest VM, click Manage Credentials...
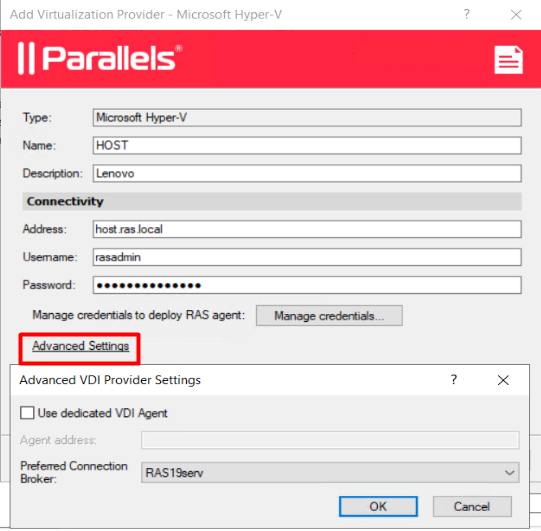
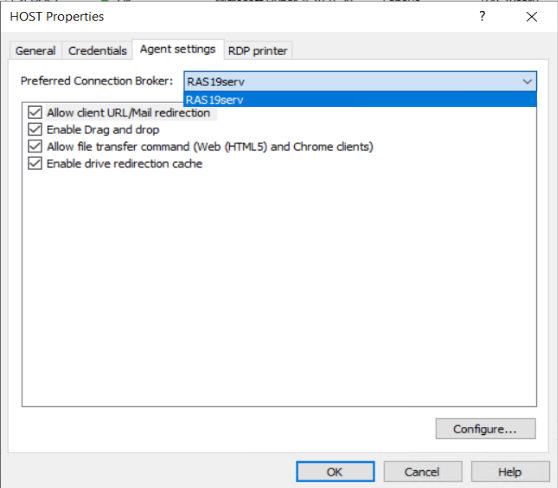
Under Advanced settings you can specify to which Connection Broker (CB) this VDI Agent will report.
Tip: if you're planning to use Template to deploy RDSH for auto-scaling feature, we recommend specifying the Primary CB as preferred.
3. Next window will check connectivity and access to hypervisor.
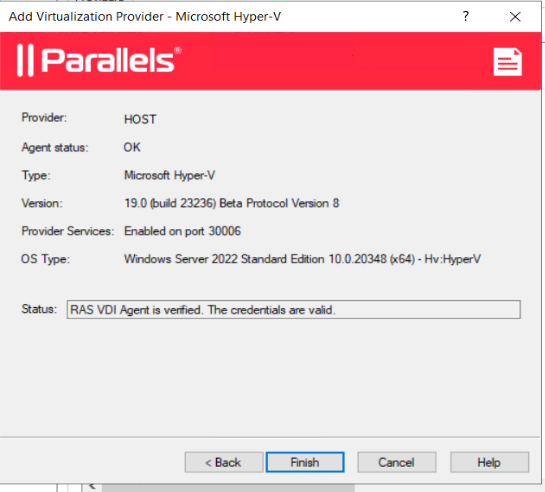
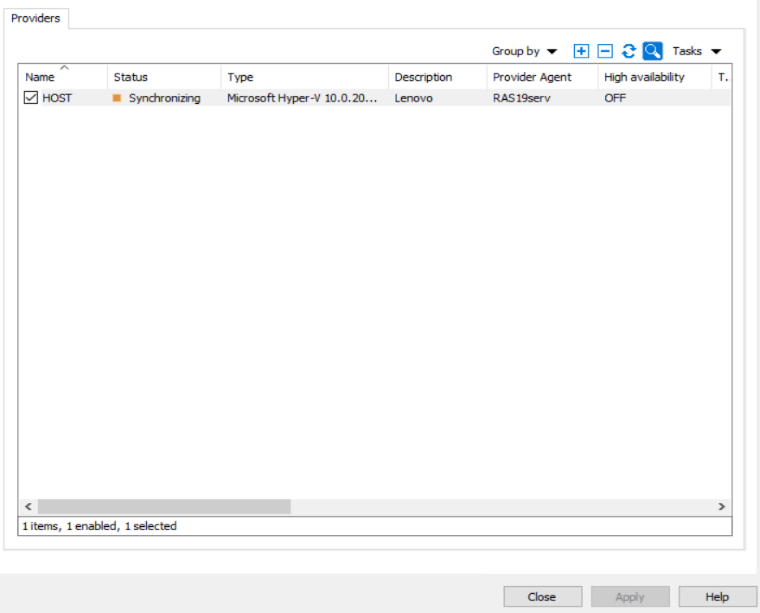
4. Once the Wizard is finished, need to Apply settings and wait for synchronization. VDI agent is now requesting a list of available VMs and their info. Depends on the environment, it could take a while.
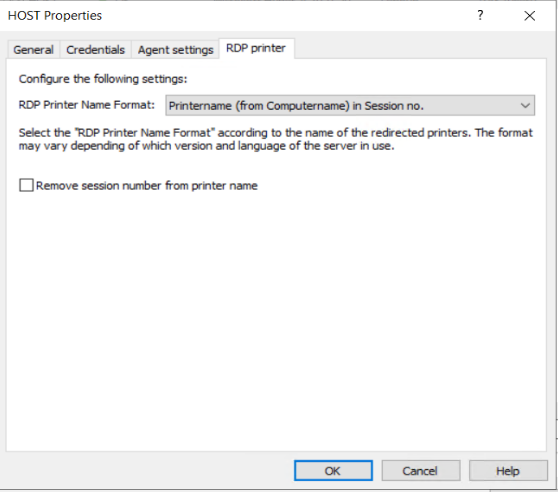
4. You can check the Properties of VDI Provider and adjust if needed:
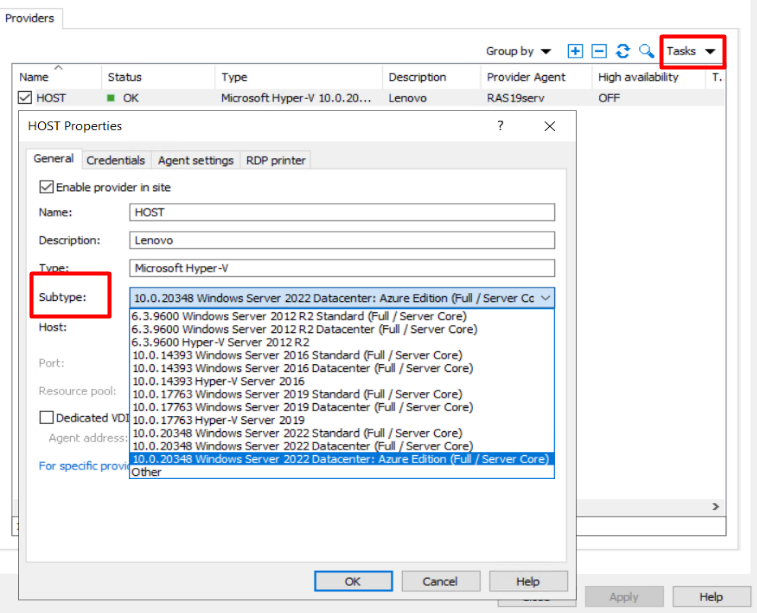
Tip: we recommend adjusting the hypervisor subtype according to your environment.
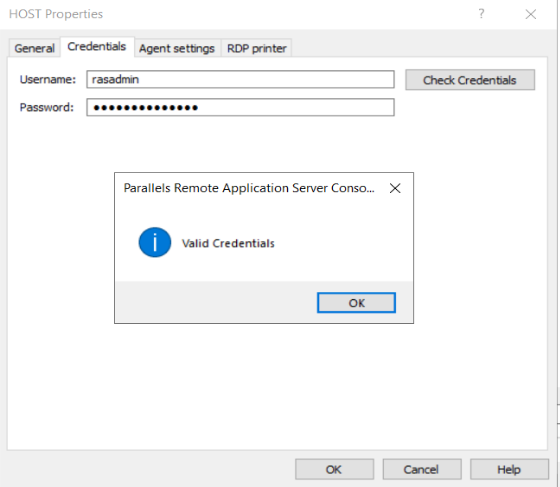
Check credentials will validate VDI Agent authentication on hypervisor.
5. Once the VDI agent is in OK state, you can continue VDI deploying.
Managing Guest VM Pools
Pools are used to manage and publish from the Guest VMs. In order to publish a resource (even from 1 Guest) need to create a pool for this.
Creating a New Pool
1. To create a new pool select go to VDI>Plus icon or Tasks>Add or right-click on a field:
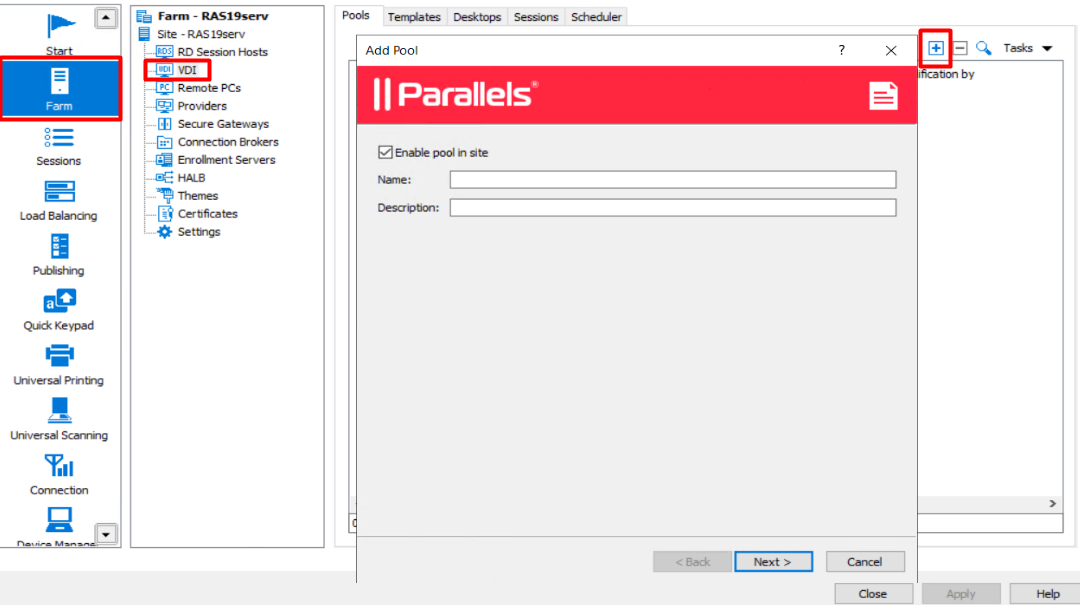
2. Specify the source of VMs for this pool.
Resource Pool: RAS also supports native pools of certain virtualization solutions. Therefore, if should you have a pool already set up on one of your VDI hosts, you can add that native pool to a Parallels pool.
Template: VMs which are made from the particular Template will be automatically added to this pool. Note: the Template shouldn't be configured for RDSH approach.
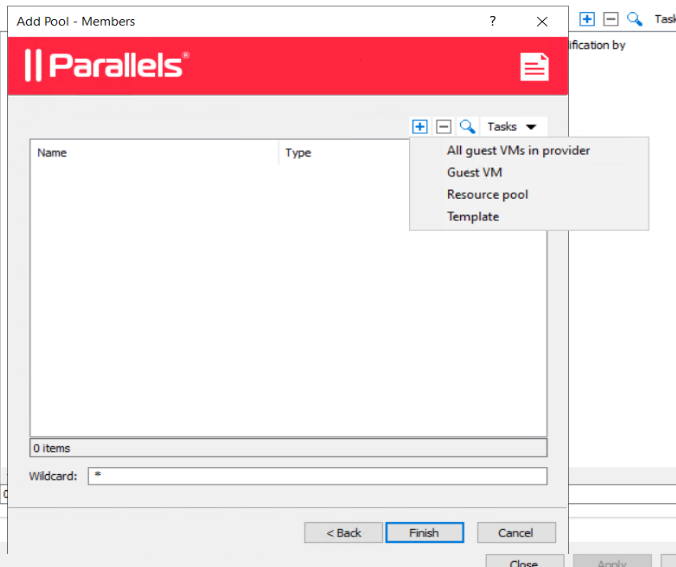
3. In this article, Guest VM was chosen. Status shows if VDI Guest Agent is reporting to VDI agent.

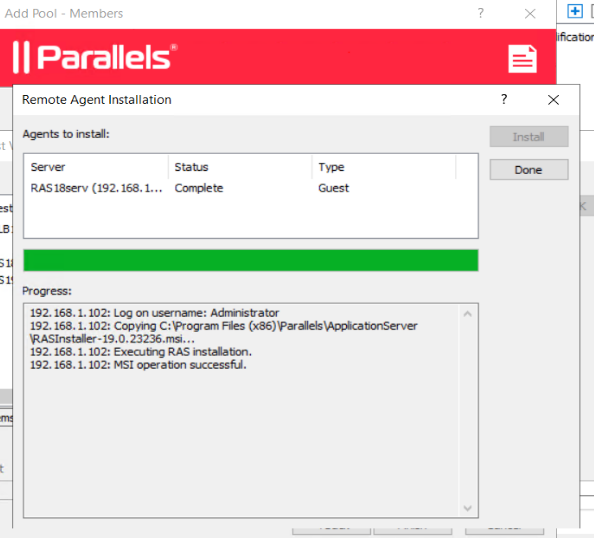
In case of adding a VM which has never been added to VDI, need to install RAS VDI Guest Agent on it.
4. Installing the RAS VDI Guest Agent. RAS VDI Guest Agent is responsible for communication between Guest VM and RAS. Guest Agent is supported on the following OS:
- Windows Server 2008 R2, 2012, 2012 R2, 2016, 2019, 2022;
- Windows 7 up to Windows 11.
For communication between VDI Guest Agent and Remote Application Server farm, the following ports should be open:
- TCP&UDP: 30006 destination RAS VDI Agent
Note: in case of Guest VM is situated on a different from RAS VDI Agent (RAS Connection Broker server) subnet, use the following KB to apply the setting KB Parallels: Virtual guests and VDI agent located in different subnets
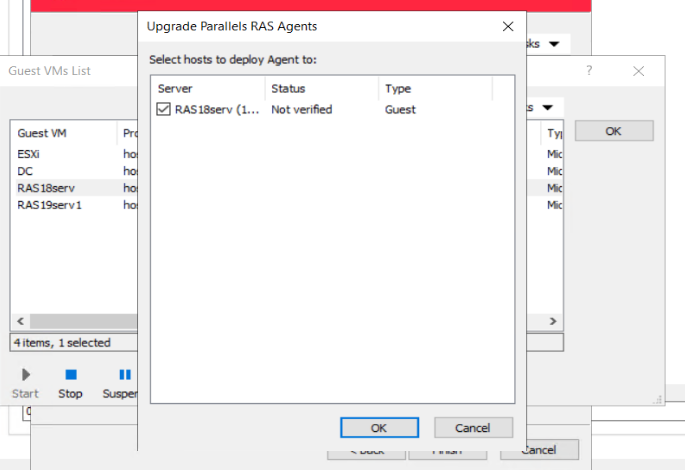
Adding Agent
Requirement for VDI Guest Agent push installation:
- The firewall must be configured on the server to allow push installation. Standard SMB ports (139 and 445) need to be open. See also Port reference for the list of ports used by Parallels RAS.
- SMB access. The administrative share (\\server\c$) must be accessible. Simple file sharing must be enabled.
- Your Parallels RAS administrator account must have permissions to perform a remote installation on the server. If it doesn't, you'll be asked to enter credentials of an account that does.
- The VM should be joined to an AD domain.
- The RAS Installer also verifies the OS state If the target machine is in Reboot pending or Waiting for updates states, the installation could be failed.
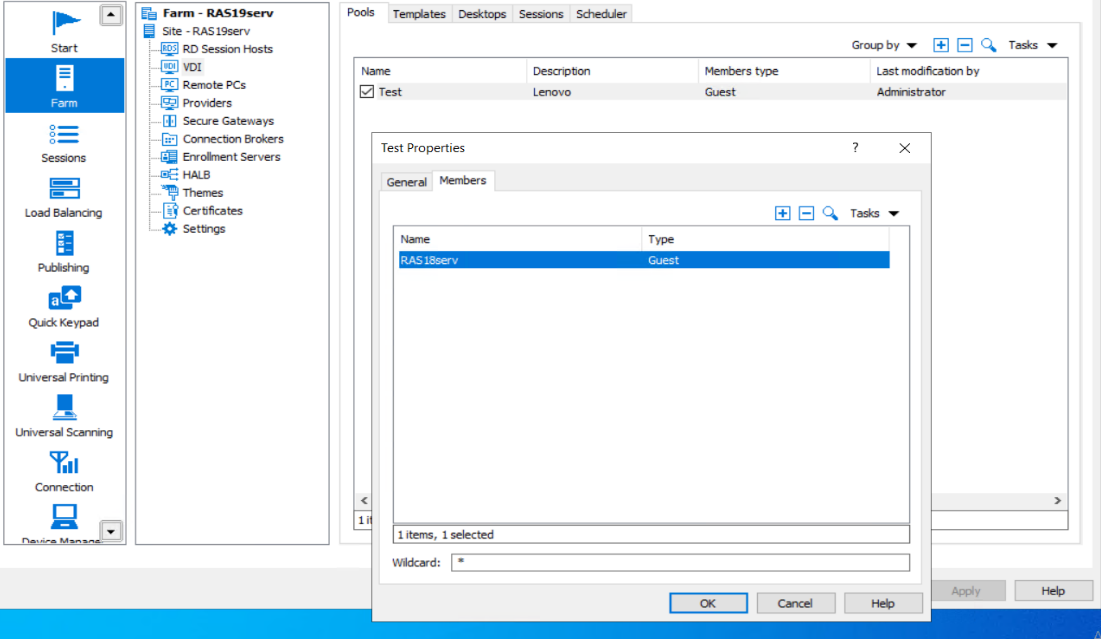
5. Added to a Pool Guests are specified in a list.
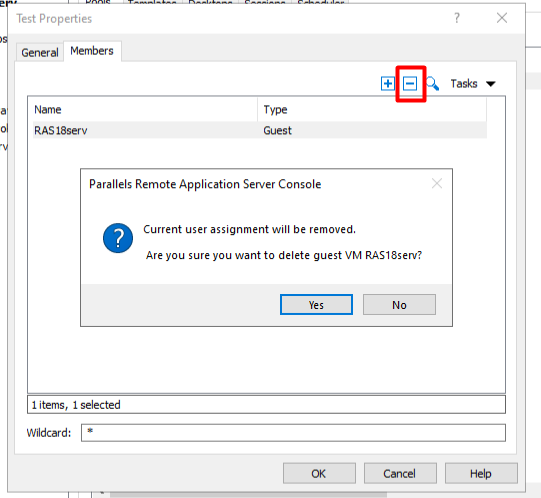
You can also delete the VM from the Pool using Minus icon or right-click>Delete on VM.
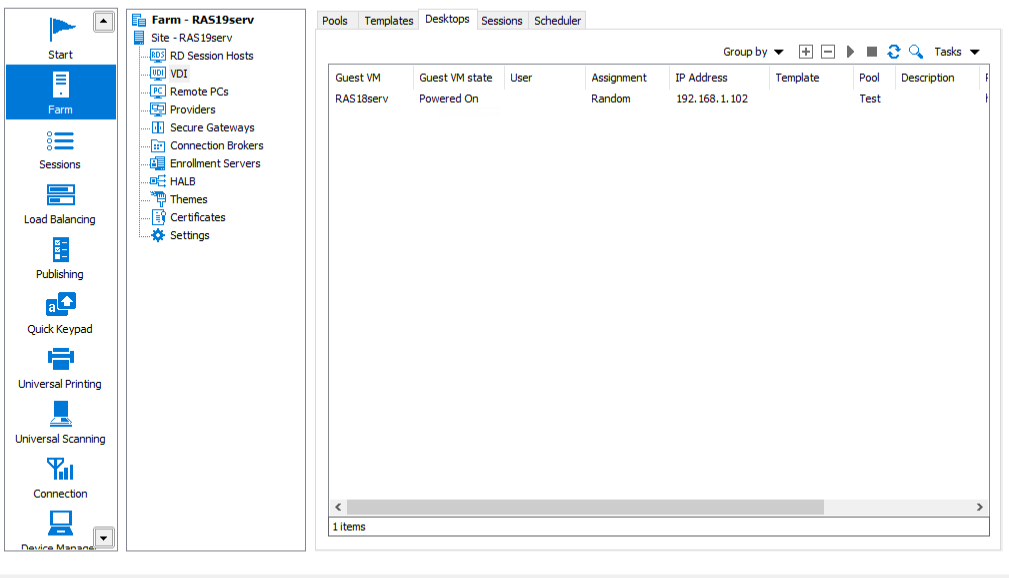
6. Once the machine is added to Pool, you can observe it on Desktops tab.
Note: freshly added machine is in Random assignment. It means any user which was able to open a published from this Pool resource, randomly followed to such machines.
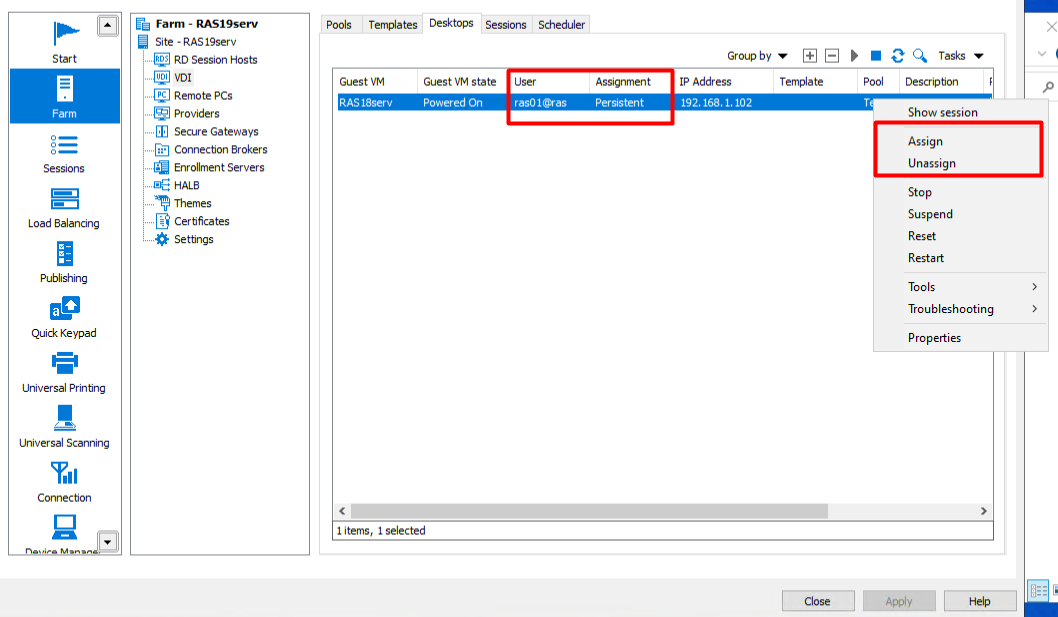
After the user is followed to any machine in the pool, the VM becomes Persistent for this particular user. Now, all published from this Pool resource will be opened on this machine. Right-click on Guest will allow you to manage Assignment.
Tip: you can assign a Guest to any user prior to establishing a session.
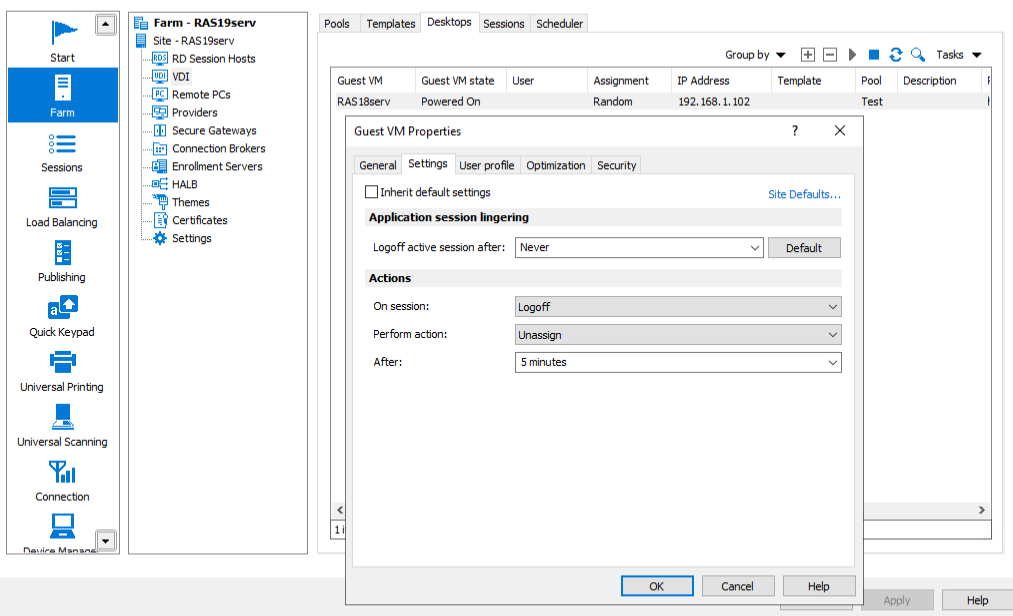
Under Guest VM>Properties>Settings you can also specify the different scenarios in order to user Guests efficiently.
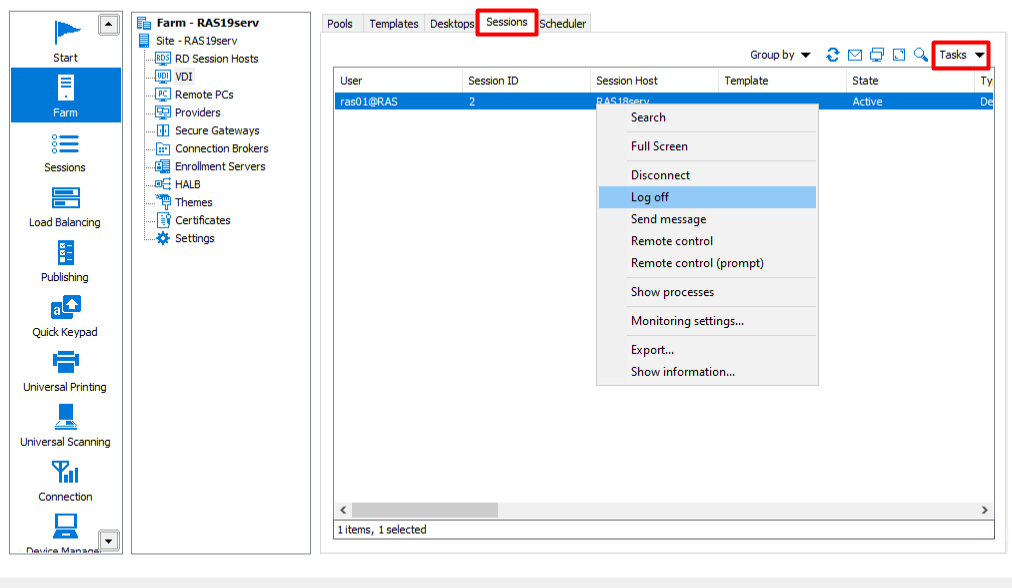
Sometimes, a newly added machine already has a User and Random assignment. This could cause an unexpected behavior. The cause could be a bypass RDP-session to this Guest.
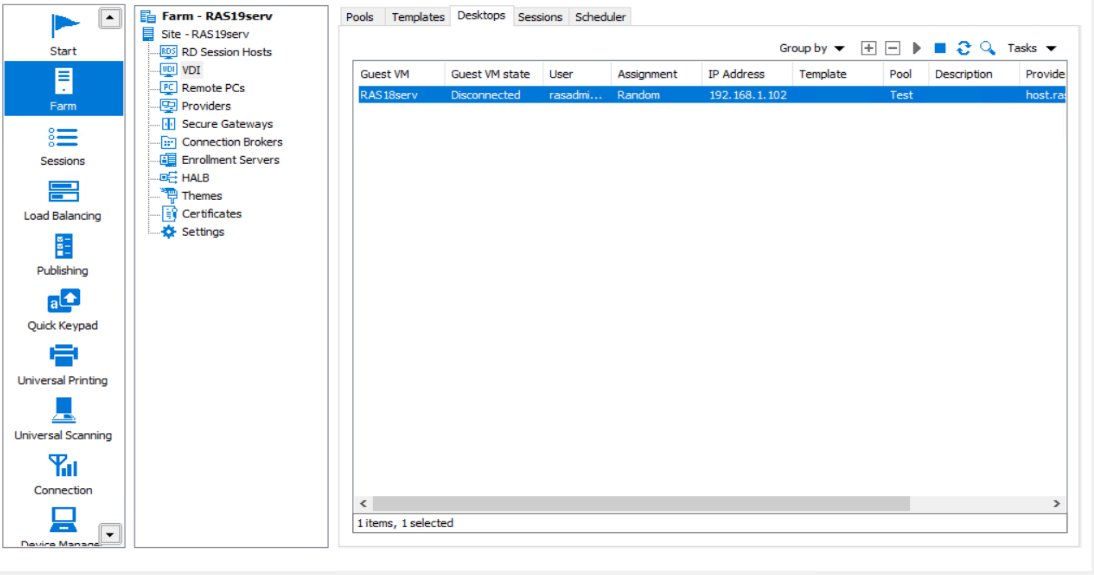
Prior to Unassign the user, log off the session on Sessions tab.
7. Now, you have a Pool a Guest VM in it, so it's possible to publish a resource using VDI.
Publishing Resources from VDI Pool
By following the procedure below, you will be able to publish the Desktop from the VDI pool:
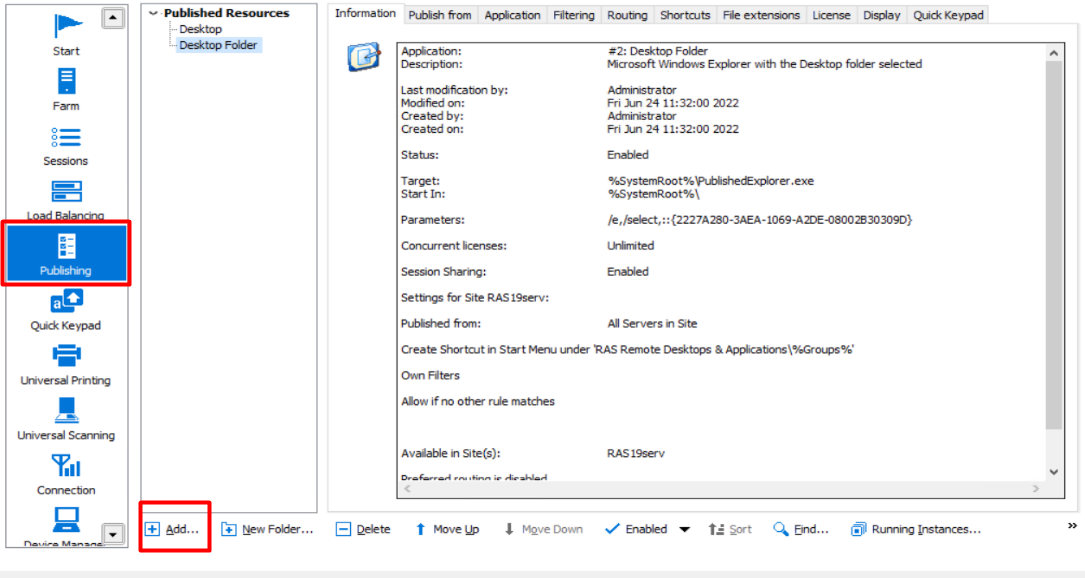
1. Click Add from the Publishing category to launch the publishing wizard.
2. Choose an item to publish.

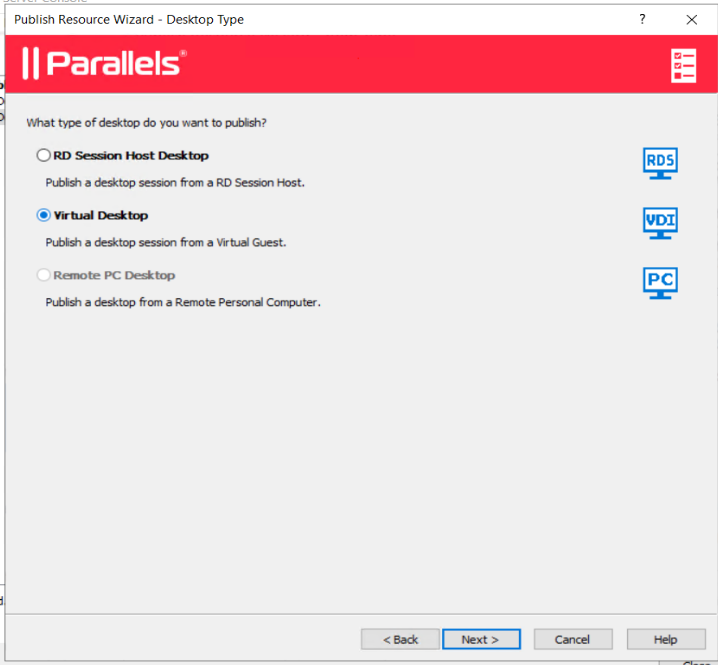
3. In the second step of the wizard select Virtual Desktop.
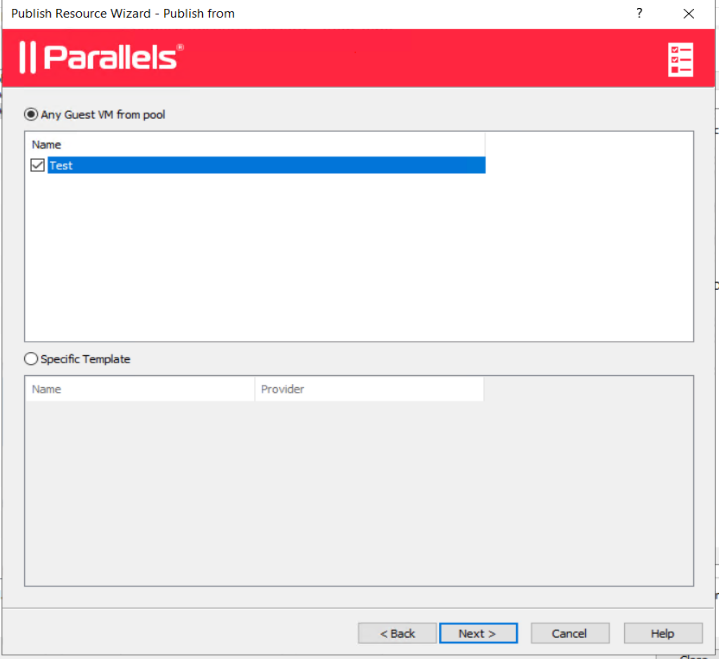
4. In the Publish from check the desired Pool.
5. Specify the published resource configuration.
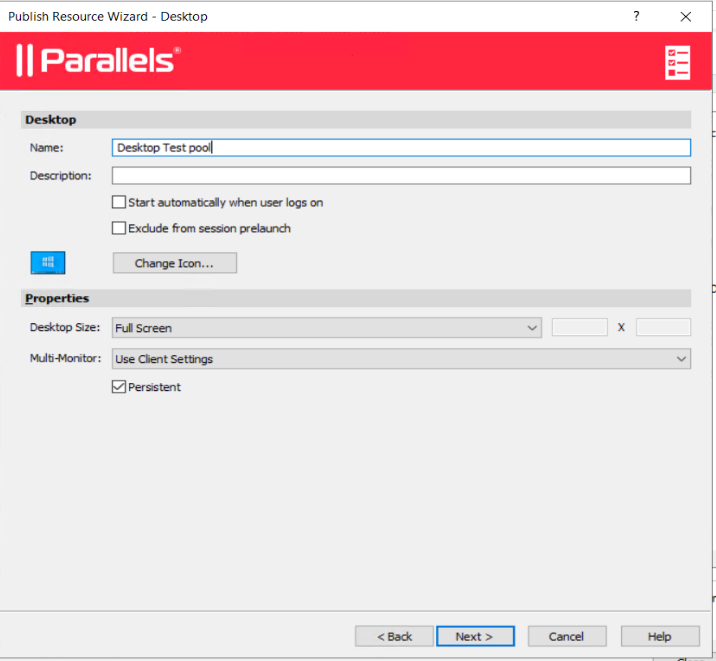
6. Choose the desired state of the published Desktop and click Finish.
Note: The same procedure applies when publishing a different resource.
VDI Templates
In order to get info about the Templates and how to publish resources from the Template, use the following KB Deploying Remote Application Server Templates
Was this article helpful?
Tell us how we can improve it.