Note: snapshots are not currently supported for macOS virtual machines running on Apple silicon Mac computers.
What is a snapshot?
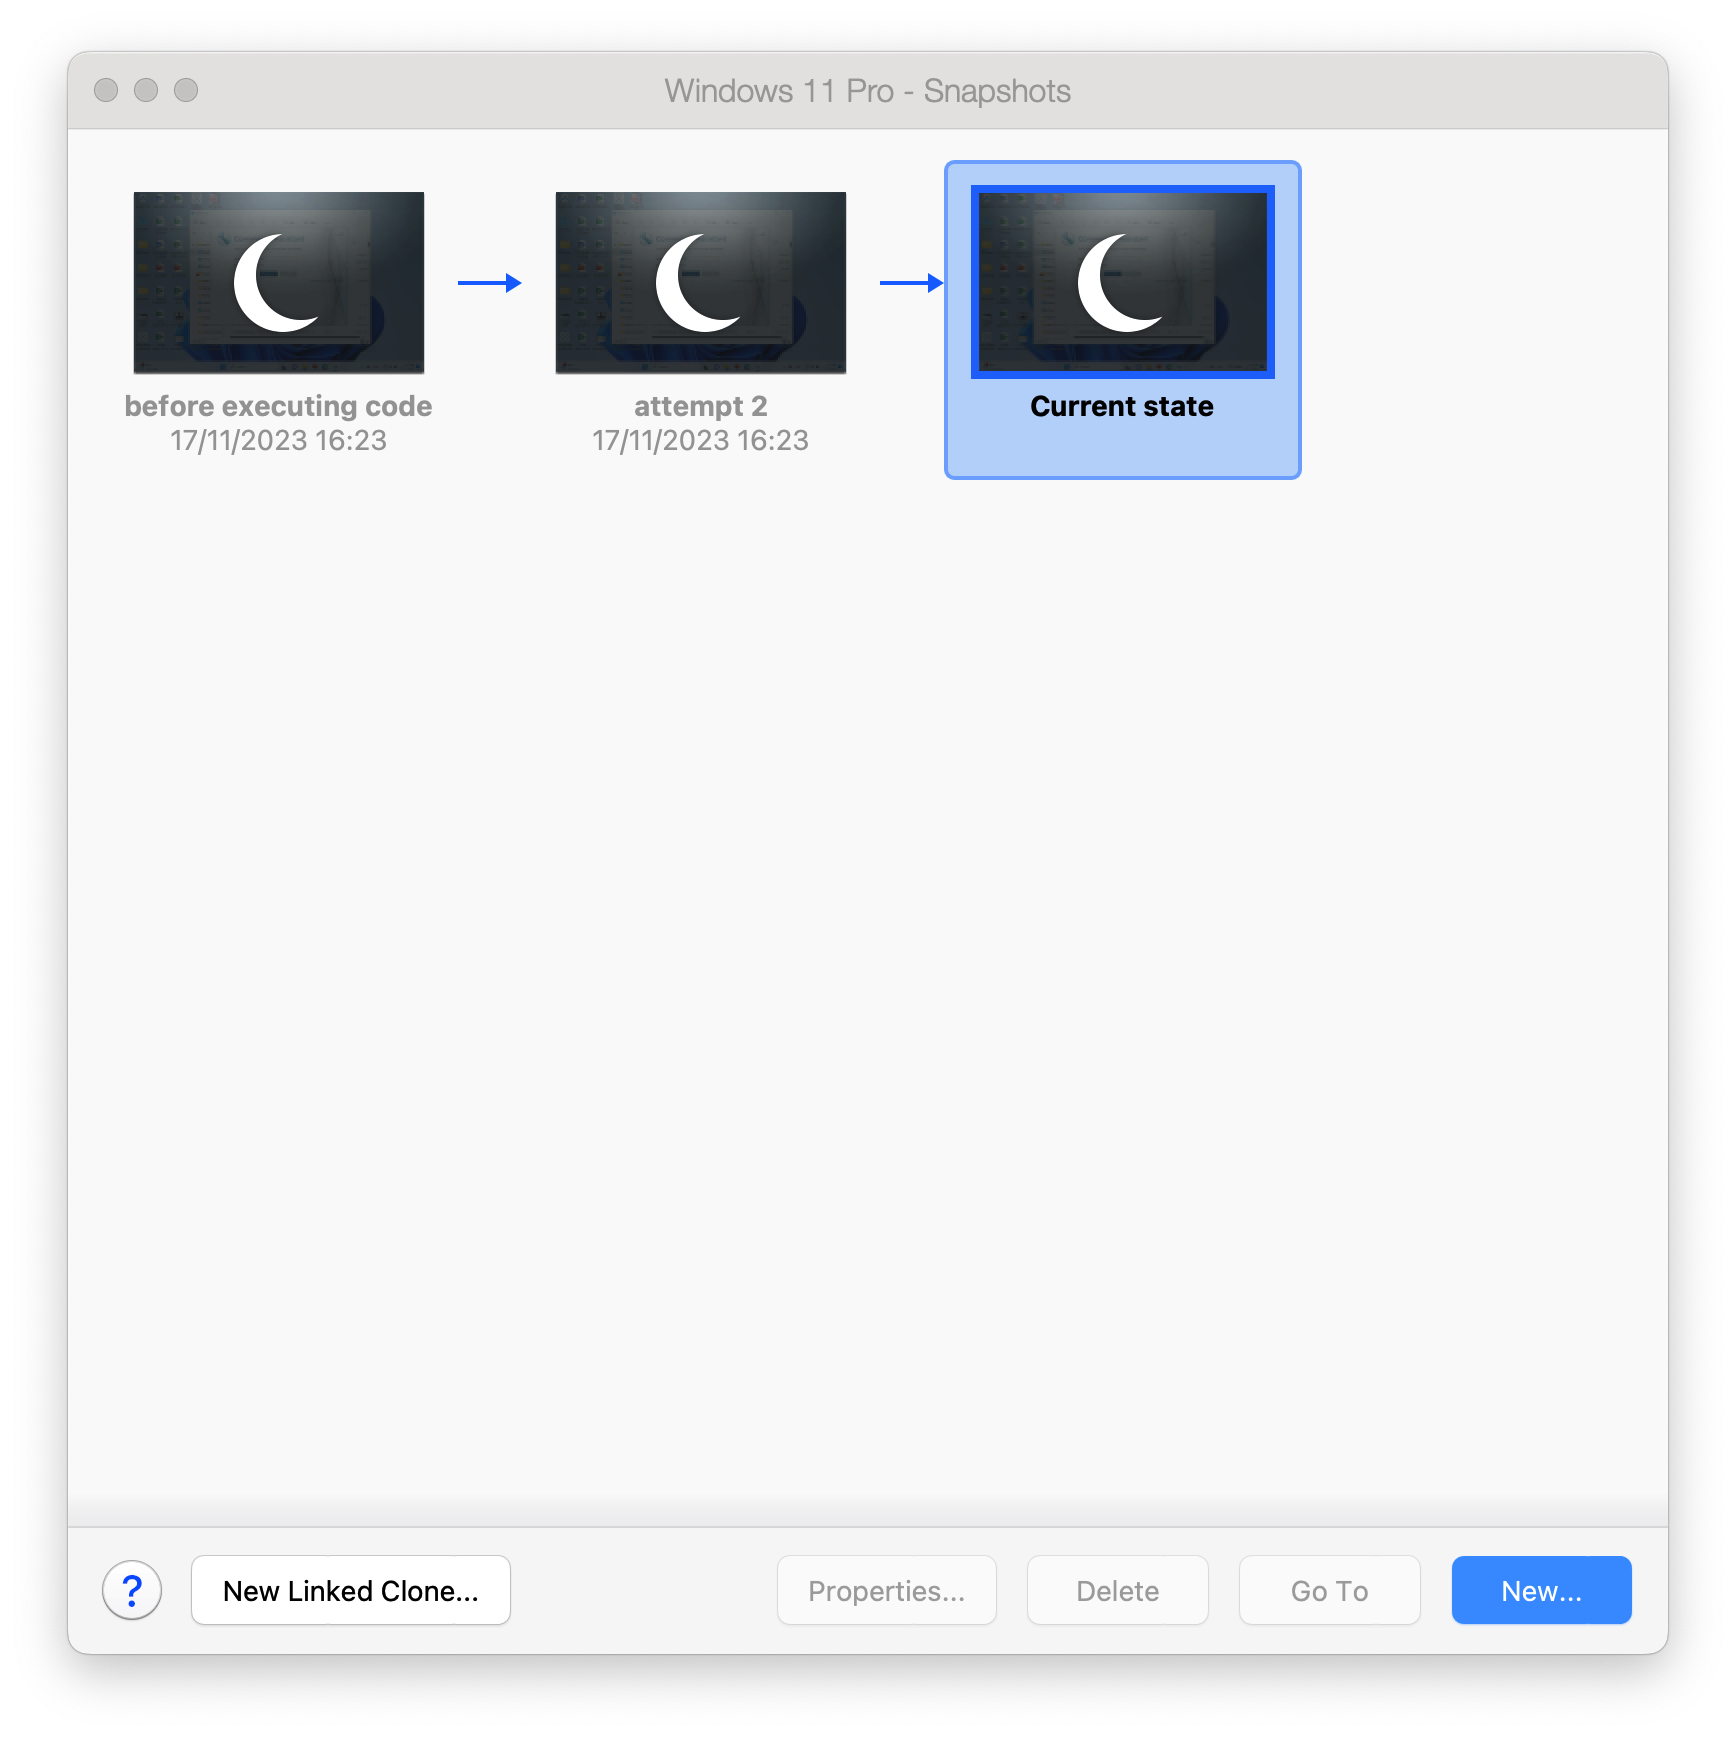
A snapshot is a saved state of a virtual machine (VM). Snapshots can be created manually or automatically.
After you make the snapshot, you can continue working with the virtual machine and revert to the created snapshot at any time of your work.
Warning: You can create the snapshot at any time. But it is recommended to complete all operations of installing, downloading, or writing to external devices before taking the snapshot. You should also complete or cancel any transactions performed in the virtual machine in external databases.
You may want to take snapshots in the following cases:
-
You are going to run some programs that may damage your VM;
-
You are going to configure some software running inside a VM that requires a lot of settings;
-
You want to mark milestones in the development process.
Working with Snapshots
Take a Snapshot
- Start Parallels Desktop and the virtual machine in which you want to create the snapshot.
-
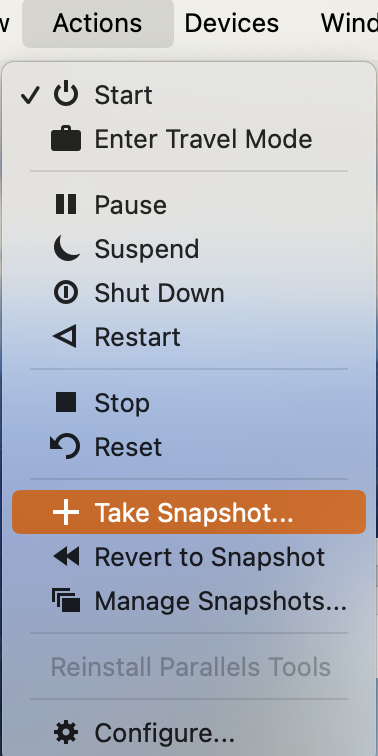
On Mac menu bar, click Actions > Take snapshot.
-
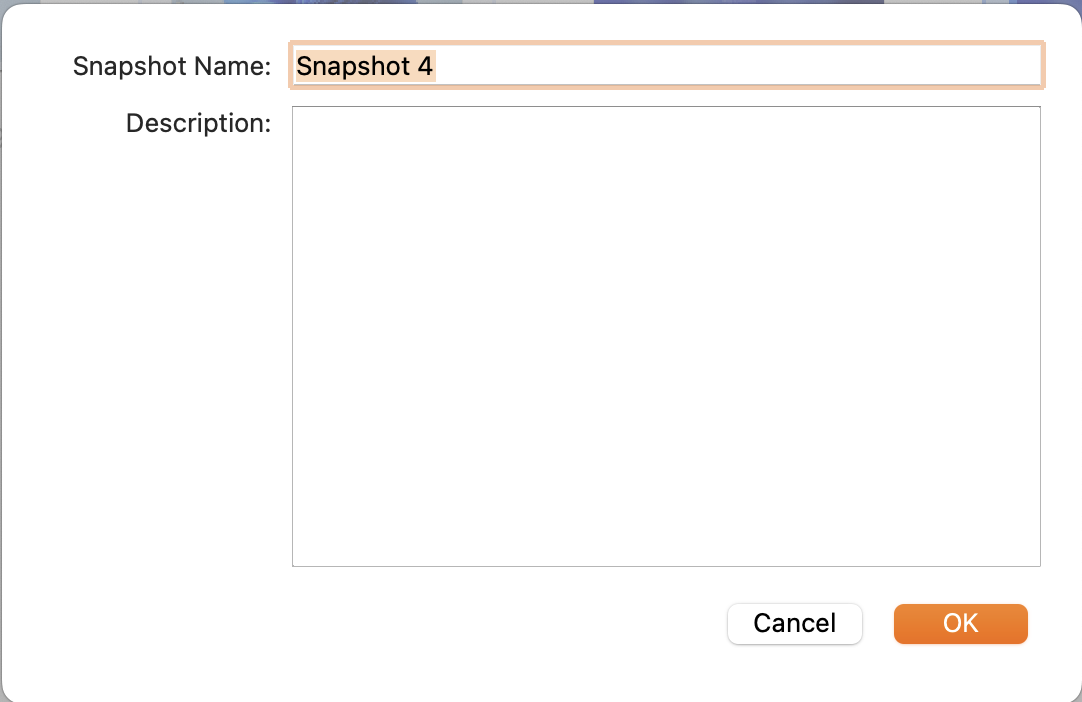
In the appeared window, specify the name of the snapshot and click OK.
Revert to a Snapshot
-
Start Parallels Desktop and the virtual machine in which you want to revert to the snapshot.
-
On the Mac menu bar, click Actions > Revert to Snapshot.
-
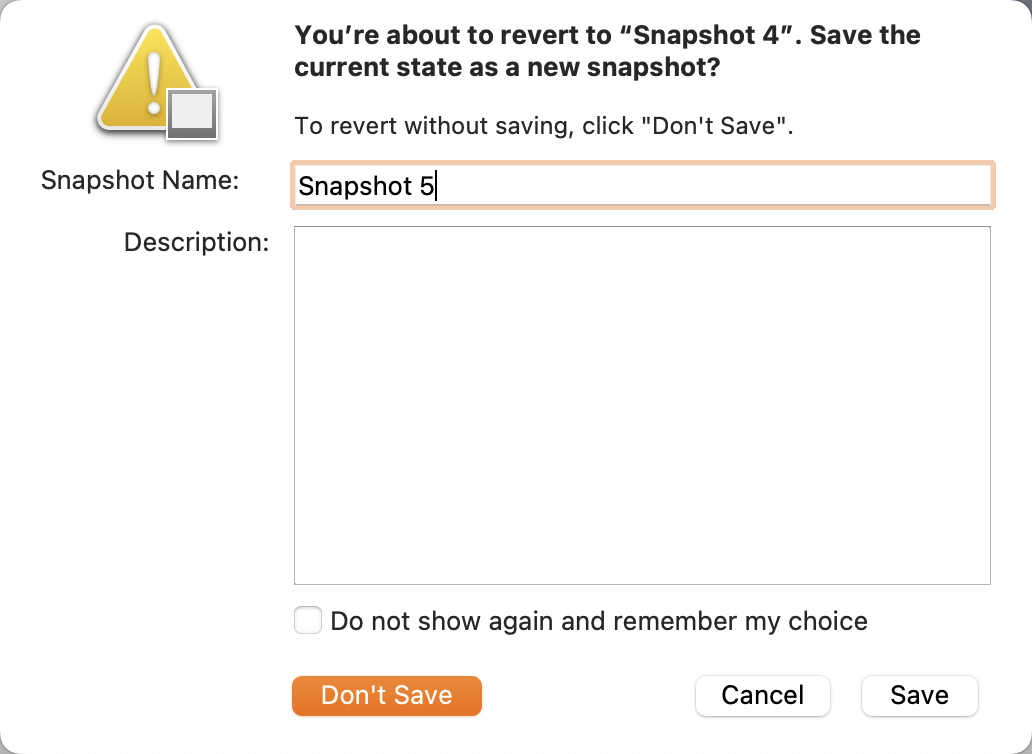
Choose whether you want to take another snapshot to save the current state of the virtual machine, or proceed directly to the previous snapshot without saving.
Note: If you select Save, Parallels Desktop will create an additional snapshot with the state you had before reverting to the previous snapshot. By selecting Don't Save, you will revert back to the previous snapshot without saving the current state.
Delete a Snapshot
1. Start Parallels Desktop and right-click the Parallels Desktop icon in the Dock > select Control Center.
2. In Control Center click the Snapshots icon to open the Snapshot Manager.

3. In the Snapshots Manager menu, select the snapshot you want to delete > click Delete.
4. Finish the removal operation by selecting Yes in the appeared confirmation message.
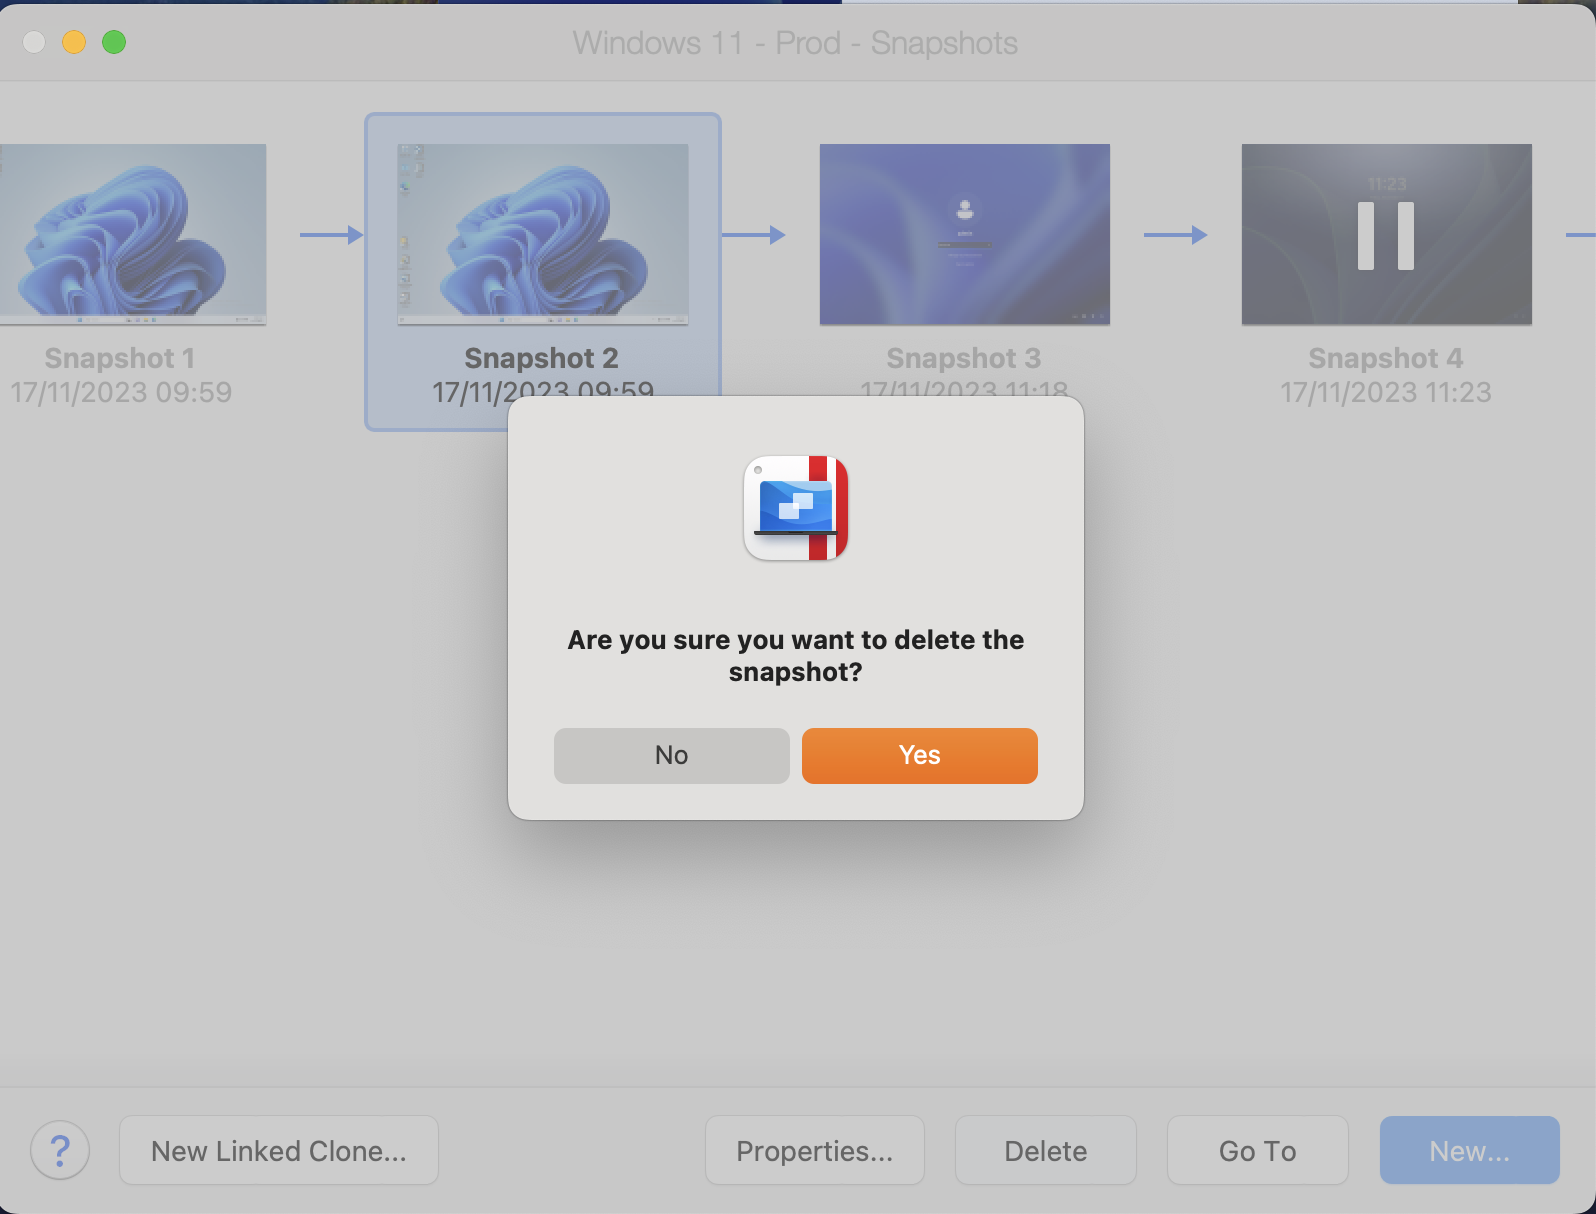
Note: When you delete an intermediate snapshot, the information it contains is merged into the next snapshot.
Limitations of Snapshots
Snapshots are possible when you work with the virtual hard disk, thus it is not possible to take a snapshot when:
-
Windows virtual machine uses the Boot Camp partition.
-
Virtual machine has physical disk added in its configuration (as a primary (bootable) or non-primary disk).
Also, if your virtual machine has one or more snapshots, you can neither compress nor resize the virtual hard disk.
Automate Snapshots Creation
The SmartGuard functionality allows you to automate snapshots' creation.
You can use this option only if you are an advanced user. Alternatively, by doing a manual backup of your virtual machines you can also refresh them once in a while (say when new guest OS updates are applied) much more easily than with a Time Machine solution.
Note: SmartGuard is available only when the Rollback Mode feature is disabled.
To access SmartGuard settings:
- Start Parallels Desktop and the virtual machine in which you want to enable SmartGuard feature.
-
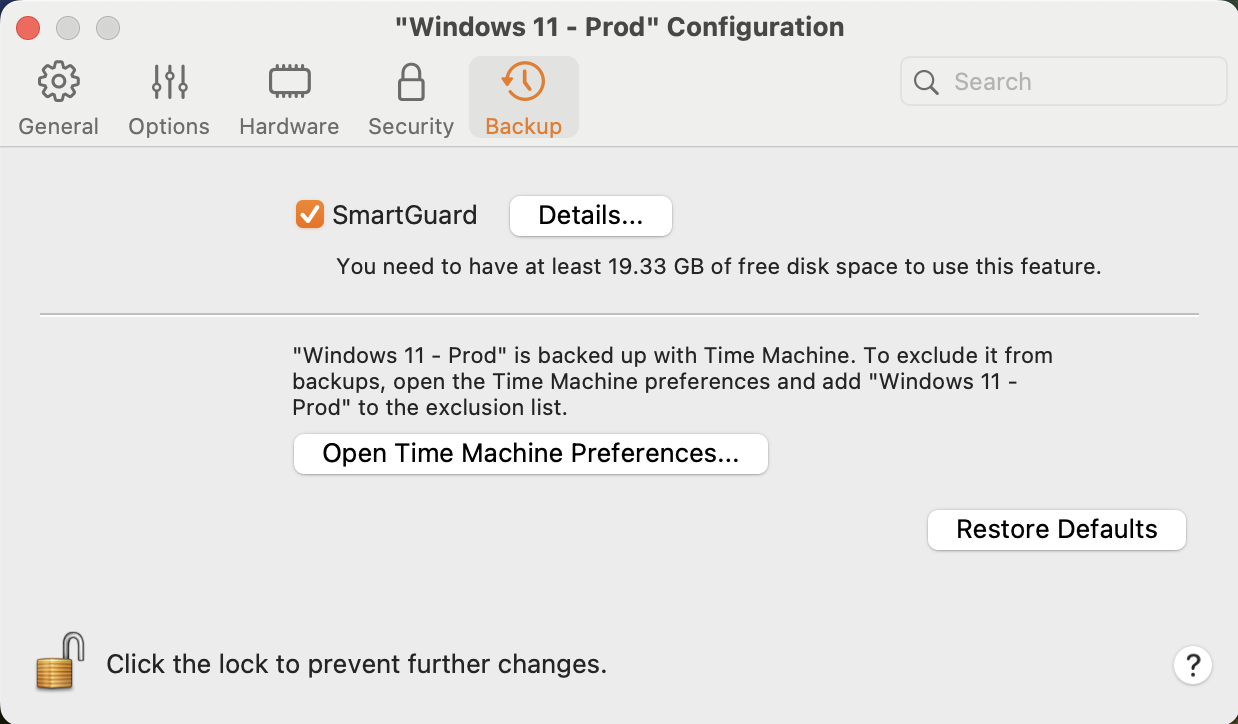
Open the virtual machine configuration > go to the Backup tab > enable SmartGuard option.
-
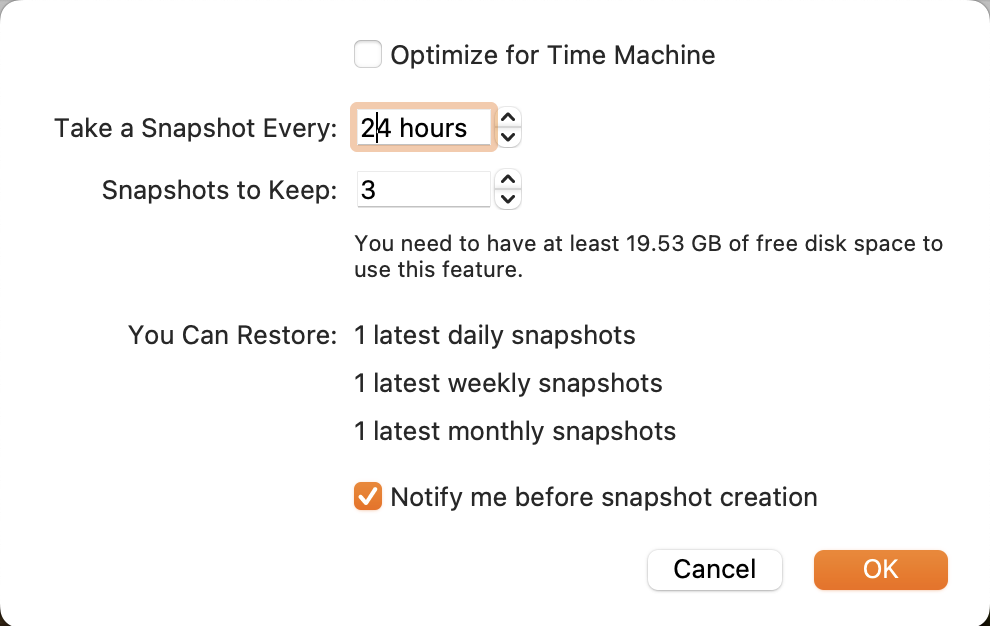
To automate snapshots, click the SmartGuard menu and choose one of the following:
-
Optimize for Time Machine.
If you use Time Machine, we recommend having SmartGuard enabled along with this option. If you select it, a snapshot will be taken every 24 hours. Time Machine, when backing up your Mac, will not back up the entire virtual machine, but only its latest snapshot. This allows you to reduce the amount of data that Time Machine backs up, to reduce the time Time Machine spends backing up the virtual hard disk(s), and to minimize the risk of data loss or corruption when restoring the virtual machine hard disk(s) from the Time Machine backup.
If you want to know when it is time to make the next snapshot and to be able to reject the snapshot creation, enable the Notify me before the snapshot creation option.Note: If you use Time Machine to back up your Mac, you can configure the virtual machine to make Time Machine back up only the changes made since the latest snapshot but not the whole virtual hard disk. To do it, select Optimize for Time Machine and click OK.
- Set how often snapshots are made
Use the Take a Snapshot Every field.
You can customize and set the amount up to 48 hours.
If the time interval is less than 24 hours, SmartGuard will allow you to restore the latest hourly, daily and weekly snapshot. If the time interval is more than 24 hours, you will be able to restore the latest daily, weekly and monthly snapshot.
- Limit how many snapshots are stored
Use the Snapshots to Keep field to set the maximum number of snapshots that can be stored on your Mac.
The maximum available value is 100 snapshots. As soon as Snapshots Manager reaches the limit for snapshots and needs to make a new one over limit, it deletes the oldest snapshot.
Note: Snapshots affect performance quite a bit unless the snapshot and the virtual disk is on a high-performance solid-state drive. It is worth considering if you need regular backups of ongoing work on the virtual machine, but since you say you don't care about changes to the virtual machine, then snapshots are best avoided altogether.
As an alternative resource on this topic, we also recommend visiting this blog post: How to Use Parallels Desktop Snapshots.
Was this article helpful?
Tell us how we can improve it.