This article has been created to inform our customers about the current Windows virtual machine creation issue on Parallels Desktop versions 18 and 17 running on Intel Macs.
Information
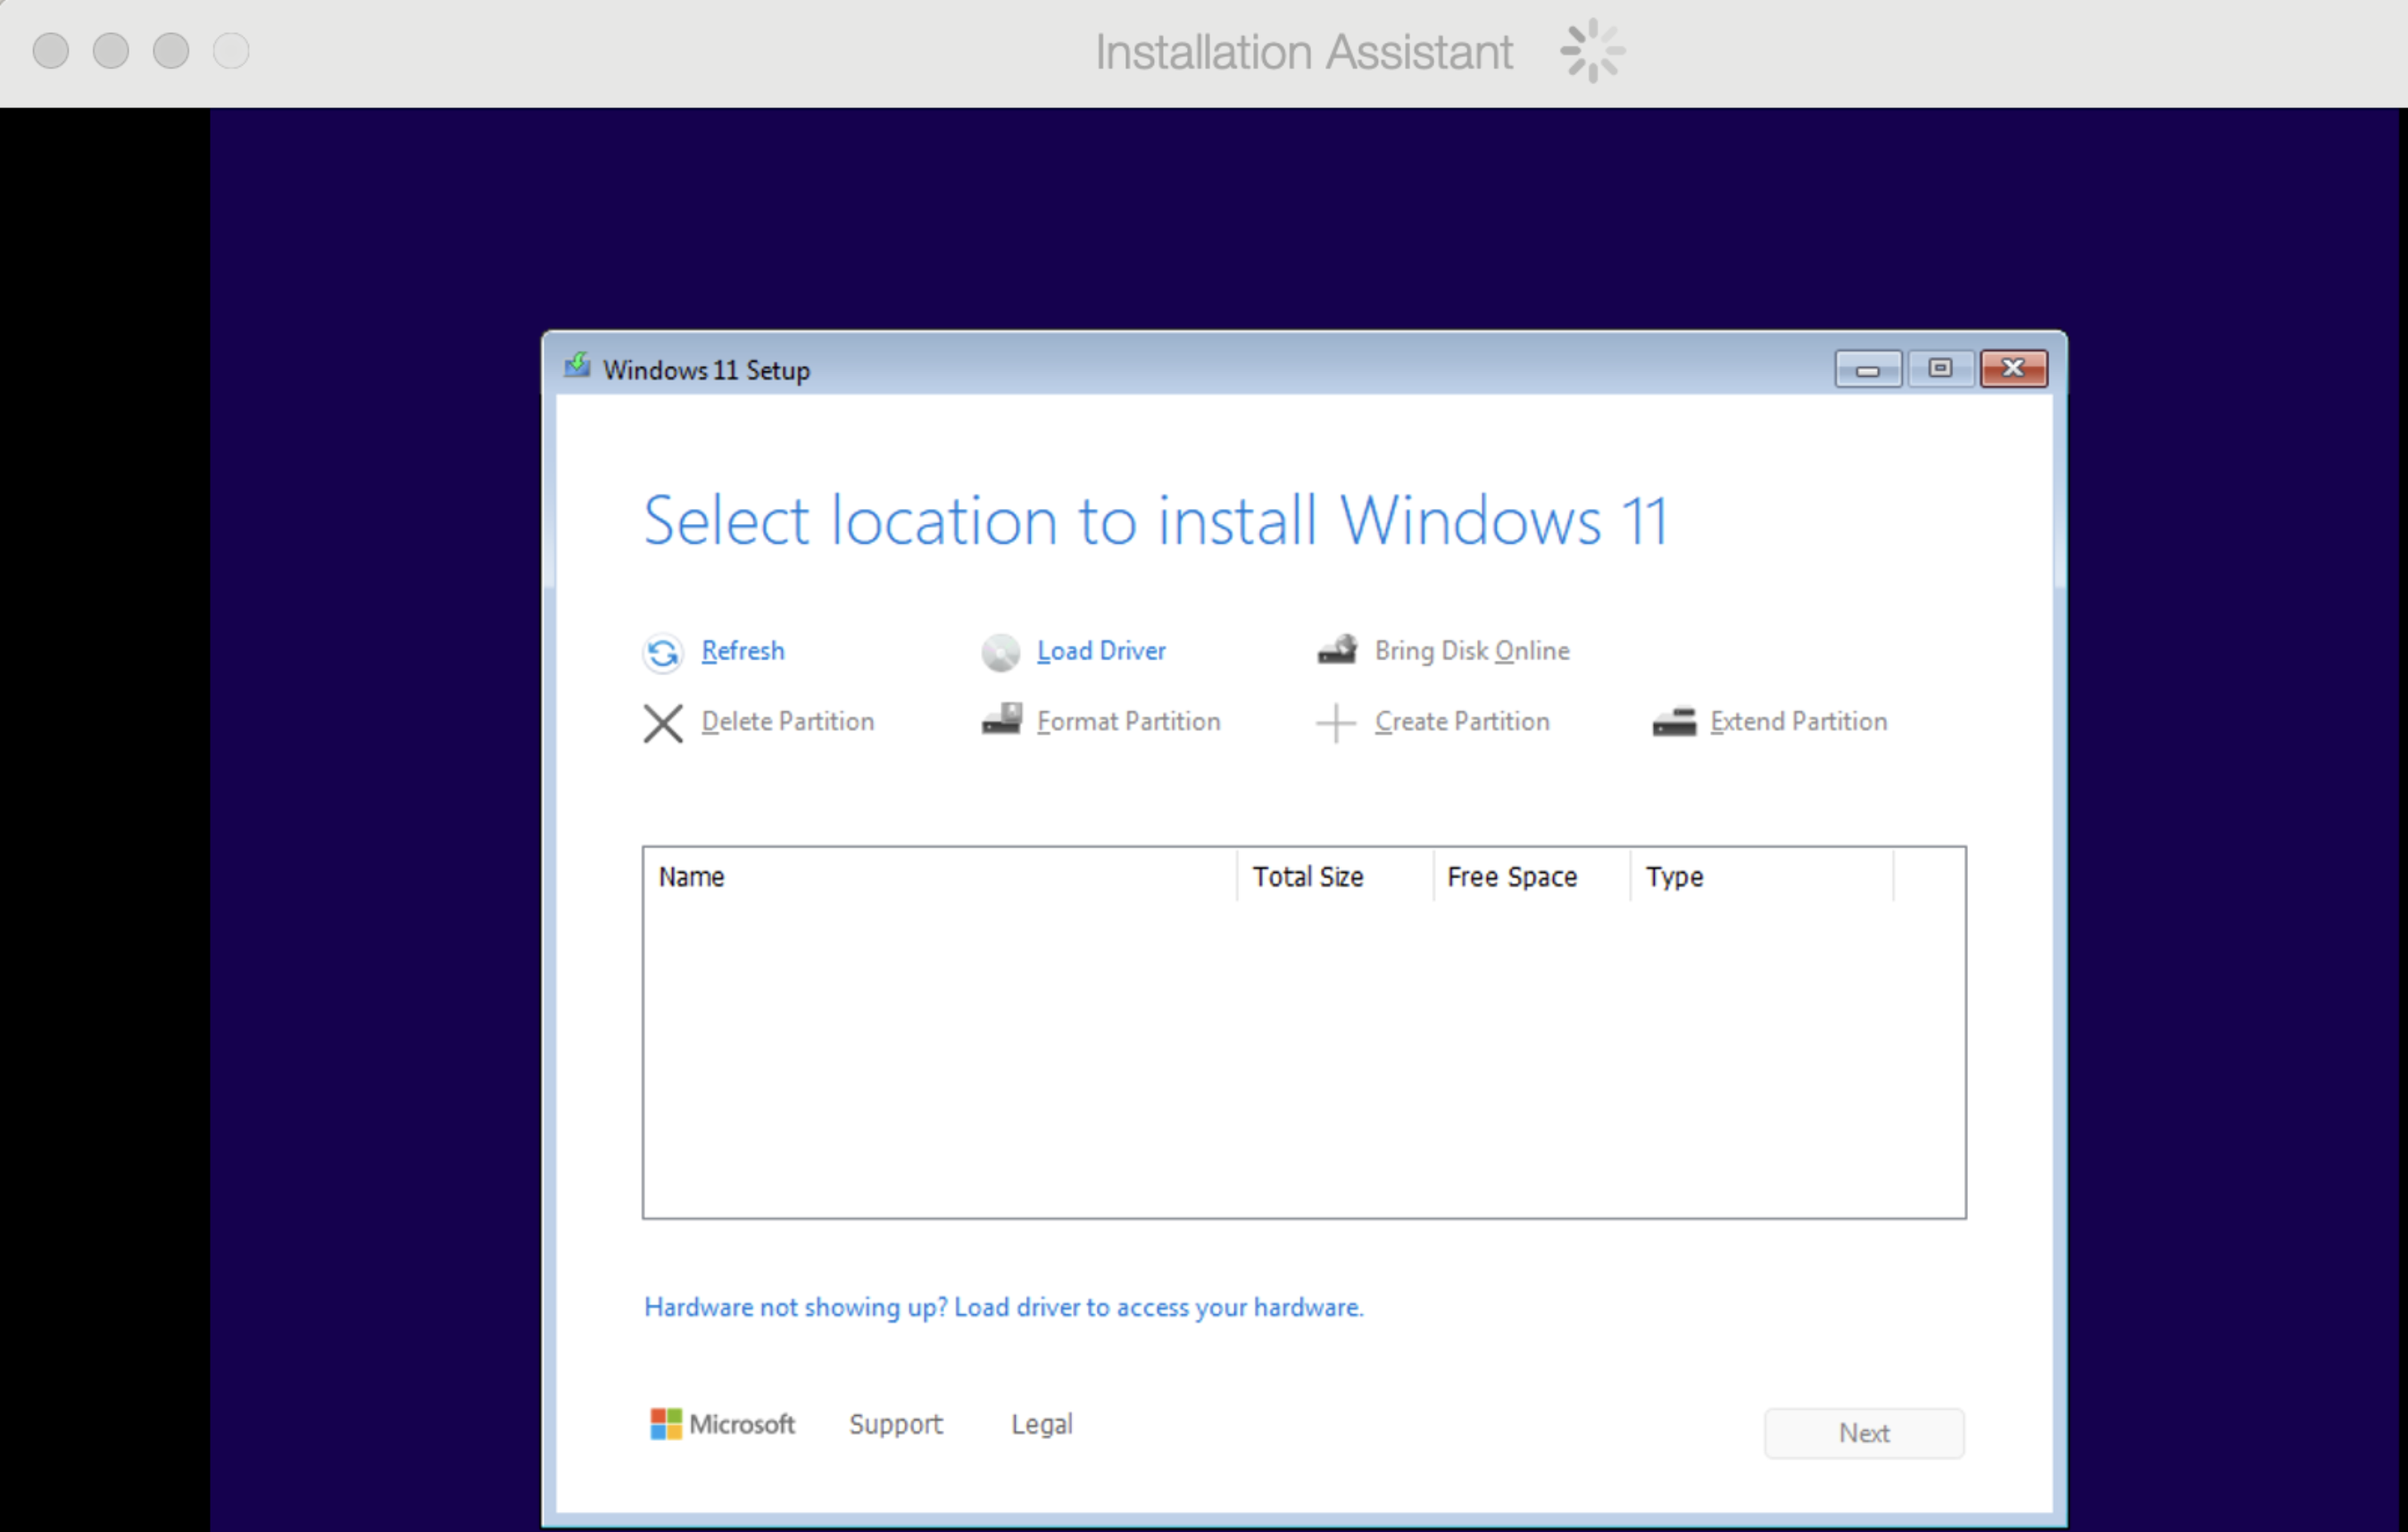
When attempting to create a virtual machine by using Get Windows 11 from Microsoft using the Installation Assistant or manually, the installation gets interrupted at the Windows 11 Setup window as shown below:

The hard disk is not loaded, and we can't complete the installation process.
Current Status
Parallels is aware of this issue and is actively working on a solution. If you want to install Windows 11 24H2, which requires tweaking the virtual machine configuration, proceed to the 24H2 section. To install Windows 11 23H2 without changing the configuration, follow the steps from the section below.
Installing 23H2
-
Download Windows 11 23H2 ISO
- Search for and download the Windows 11 23H2 ISO image file from trusted resources on the internet.
-
Open Parallels Desktop
- Right-click on the Parallels icon in the Dock.
- Select Control Center.
-
Start a New Virtual Machine Installation
- Click the [+] (plus) button in the Parallels Desktop Control Center.
-
Select Installation Method
- Choose Install Windows or another OS from a DVD or image.
- Click Continue.
-
Navigate to the Windows 11 ISO
- If the Windows 11 23H2 ISO image is not automatically recognized, manually navigate to the downloaded ISO file.
-
Follow Installation Assistant Instructions
- Proceed with the Installation Assistant’s instructions to complete the setup.
Installing 24H2
- Open Parallels Desktop
- Right-click on the Parallels icon in the Dock.
- Select Control Center.
-
Start a New Virtual Machine Installation
- Click the [+] (plus) button in the Parallels Desktop Control Center.
-
Select Installation Method
- Choose Install Windows or another OS from a DVD or image.
- Click Continue.
4. Navigate to the Windows 11 24H2 ISO
- If the Windows 11 24H2 ISO image is not automatically recognized, manually navigate to the downloaded ISO file and click Continue
5. Windows License Key
- If you don't have a Windows license key, you can untick the box with the license key request and click Continue
- Select your Windows edition to install from the list, and click Done then Continue.
6. Name and Location
- In the Name and Location page, make sure to tick Customize settings before installation first then click on Create button.
7. Windows 11 Configuration
- Select the Hardware tab, choose Hard Disk and click on Advanced..
- Set the Location to SATA 0:3 and press OK
- Close the Configuration Window and click Continue in order for the Windows 11 installation to start.
Additional Information
For further assistance, please contact Parallels Support via our support page.
Click on the Get updates button to get notified of upcoming updates regarding the outlined issue.
We appreciate your patience as we work to resolve this issue. Thank you for choosing Parallels Desktop.
Was this article helpful?
Tell us how we can improve it.