Parallels is fully supported as a virtualization driver for Minikube on Intel-based Mac computers. However, it is important to note that using Parallels as a virtualization driver with the ARM64 architecture is not currently supported.
A list of supported drivers and their respective operating systems may be found here.
As a workaround for Silicon Macs, we recommend the use of docker as a virtualization driver.
Install Minikube on Intel-based Mac computers
NOTE: Note that setting up Minikube using Parallels as a virtualization driver requires installing Minikube directly on the host Mac. The steps to achieve this are described below.
1. Launch Parallels Desktop.
2. Open your browser and visit the Minikube Installation page.
3. Select the appropriate Operating system (MacOS), Architecture (x86-64), and your preferred Installer Type. ( It is advised to install the latest Minikube stable release ).
4. Upon downloading the Minikube setup file, perform the installation.
5. Launch Terminal application (Finder > Applications > Utilities > Terminal).
6. Execute the following commands to set Parallels as your default driver and start a Minikube cluster using the Parallels driver.
minikube config set driver parallels
minikube start --driver=parallels

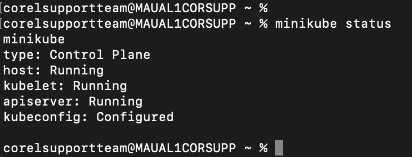
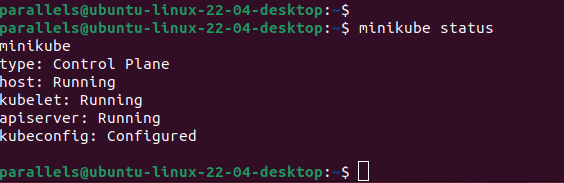
At this point, a fully functional Minikube cluster has been set up.
Install Minikube on Mac computers with Apple silicon
NOTE: Note that Minikube can be set up on a Linux virtual machine using Docker as a virtualization driver. The steps to do so are described below.
Alternatively, it can also be set up directly on the host Mac. In this case, you should start performing the steps from Step 3.
1. Launch Parallels Desktop.
2. Start your Linux virtual machine.
3. Open your browser and visit the Minikube Installation page.
4. Select the appropriate Operating system, Architecture (ARM64), and your preferred Installer Type. (It is advised to install the latest Minikube stable release).
5. Upon downloading the Minikube setup file, perform the installation.
6. To use Docker as the virtualization driver, you need to install Docker Engine. Visit the Docker Installation page.
7. Select the appropriate platform and the "arm64/aarch64" option.
8. Follow the installation steps detailed on the page.
9. Launch either your terminal or command line as the case may be.
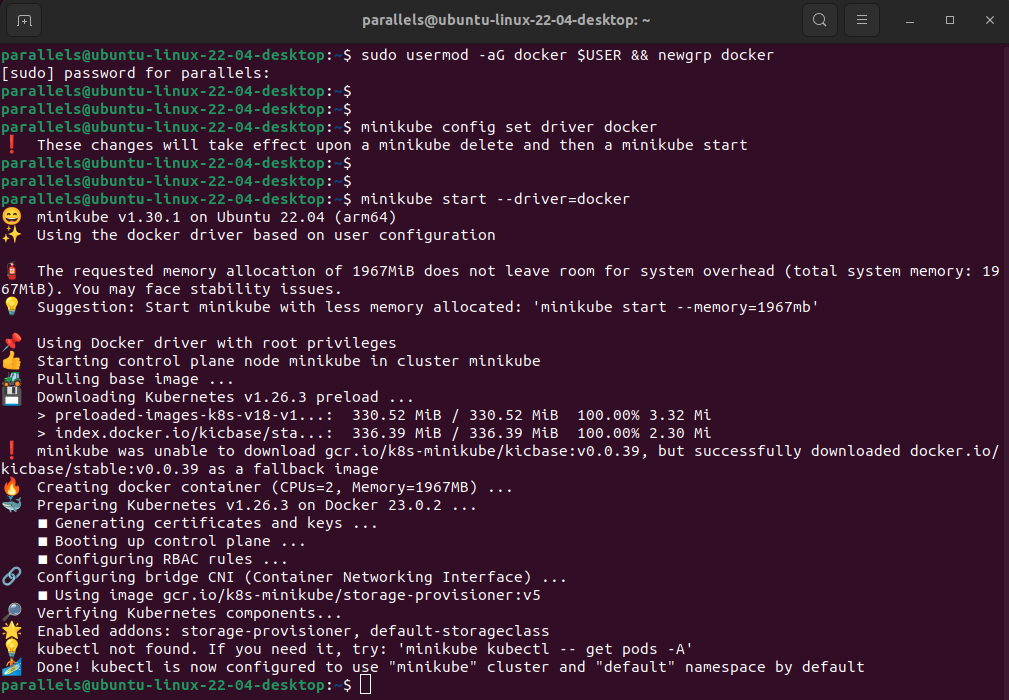
NOTE: For Linux users, Execute the following command in your Terminal to create a Docker group and add your user to the group.
sudo usermod -aG docker $USER && newgrp docker

10. Execute the following commands in the following order to set Parallels as your default driver and start a Minikube cluster using Docker as your virtualization driver.
minikube config set driver docker
minikube start --driver=docker
At this point, a fully functional Minikube cluster has been set up.
Was this article helpful?
Tell us how we can improve it.