This article is a step by step guide to configure SSO Authentication using the Security Assertion Markup Language (SAML) authentication mechanism. SAML is an XML-based authentication mechanism that provides single sign-on (SSO) capability between different organizations by allowing the user authentication without sharing the local identity database.
As an example, we will review the process of configuring Auth0 as Identity Provider.
Prerequisites:
1. Local Active Directory:
- A local AD user account for NLA authentication
- If integrating on-premises AD users, configure the Auth0 AD/LDAP Connector or provisioning to synchronize accounts.
2. Auth0 Tenant:
- Administrative access to an Auth0 tenant.
This is where, a configured Application in Auth0 will act as the Service Provider in RAS and SAML2 Web App Add-on will be Enabled which will allow Auth0 to generate SAML assertions and act as the idP for RAS.
3. Certificates:
- Valid and trusted SSL/TLS certificates installed on the RAS server.
Adding Identity Provider to Parallels RAS
1. Open Parallels RAS Console > Connection > SAML tab > Add.
2. In the opened Add Identity Provider wizard, add a name (e.g. Auth0), choose "Manually enter the IdP information" and click Next.

3. On the next page enter any information to satisfy the requirements to not leave the fields blank, (we will import Auth0 settings using metadata file later) and click Finish.
4. Apply the configuration by clicking the Apply button.
Export SP settings
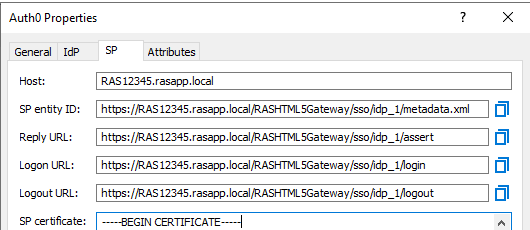
1. Open just created IdP Auth0 properties and switch to SP tab.
2. Specify external FQDN or public IP address in the “Host” field.
3. Copy and save values for “SP entity ID”, e.g. https://RAS12345.rasapp.local/RASHTML5Gateway/sso/idp_1/metadata.xml and “Reply URL”, e.g. https://RAS12345.rasapp.local/RASHTML5Gateway/sso/idp_1/assert
4. Now you are ready to proceed with configuring Auth0.
Auth0 Side Configuration
1. Sign in to Auth0 Dashboard
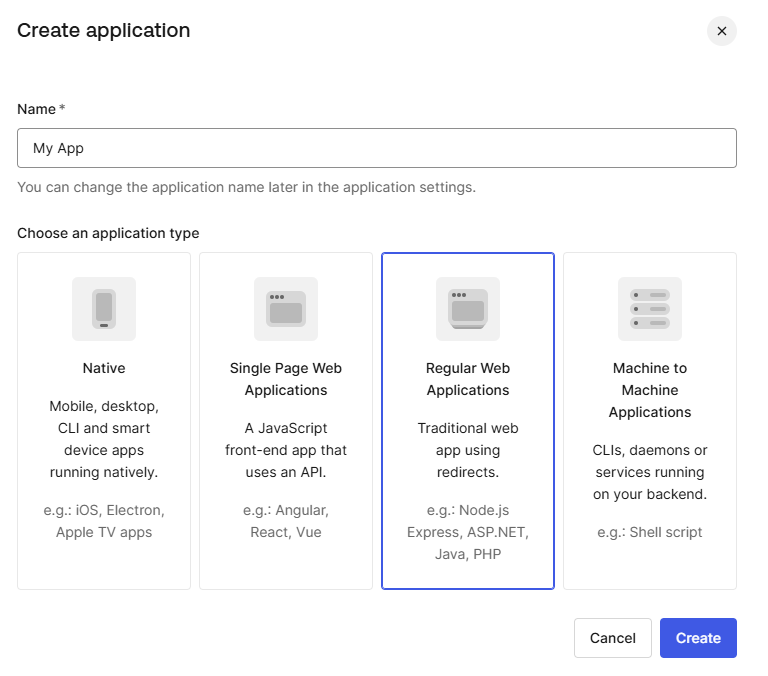
2. Click on Applications > + Create Application

3. Give the application a Name and Choose Regular Web Applications as type
4. Switch to the Settings tab
- Application URIs : Application Logon URI should be the Login URL from SP tab in RAS Console
: Allowed Callback URLs should be the Reply URL from SP tab in RAS Console
: Allowed Logout URLs should be the Logout URL from SP tab in RAS Console
5. Save changes
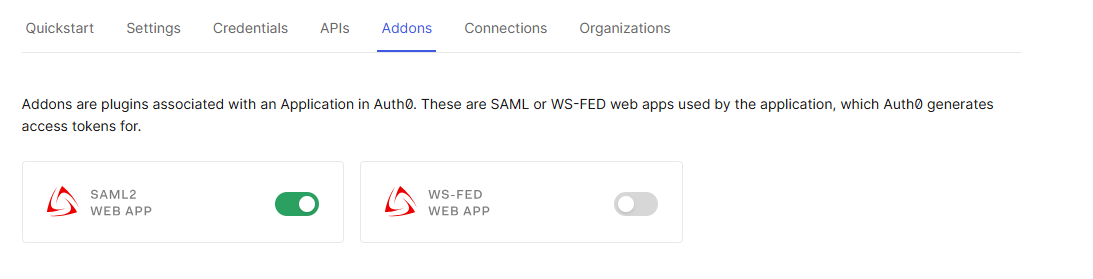
6. Switch to the Addons tab
- Enable : SAML2 WEB APP
- Usage tab : Download Identity Provider Metadata (certificate) and import the same under IdP tab in RAS Console for IdP certificate.

: Copy Identity Provider Login URL (under Usage in Auth0) and paste in RAS Console > IdP tab > Logon URL
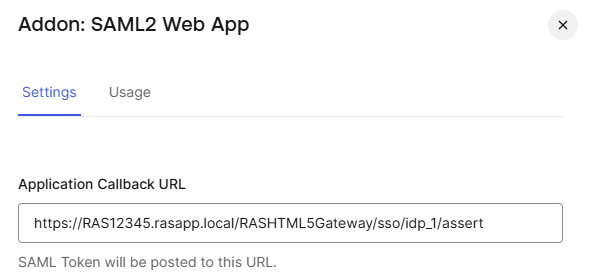
- Settings tab : Application Callback URL in Auth0 should be the Reply URL from SP tab in RAS Console
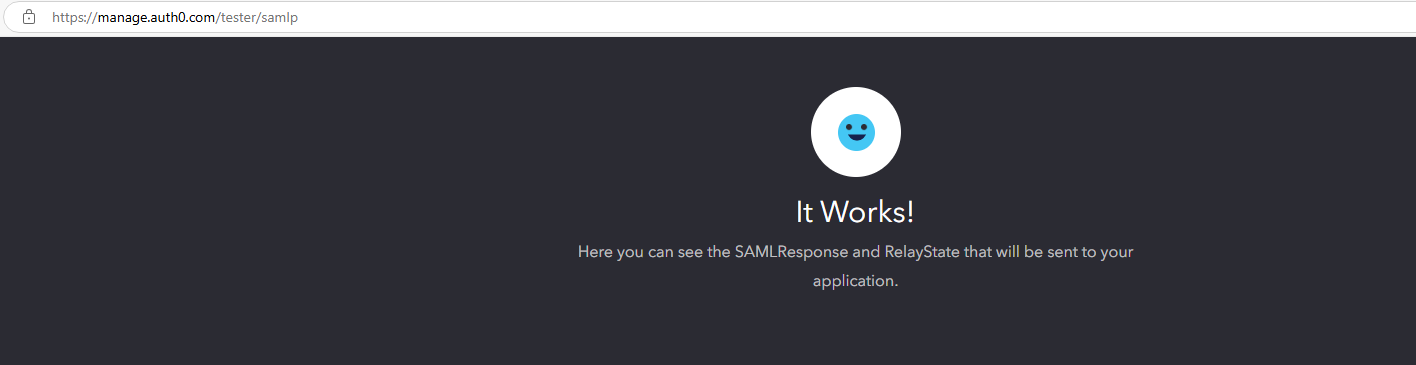
Check : Under the Settings tab in Addon: SAML2 Web App, click on the Debug button. If the configuration is correct, after loging in, one should get a success message on the SAML tester URL. The message is usually shown as It Works!
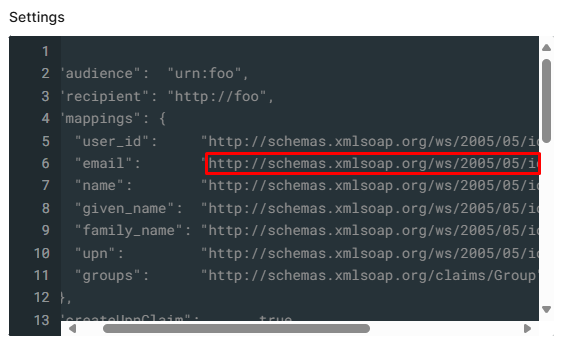
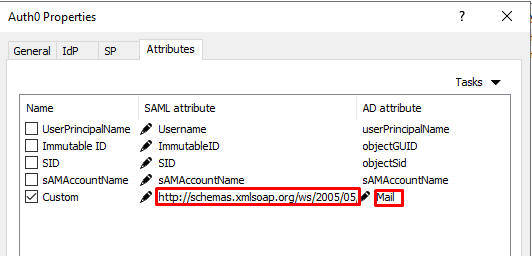
In the Settings field, copy the Attribute for "email" which should be : ' http://schemas.xmlsoap.org/ws/2005/05/identity/claims/emailaddress ' and paste this link in RAS Console > SAML > Attributes tab > Custom : SAML Attribute.
For AD Attribute in RAS Console > Connection > SAML > Attributes tab > Custom : AD Attribute, 'Mail' is set as default. (Make sure attributes are the same in Active Directory)
SAVE on Auth0 level.
7. Go to User Management > Users > + Create User(s)

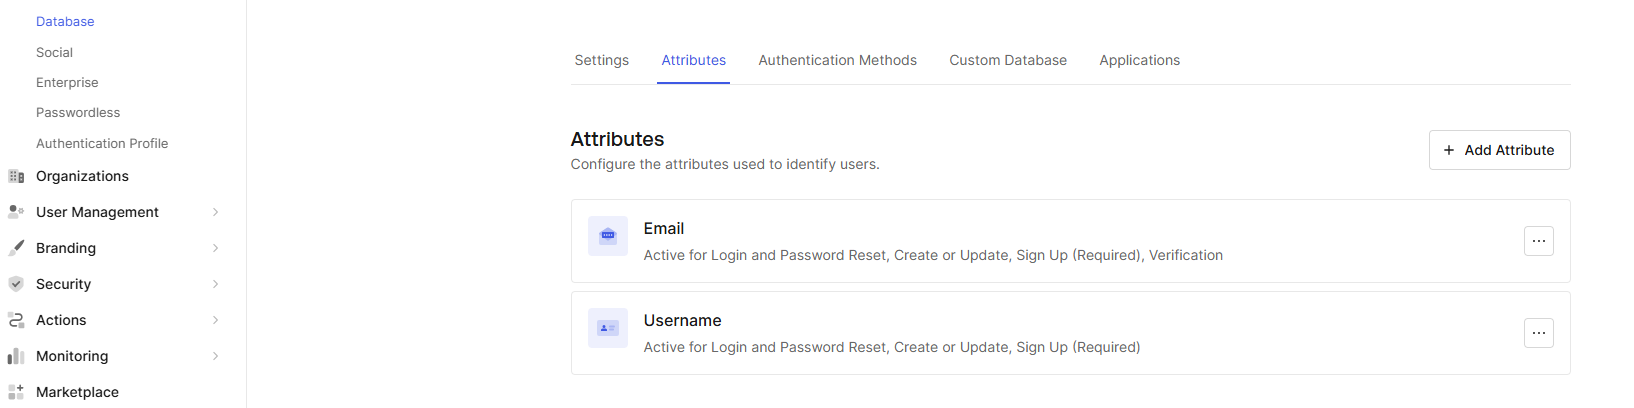
8. Go to Authentication > Database > click on the Database > Attributes tab > + Add Attribute and select 'Username' > Save
Configuration on Auth0 Dashboard and in RAS Console are now completed.
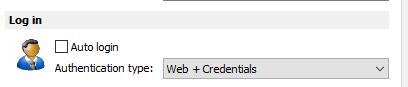
RAS side Configurations - Web + Credentials
In Parallels Client > Connection Properties > Connection tab : Authentication type should be set as Web + Credentials
In the RAS Console > FARM > Secure Gateways > Properties > Web tab, the Default URL should be modified so that the %hostname% matches with the actual Host that is specified under the SP tab of the configured Identity Provider (IdP).
In addition to the above, under Connection > Authentication > Authentication type : Web + Credentials should be selected.

Was this article helpful?
Tell us how we can improve it.