I have a device that allows connection to the Internet, but it only has drivers for Windows. How can I share the Internet connection from Windows Virtual Machine to macOS?
Resolution
Note: the solution below won't work on Mac computers with Apple silicon and Mac computers with Intel processors having macOS Ventura and newer installed as a host operating system.
This article lists basic steps to configure your Mac to share Network Connection from Windows. Please note that it is not implemented in Parallels Desktop for Mac and settings may vary on some specific configuration.
Due to this, Parallels Technical support does not provide any assistance with this implementation and you can use it and modify as much as you like to fit your needs or your configuration. Any related questions can be asked in the corresponding thread of the Parallels Forum.
Instructions:
- Connect the modem to USB port on Mac OS X computer
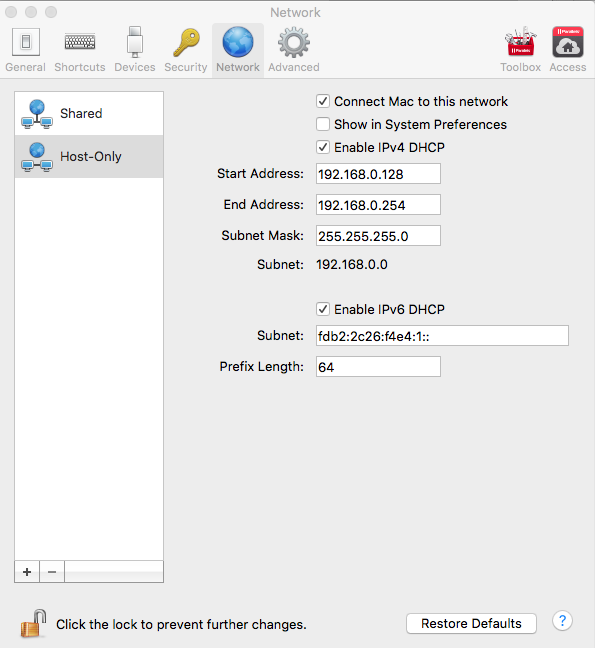
- Start Parallels Desktop (do not launch the virtual machine yet) and open Parallels Desktop menu on the menubar > Preferences > Network > Host Only tab:
-
Fill both Start address and End address with the numbers below:
    Start address [192.168.0.128]
    End address [192.168.0.254]
It should look like this:
-
Make Parallels Network Adapter visible in Mac OS X Network Preferences by following the steps in KB 116528.
-
Go to Mac OS X System Preferences > Network, choose Parallels Host-Only adapter and change the settings to be:
Router: 192.168.0.1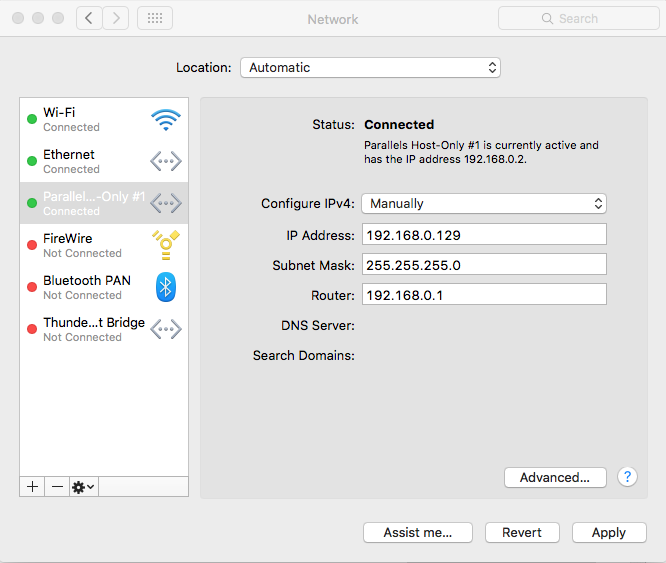
Click Advanced > choose DNS > then click the "+" symbol and add the address below, then OK to apply.
DNS server: 192.168.0.1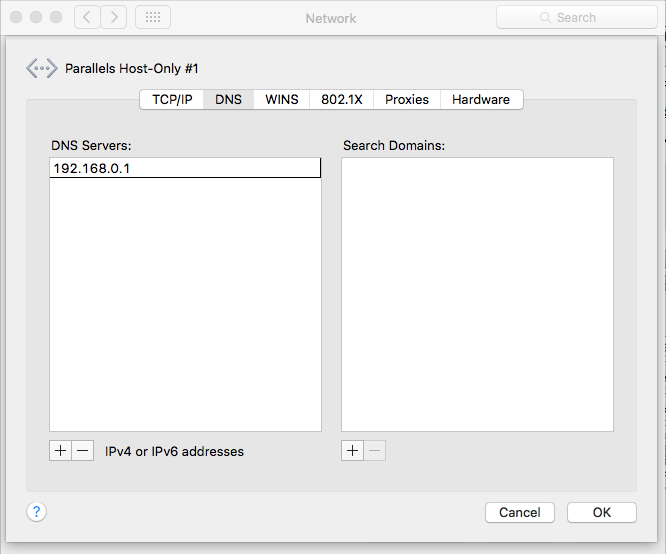
-
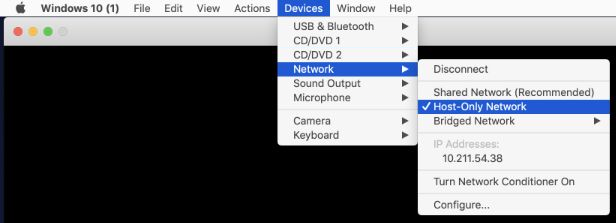
Start the virtual machine, go to the Parallels Desktop dropdown menu > Devices > Network > change network connection type to Host-Only Network.
-
Connect your USB modem to virtual machine. For this purpose click on the Parallels Desktop menu > Devices > External Devices and check the necessary modem.
If there are no drivers installed yet for this USB modem device, please install them first. Refer to the manual of the device for additional information.
-
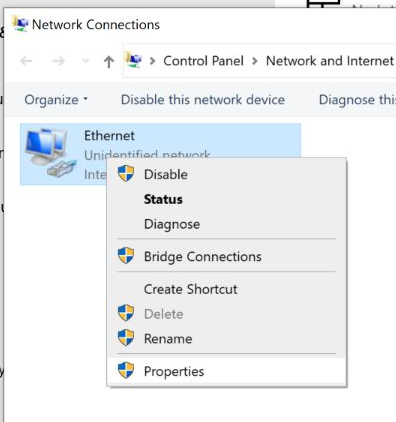
When modem installation is completed, a new Network connection should appear under Start > Settings > Network > Network and Sharing Center/Network Connections applet.
Click (or right-click) the correspondent USB device network connection and choose Properties > Sharing.
Enable Allow other network users to connect through this computer’s Internet connection. In the Home networking connection drop-down list, select the network adapter which was previously set to Host-only.
-
Then get back to
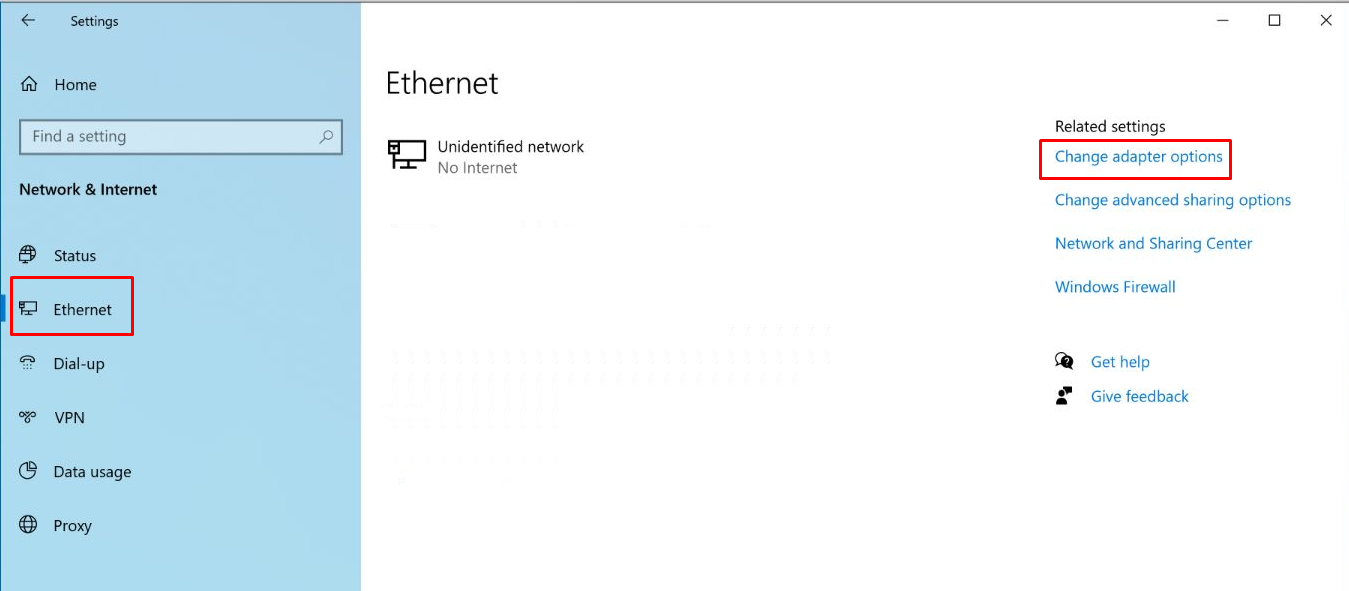
- Settings > Network > Change adapter options
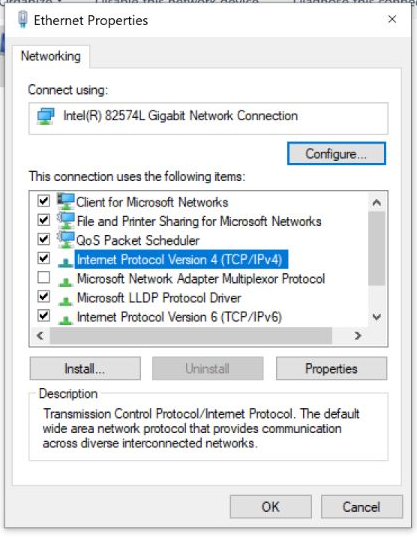
- Right-click on the network connection created for Host-only in Windows > Properties
- Internet Protocol version 4 (TCP/IPv4) > Properties
-
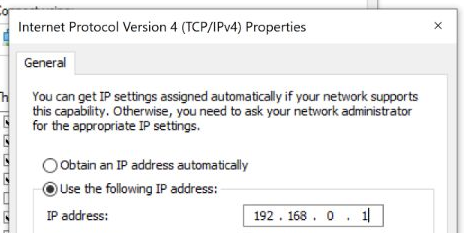
In General Tab > select Use the following IP address and change the IP to be:
192.168.0.1
Was this article helpful?
Tell us how we can improve it.