Many IT admins want to distribute Windows to their end users with the help of an ISO file, not a preinstalled Windows. It has several advantages:
-
Windows ISO image is smaller than an installed Windows image, making deployment lighter.
-
IT can reuse a Windows ISO image that is already built in a company for use on Windows PCs.
This article explains how you can create a blank virtual machine (VM), add Windows ISO and Parallels Tools and drivers inside the package, set necessary settings, and then prepare it for deployment.
Known issues
There is a known issue with the below approach:
-
Windows ISO is not removed after installation and will occupy disk space on the end-user computer.
In the future, the Parallels team plans to significantly simplify this process and address the known issue.
Prerequisites
1. Mac with Parallels Desktop installed and activated with the Business or Enterprise Edition license.
2. Windows ISO image.
Note: your company might build its own ISO files, or you can download one from the Microsoft Business portal or with the help of Parallels (learn more at KB 129607).
Make sure you are using the right architecture of Windows (Arm for Apple silicon-powered Macs, x86 for Intel-powered Mac computers)
3. Parallels Tools and drivers image. If you're about to deploy Windows on Arm VMs, you can use this Parallels Tools and Drivers.iso file.
Prepare the image
Prepare a blank Windows 11 VM
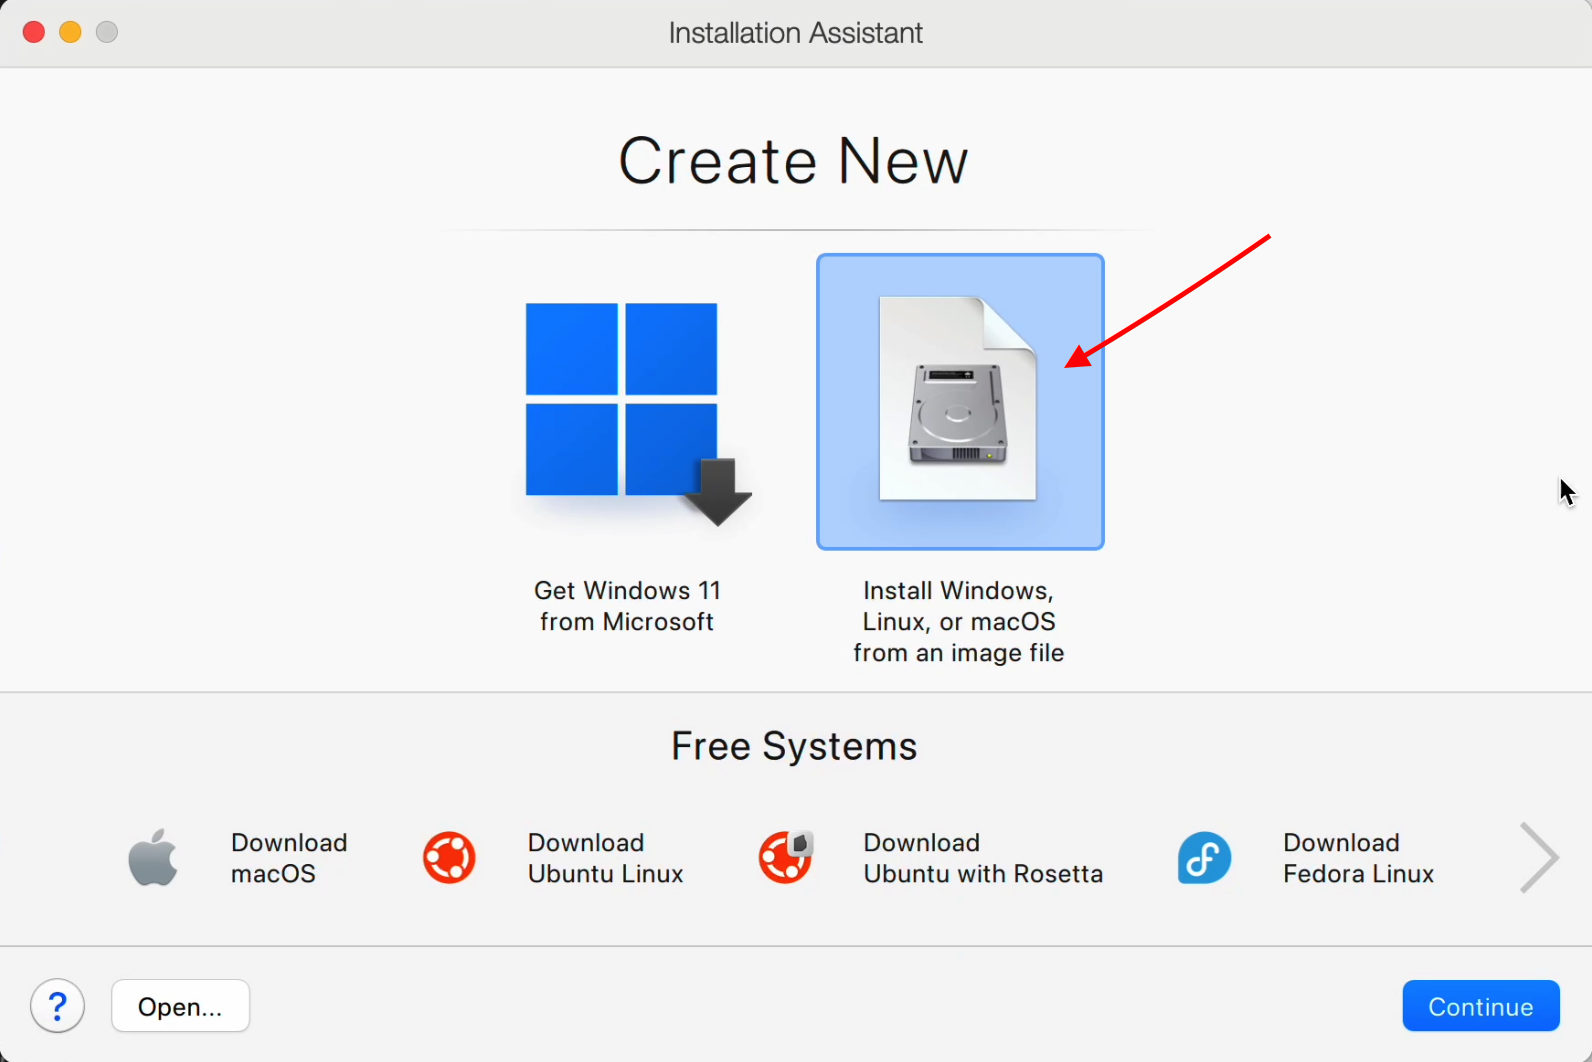
Firstly, you need to create an empty virtual machine. For that, start Parallels Desktop. If you see the Download Windows screen, select Skip. If you already have virtual machines, click the + icon in Control Center that you can launch from the Parallels Desktop menu in the menubar or context menu of the Parallels Dock icon. You will get to the Installation Assistant options.
Select Install Windows, Linux, or macOS from an image file.
On the next screen, select Choose Manually > check the box Continue without source > in the next screen, select “Windows 11” and follow further on-screen instructions.
Once the VM is created it will start with the error message and BIOS screen. No worries, this behaviour is expected.
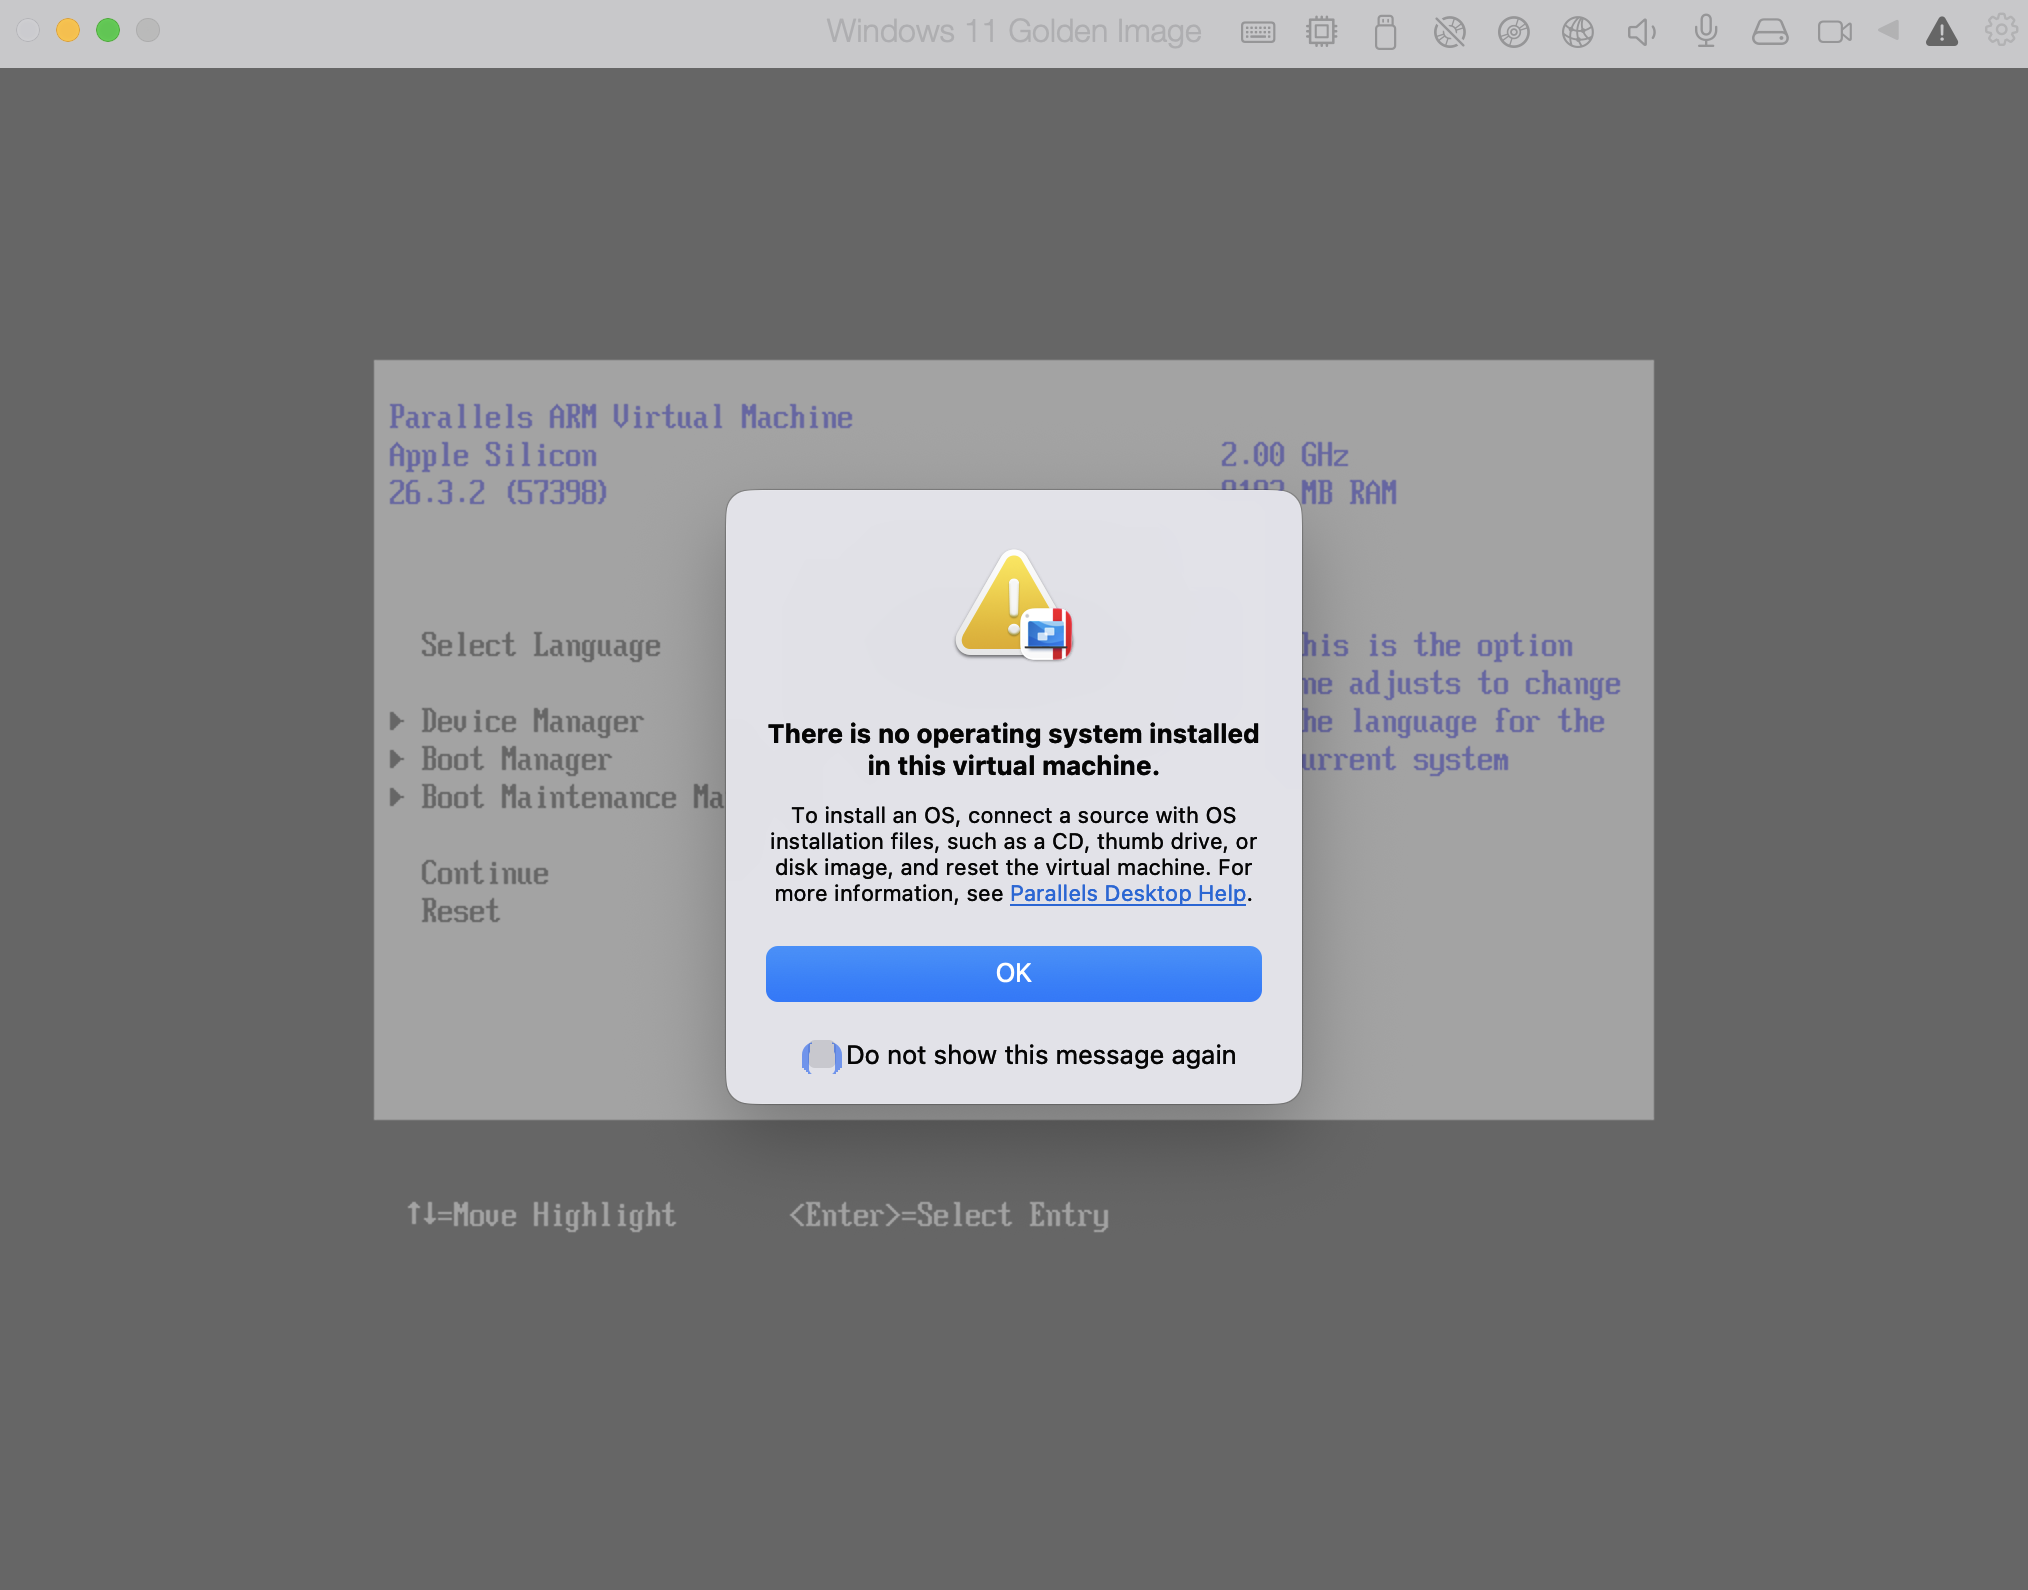
Just click OK and stop the VM (Actions > Stop).
Configure the virtual machine
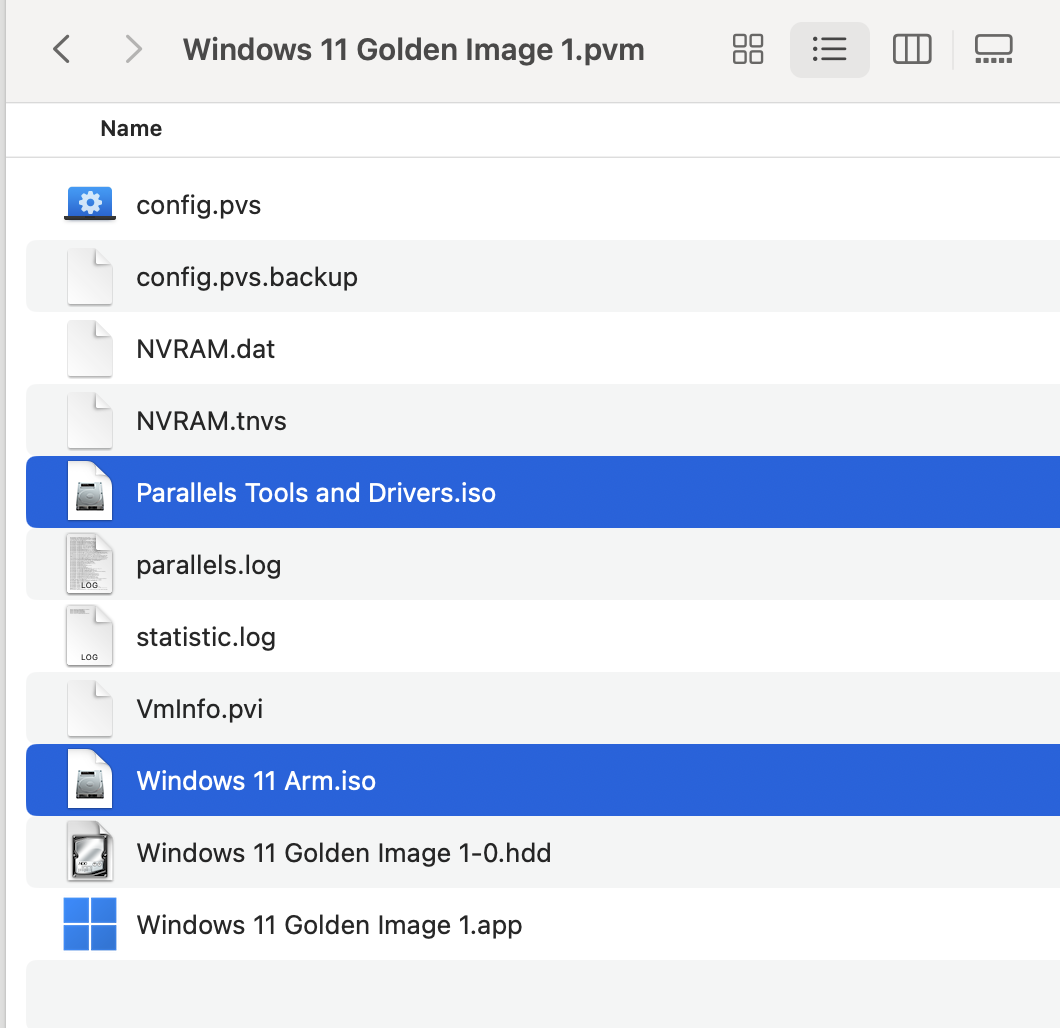
First of all, you need to move the Windows ISO and the downloaded Parallels Tools and Drivers images to the VM bundle to make sure these images aren't lost during the deployment process.
1. Open Control Center, right-click the virtual machine name and select Show in Finder. Right-click the bundle name and choose Show Package Contents.
2. Paste the Windows ISO and Parallels Tools and Drivers images to this folder:
3. Adjust VM configuration.
Open the Control Center and go to the VM configuration.
Configure the settings you find useful for your use case. One of the most popular settings IT administrators like to set is the Always ready in background feature and disable the option to pause the VM after a few seconds. That helps you to manage Windows VM in your Windows endpoint management solution (Intune, Domain, Workspace ONE) even if users are not using Windows applications often. Learn more in KB 130111.
4. Switch to the Hardware tab and add a new CDROM device.
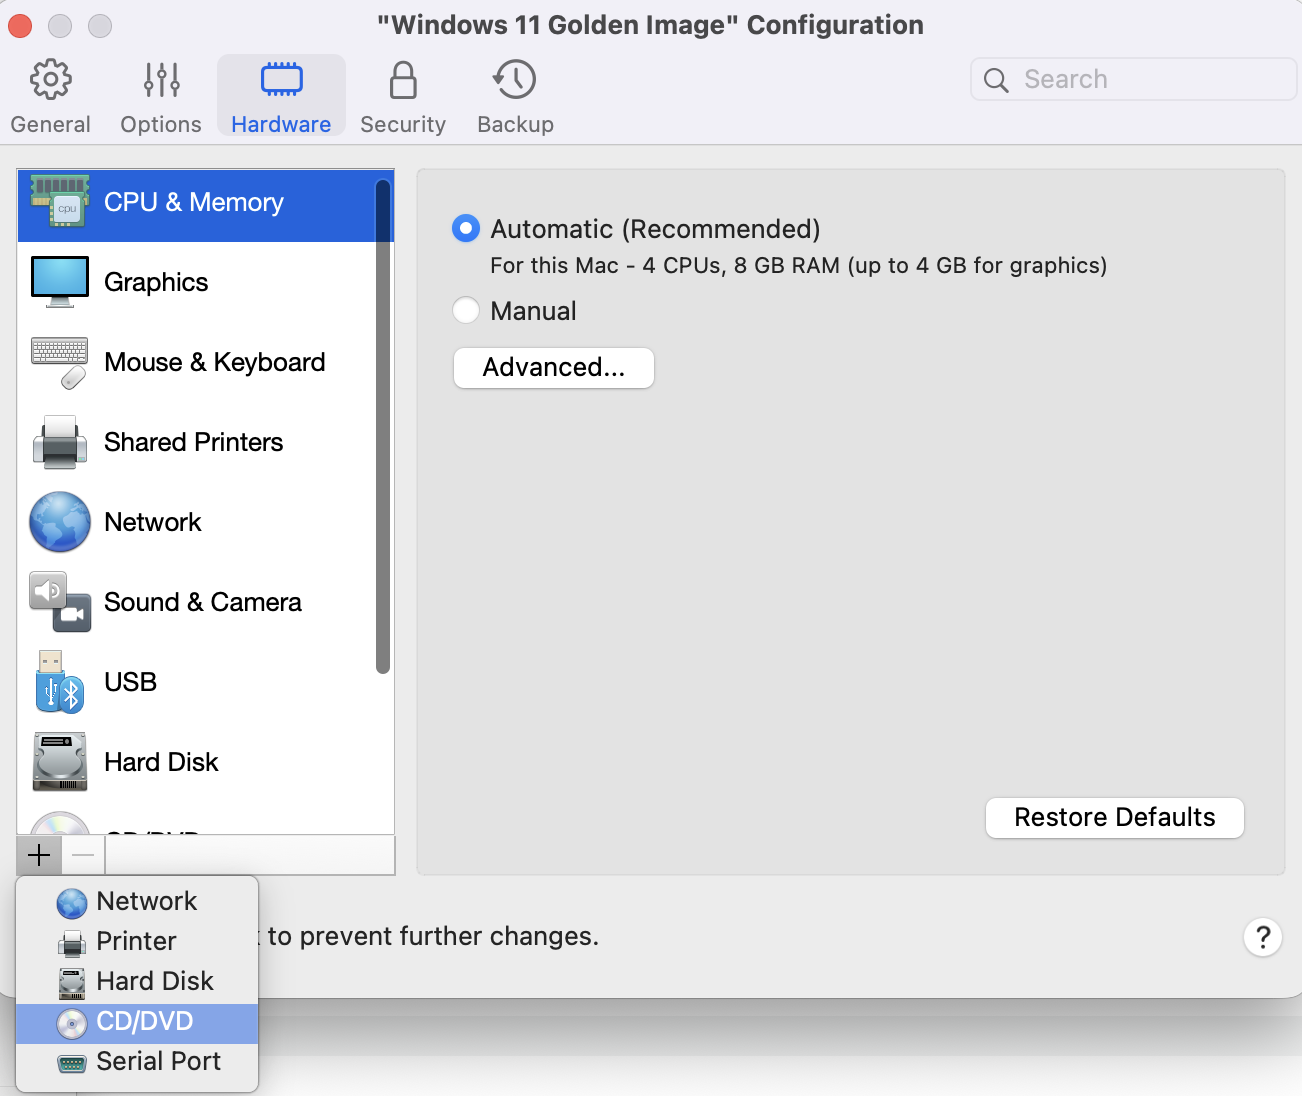
Assign the added into the VM bundle Windows ISO to CD/DVD 1 and Parallels Tools and Drivers to CD/DVD 2.
Test locally
1. To clean up the virtual hard disk for any remnants of previous installations, remove the Hard Disk from the Hardware tab (click Hard Disk > click the - icon at the bottom), and select the Move to Trash option when you're asked what to do with this disk.
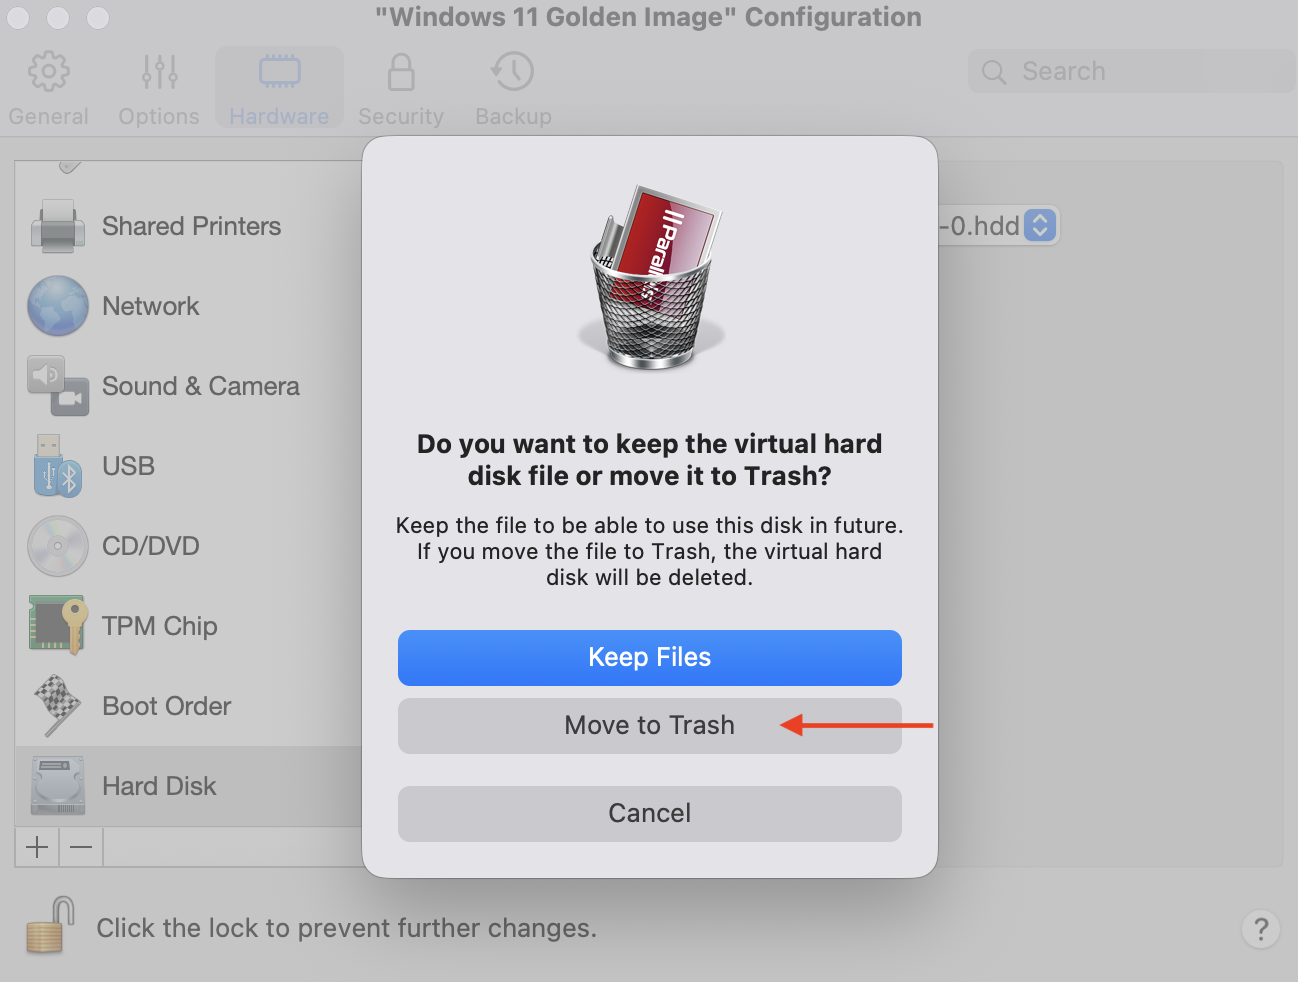
Important: add a new Hard disk then (click the + icon and choose Hard disk). Feel free to use the default settings and press OK. Do not worry about disk size, as the expanding disk technology means that the virtual disk only occupies the amount of space actually used by Windows and apps.
2. Recheck that CD/DVD 1 and CD/DVD 2 are connected to the proper ISOs. They might get disconnected after the successful test.
Start the virtual machine and go through the Windows installation till the end (when you see Windows Desktop), restart after this, and make sure everything is fine. You can adjust and experiment with the installation settings. See the Advanced customization section at the end of the article.
Deployment
1. Shut down the virtual machine (Actions > Shut down).
2. Repeat removing and re-adding a virtual Hard Disk as described above and double-check that CD/DVD 1 and CD/DVD 2 are connected to the proper ISOs. Do not start a virtual machine.
Now the virtual machine is ready for deployment. We recommend you follow the Golden Images topic in the Administrator Guide to distribute the virtual machine to users. But you can also deploy it using the deployment option you prefer most. Learn more about Golden Images here.
Note: if you use the Golden Image feature to distribute the virtual machine to end users, please note that the VM should be uploaded to My Account in .pvmp (learn more in KB 125083) format.
Advanced customization
Parallels Tools and Drivers image does the following:
-
Partitions the virtual hard disk
-
Provides a driver to enable network and internet connection
-
Installs Parallels Tools to enable dynamic resolution adjustments, shared clipboard, shared folders, and more.
-
Does not allow using the BitLocker encryption (otherwise the encrypted disk will occupy all the space)
-
Disables OneDrive setup (since the recommended way is to use it on a Mac side and share it with Windows)
If you want to customize the Windows installation routine and enable things like:
-
Provide a product activation key
-
Set up a default user
-
Setup machine name template
-
Skip some OOBE steps
-
Set default Windows and installation language
-
Execute additional scripts, etc
Then you can tinker with ParallelsCD.cdr and the Autounattend.xml file located on it. When you are ready, you can convert it to ISO file using the Terminal command:
cd <PATH to the folder with ParallelsCD.cdr>
hdiutil makehybrid -iso -joliet -o ParallelsCD.iso Parallels CD.cdr
And then use the produced image in the instructions above instead of the "Parallels Tools and Drivers.iso" file.
Was this article helpful?
Tell us how we can improve it.