Configuring Microsoft Entra ID as an Identity Provider (IdP)
App Registration
- Navigate to https://portal.azure.com/#home .
- In the top Search Bar, search "App Registration".
- On App registration, click on "New registration".
- Provide the following values:
- Name
- Supported Account Type
- Redirect URI: Add these to redirect URIs (type: Web).
- https://pbi.parallels.com/rbi/oidc/signin/callback
- https://pbi.parallels.com/owner/test-idp
- Move to the left navigation pane to perform the actions below on each tab.
Certificates and Secrets
- Navigate to the Secret tab.
- Click on "New client secret".
- Add a "Description" and set the expiration time.
- Finally, click "Add".
Token configuration
- "Add group claim", select group types, and click "Add”.
- Select an appropriate group type.
- Customize token property.
- Add Optional Claim.
- Token Type = ID.
- Select Claim and preferred_username in the checkbox.
API Permission
- Add permission", then on "APIs my organization uses", then on "Microsoft Graph".
- Click on "Delegate permission",
- Select permission "group",
- Select "Group".
- Read "All"
- Click on "Add permission"
- Click on "Grant admin consent", then "Yes"
Owners
- Goto Owners and Click “Add Owners"
- Add the list of users who would be using the Parallels Browser Isolation
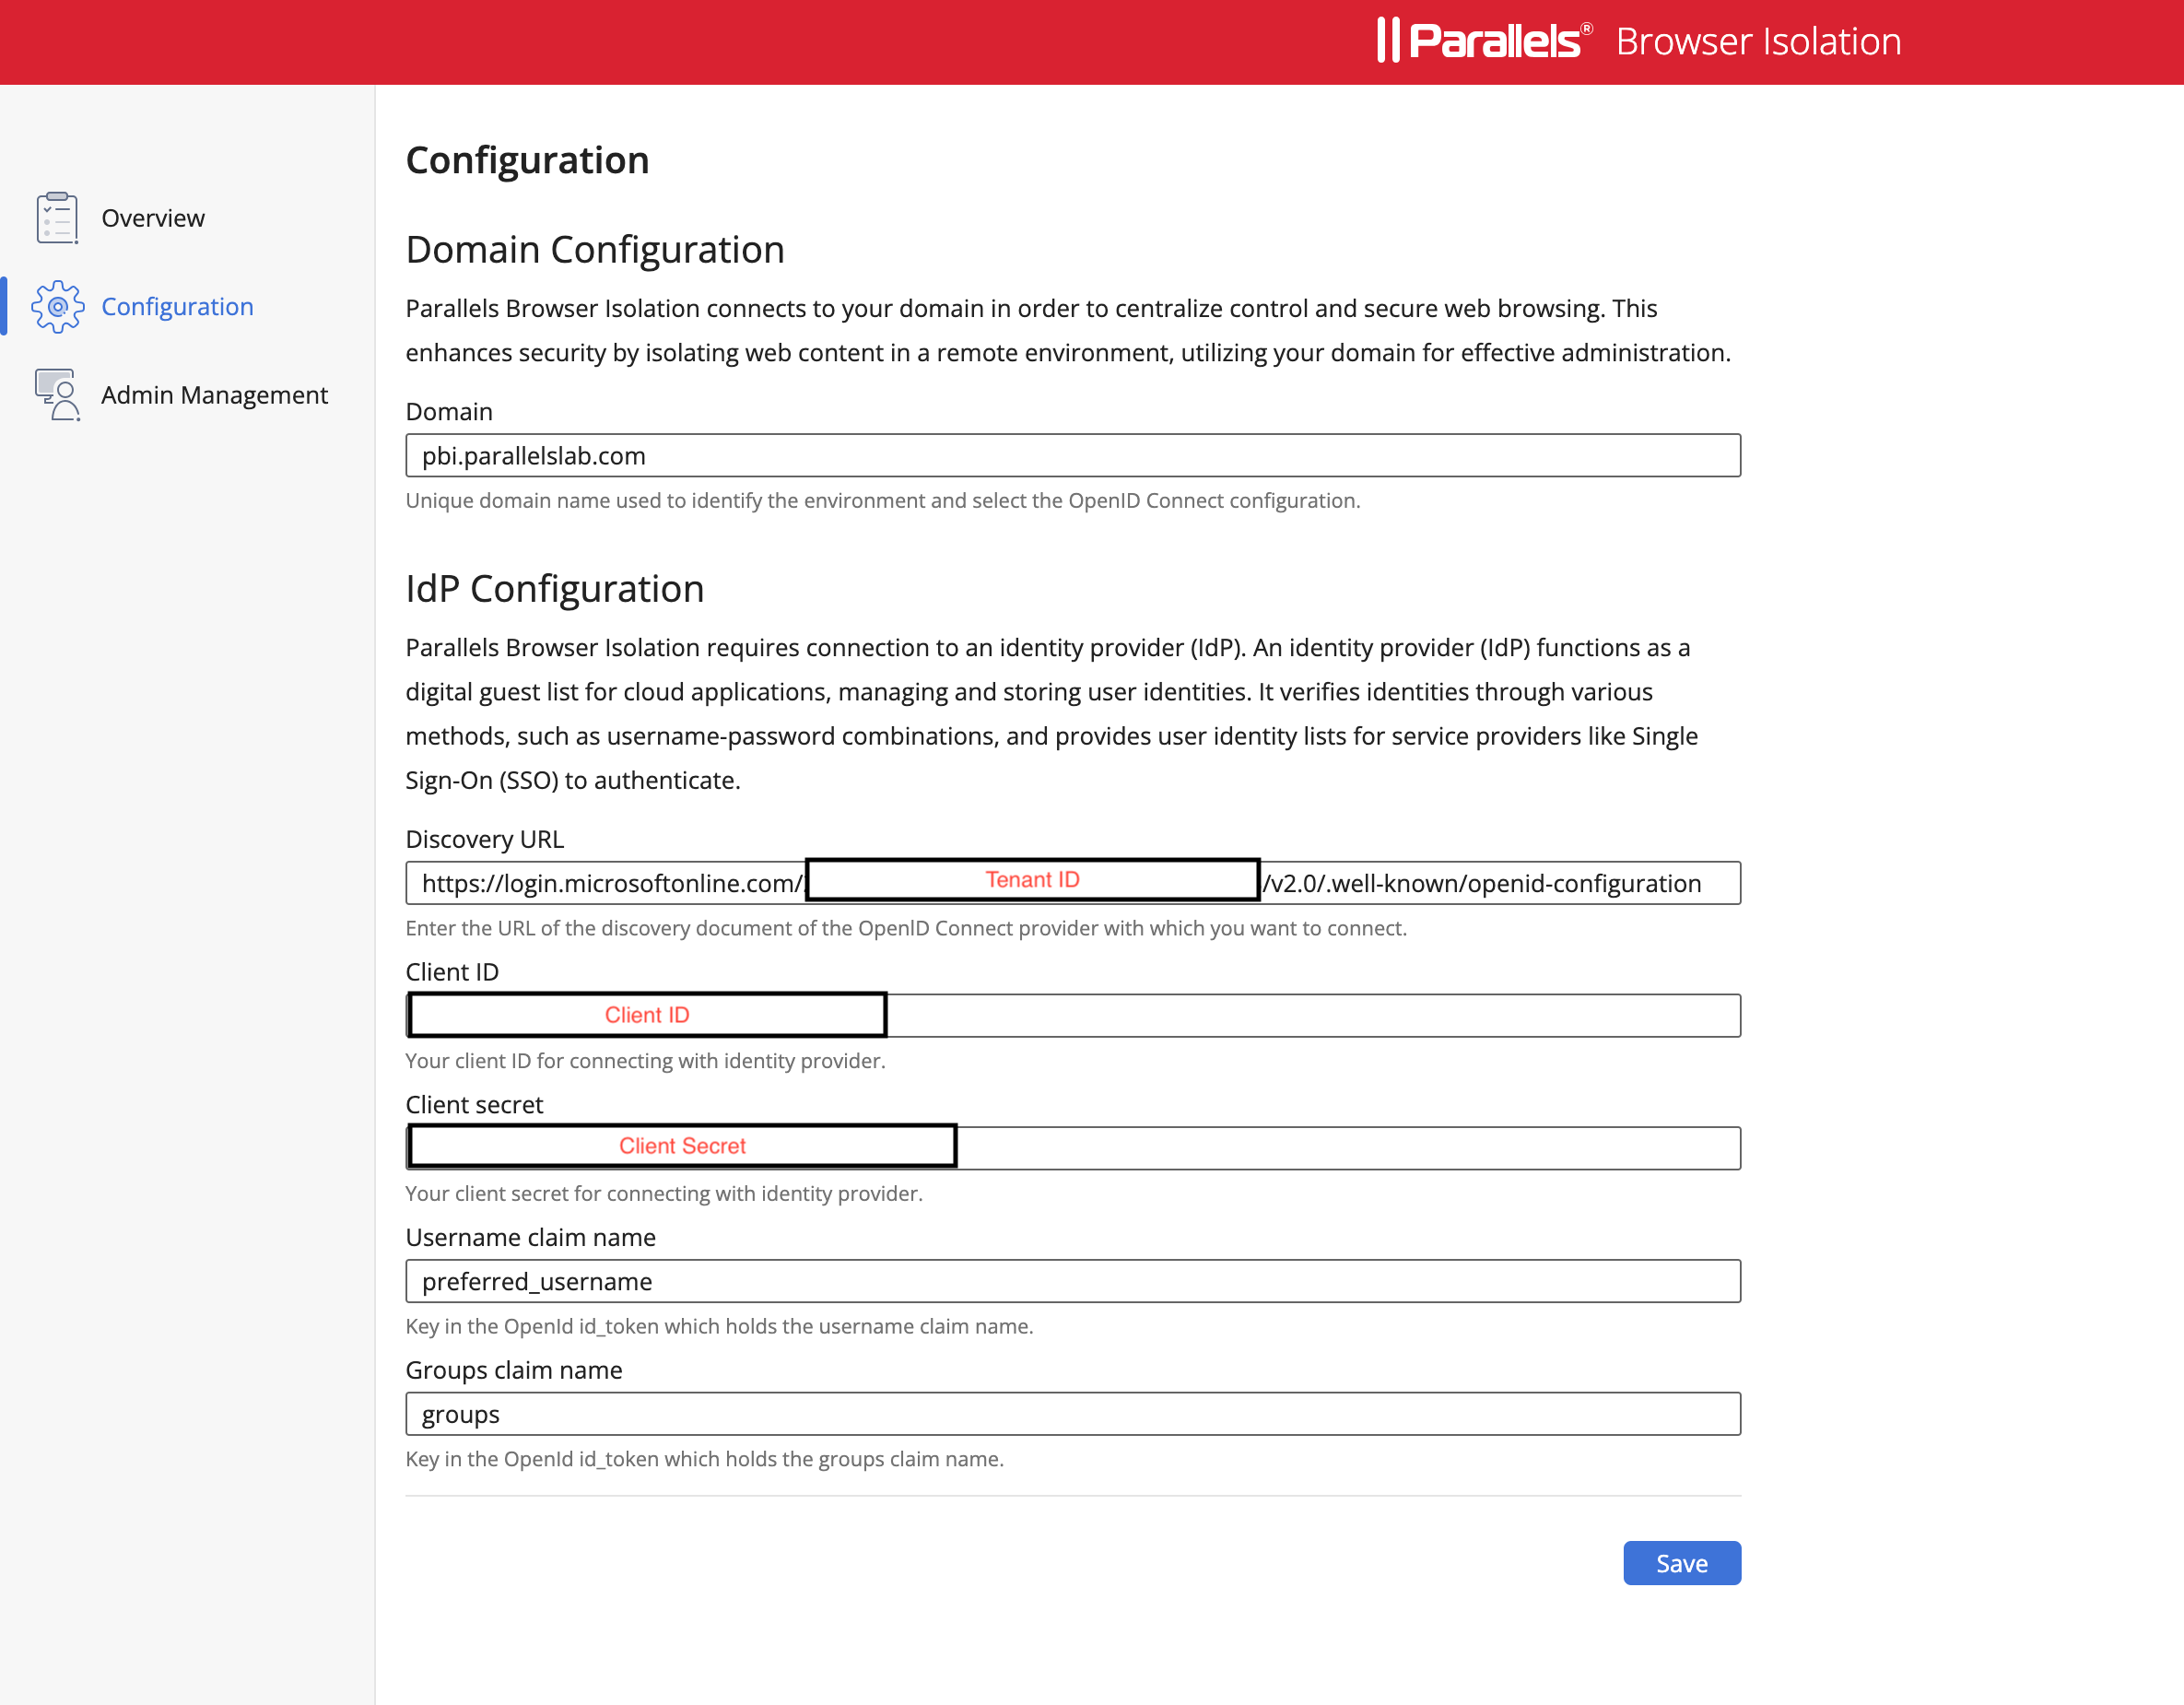
- Go to the Overview section and have the following values at hand for the Next Steps on IdP Configuration on Parallels Browser Isolation
- Discovery URL - Goto Endpoints and Copy OpenID Connect metadata document value (Format:
https://login.microsoftonline.com/{tenantid}/v2.0/.well-known/openid-configuration) - Client ID - Application (client) ID
- Client Secret - Client Credentials (Also can be fetched from certificated) - Copy the Secret Value (Which is hidden)
Parallels Browser Isolation My Account
- Click on Initial Config to navigate to the Parallels Browser Isolation Owner Portal.
- Copy and paste the above values into the configuration section of the Admin Portal on Parallels Browser Isolation. Note: The initial owner of the Parallels Browser Isolation will complete this step.
Please refer to the image below:

Was this article helpful?
Tell us how we can improve it.