You can use the Parallels Desktop Command-Line interface to change the configuration settings of all virtual machines (VMs) already registered on a Mac. To do so, you first need to create a script to perform a desired configuration modification.
Note: Parallels Desktop Command-Line interface is not supported in Parallels Desktop Standard Edition.
Create a new script
To create a script, feel free to follow the steps below:
1. Open the TextEdit application on your Mac and create a new file.
2. In Mac menubar choose Format > Make Plain Text.
3. Type or paste in the script as directed in the text.
Example: the following script disables the auto-pause option for all virtual machines registered on the Mac computer:
#!/bin/zsh


# Get the current user

CURRENT_USER=$(whoami)


# List all VMs, extract IDs, and disable pause-idle for each VM under the current user

for i in $(prlctl list -a --info | grep "ID" | sed 's/.....//;s/.$//'); do

    sudo -u "$CURRENT_USER" prlctl set "$i" --pause-idle off

done
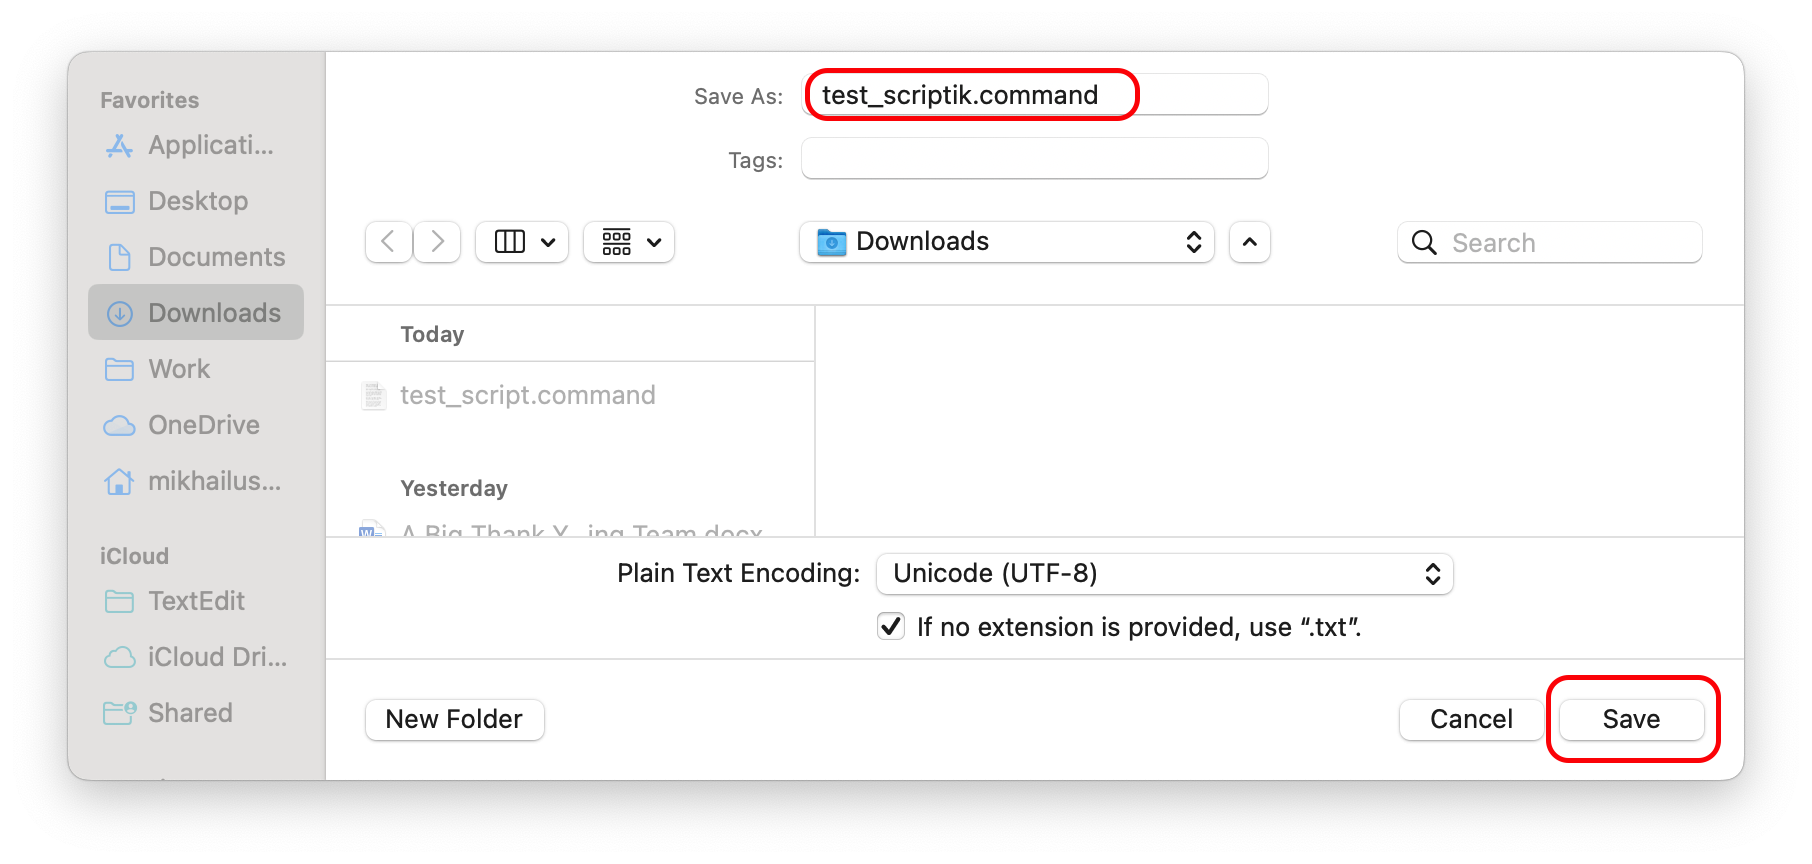
4. Once done, save the script by selecting a location for it and defining the file extension as .command.

5. Define permissions for the file. For example, you can execute the chmod 777 <path_to_the_file> command in Terminal to grant all permissions to the file. Use ls -la to check the permissions.
mikhailushakov@MAUAL1MIKUSHS ~ % ls -la /Users/mikhailushakov/Downloads/test_script.command
-rw-r--r--@ 1 mikhailushakov staff 288 Oct 31 11:26 /Users/mikhailushakov/Downloads/test_script.command
mikhailushakov@MAUAL1MIKUSHS ~ % chmod 777 /Users/mikhailushakov/Downloads/test_script.command
mikhailushakov@MAUAL1MIKUSHS ~ % ls -la /Users/mikhailushakov/Downloads/test_script.command
-rwxrwxrwx@ 1 mikhailushakov staff 288 Oct 31 11:26 /Users/mikhailushakov/Downloads/test_script.command
Note: this is a basic example script, and you may need to modify it to suit your specific needs. For more information on available commands and options, refer to the Parallels Desktop documentation.
Deploy script using Management tools
You can execute the script on a Mac computer using one of the remote Mac management tools listed below:
• Jamf Pro
• Microsoft Intune
• Kandji
• Apple Remote Desktop (ARD)
• IBM Endpoint Manager
• Mosyle
• Addigy
• Munki
To do so, save the script and upload it to the Mac management tool to push it to the target Macs.
Was this article helpful?
Tell us how we can improve it.