Warning! We strongly recommend that you back up your VM before following the steps below.
Increasing the virtual hard disk size
-
Start Parallels Desktop and do not start your virtual machine. Shut it down if it is either suspended or running.
-
Click on the Parallels icon on the Mac menu bar and select Control Center:

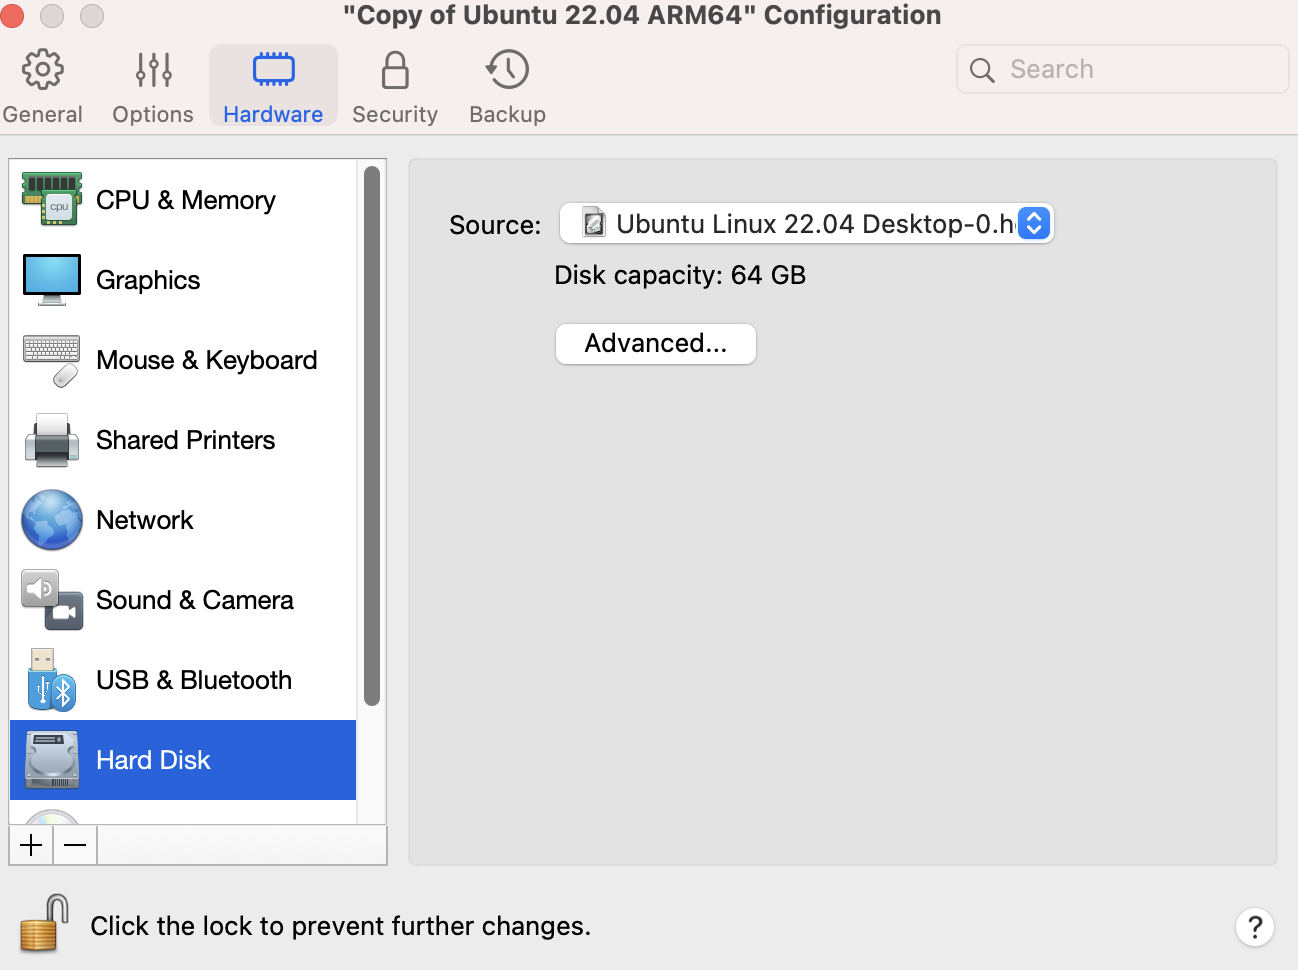
3. Right-click on your virtual machine and choose Configure to open its configuration
4. Go to the Hardware tab, select Hard Disk which requires increasing the size then click Advanced... > Properties

5. If the VM has Snapshots the following notification window will appear. Press Manage Snapshots... to open the corresponding dialogue window then remove Snapshots to start editing the disk size.
6. Drag the slider to increase the size of the hard disk.

7. After that, Parallels Desktop will recommend creating a backup of the VM. To proceed further click Continue.
Note: as mentioned above, we strongly recommend creating a backup of the VM. In case of power surges/failures with the Mac, the Mac's unpredictable restarts or third-party applications interventions, during the operations with the virtual hard drive may result in its corruption resulting in the inability to use the virtual machine.
Extending the size of the disk on Linux
To complete the changes required to extend your disk size on Linux,
1. Start your virtual machine.
2. Open "Terminal" on your Linux virtual machine.
3. Execute the following command:
sudo apt install -y gparted

4. Wait till the gparted application is installed successfully.
5. From your list of applications, search for and open Gparted. If you receive a prompt, enter your password.

6. Select the hard drive partition you wish to expand.
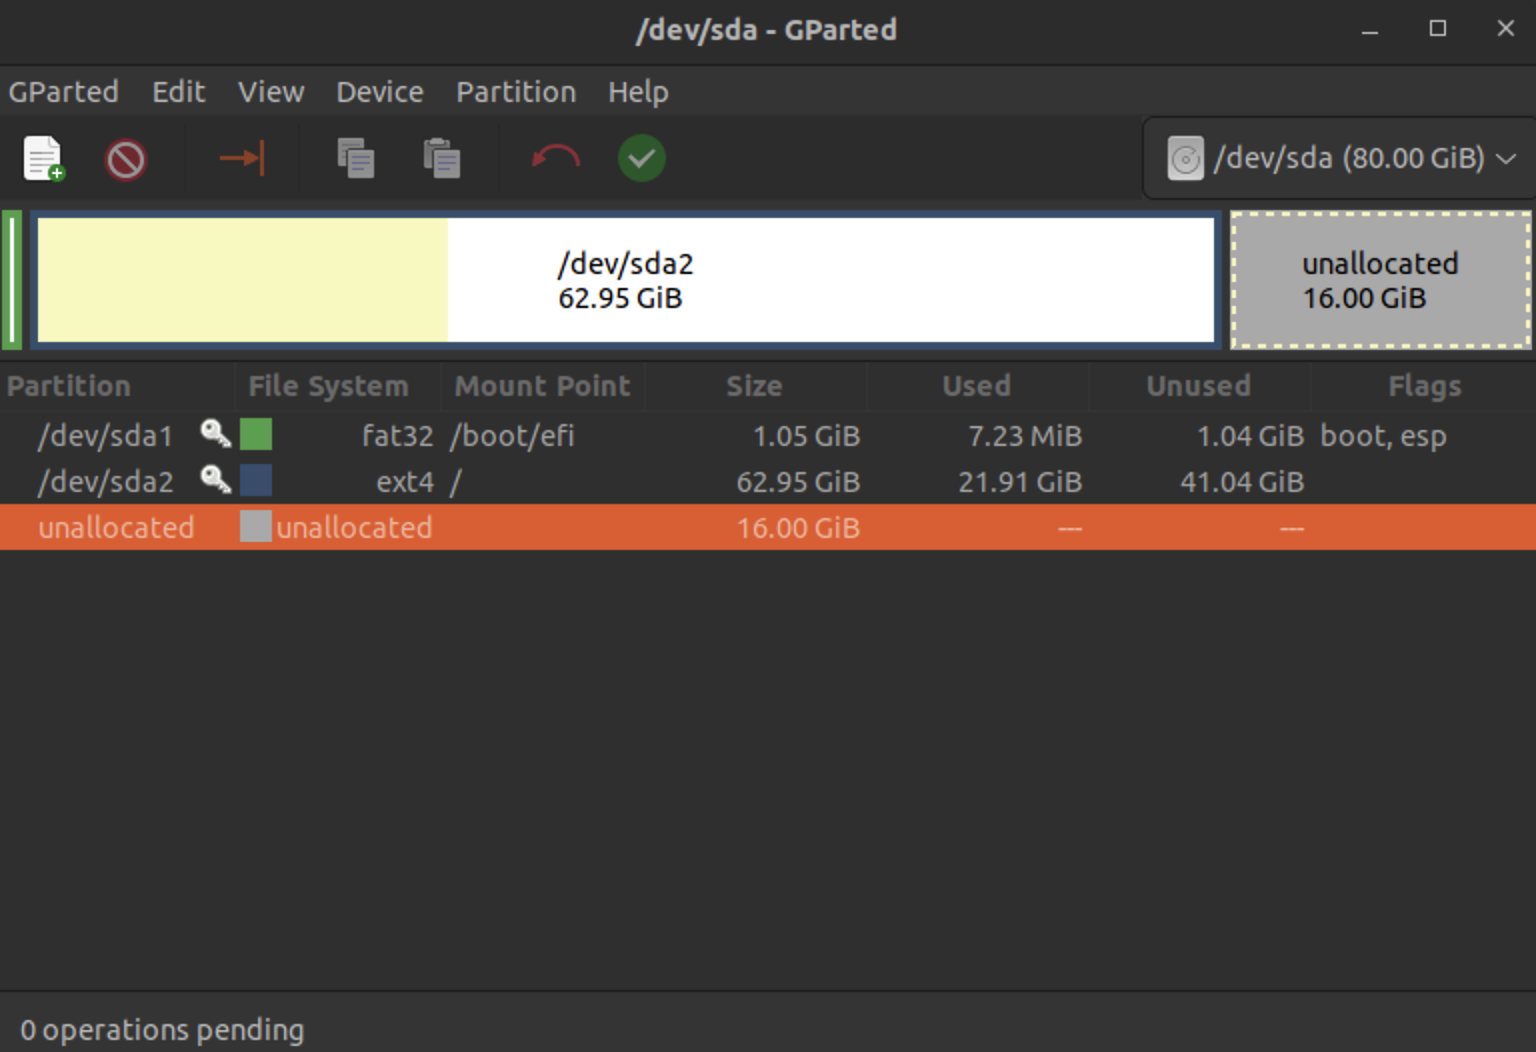
7. Right-click the preferred partition and click on "unmount", if you receive an error informing you the target is busy, click on "Ok".
8. Right-click the preferred partition and click on "Resize/Move".

9. Drag the slider to increase the partition size (Please note that you can only increase the partition size, not reduce/decrease it).
10. Once the slider is in your preferred position, click the "Resize" button to close the prompt.

11. Click the green checkmark icon in the Gparted window, then click on the "Apply" button in the newly appeared prompt.

12. Wait till the operation completes successfully, then close the gparted window

Checking the size of the disk on Linux
1. Open "Terminal" on your Linux virtual machine.
2. Execute the following command and check the second column for the new partition size:
df -h

You should now see the partition fully extended.
Was this article helpful?
Tell us how we can improve it.