Parallels Tools is a suite of software utilities designed to enhance the performance and usability of virtual machines created using Parallels Desktop. Installing Parallels Tools in a Linux virtual machine can provide improved integration, graphics acceleration, and better overall functionality. This article provides a step-by-step guide on how to install Parallels Tools in Linux.
Note: you can find a list of Linux distributives supported in Parallels Desktop on Mac computers with Apple silicon in KB 124223.
Install Parallels Tools using GUI
1. Launch Parallels Desktop and start the Linux virtual machine.
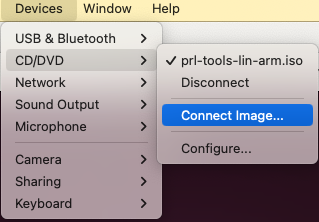
2. Connect the Parallels Tools image to the virtual machine: in the menubar, click Devices > CD/DVD > Connect image...
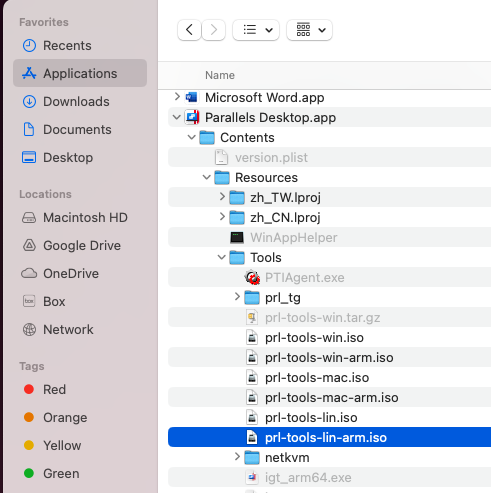
3. Browse to the image location Application > Parallels Desktop.app > Contents > Resources > Tools > select prl-tools-lin-arm.iso if your Mac is a Mac with Apple silicon or prl-tools-lin.iso for Mac computers with Intel processors.
This will mount a virtual CD/DVD with the Parallels Tools.
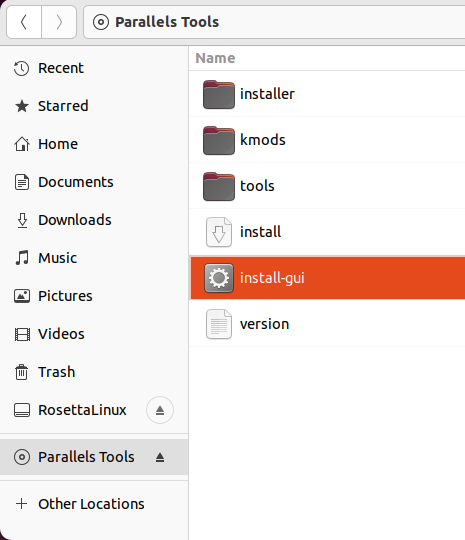
4. In the virtual machine, select the mounted CD/DVD with Parallels Tools and double-click on the Install-gui file. You may be required to enter your Linux password to start the installation.
5. You will be presented with the Parallels Tools Installation wizard.
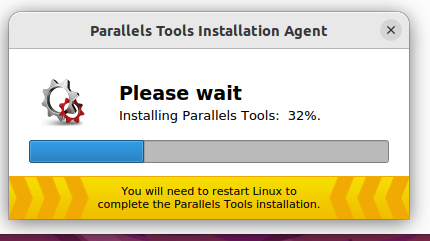
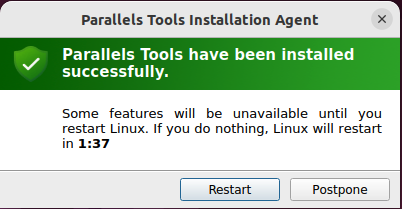
6. Once the installation finishes, restart the virtual machine.
Install Parallels Tools using Terminal
Note: we suggest opening this article inside a Linux virtual machine to easily paste the commands into the Linux Terminal.
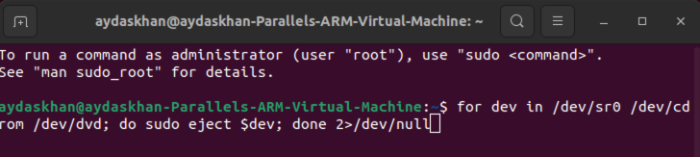
1. In Linux virtual machine, open Terminal and execute the following command to eject any CD/DVD images:
for dev in /dev/sr0 /dev/cdrom /dev/dvd; do sudo eject $dev; done 2>/dev/null
(You will need to enter your Linux password to run the command. No symbols will be shown due to security measures, so just enter the password and press Return/Enter.)
2. On Mac side, mount the Parallels Tools image into the virtual machine execute the following command:
Note: before executing the command, make sure that the Linux virtual machine in question is the only one running.
VM_ID=$(prlctl list -a | grep running | awk '{print $1}' | head -n 1) && ISO_PATH=$(if [[ $(uname -m) == "x86_64" ]]; then echo "/Applications/Parallels Desktop.app/Contents/Resources/Tools/prl-tools-lin.iso"; elif [[ $(uname -m) == "arm64" ]]; then echo "/Applications/Parallels Desktop.app/Contents/Resources/Tools/prl-tools-lin-arm.iso"; fi) && prlctl set $VM_ID --device-set cdrom0 --image "$ISO_PATH" --connect
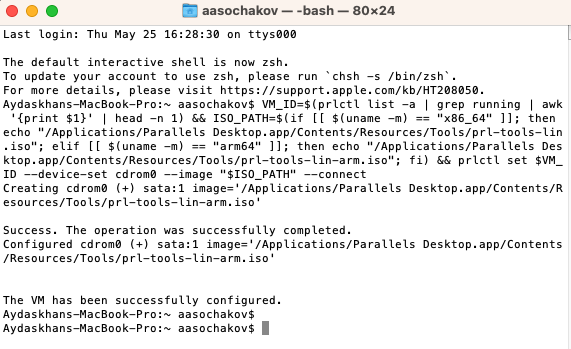
Once executed, the command should produce the following message: "The VM has been successfully configured", and on the Linux virtual side, you should see that Parallels Tools are mounted.
3. Switch back to the Linux virtual machine Terminal and execute the following command to update dependencies, correctly mount the image on the virtual machine side, and run the Parallels Tools installation:
sudo mkdir -p /media/cdrom0; if [[ -f /etc/fedora-release ]]; then sudo dnf install -y gcc kernel-devel-$(uname -r) kernel-headers-$(uname -r) make checkpolicy selinux-policy-devel; sudo mount -o exec /dev/sr0 /media/cdrom0; cd /media/cdrom0; sudo ./install; elif [[ -f /etc/debian_version ]] || [[ -f /etc/kali_version ]] || [[ -f /etc/os-release && $(grep -Ei "NAME=\"Debian|NAME=\"Ubuntu" /etc/os-release) ]]; then sudo apt-get install -y dkms libelf-dev linux-headers-$(uname -r) build-essential; sudo mount -o exec /dev/sr0 /media/cdrom0; cd /media/cdrom0; sudo ./install; fi
(You may be required to enter your Linux password to run the command. No symbols will be shown due to security measures, so just enter the password and press Return/Enter.)
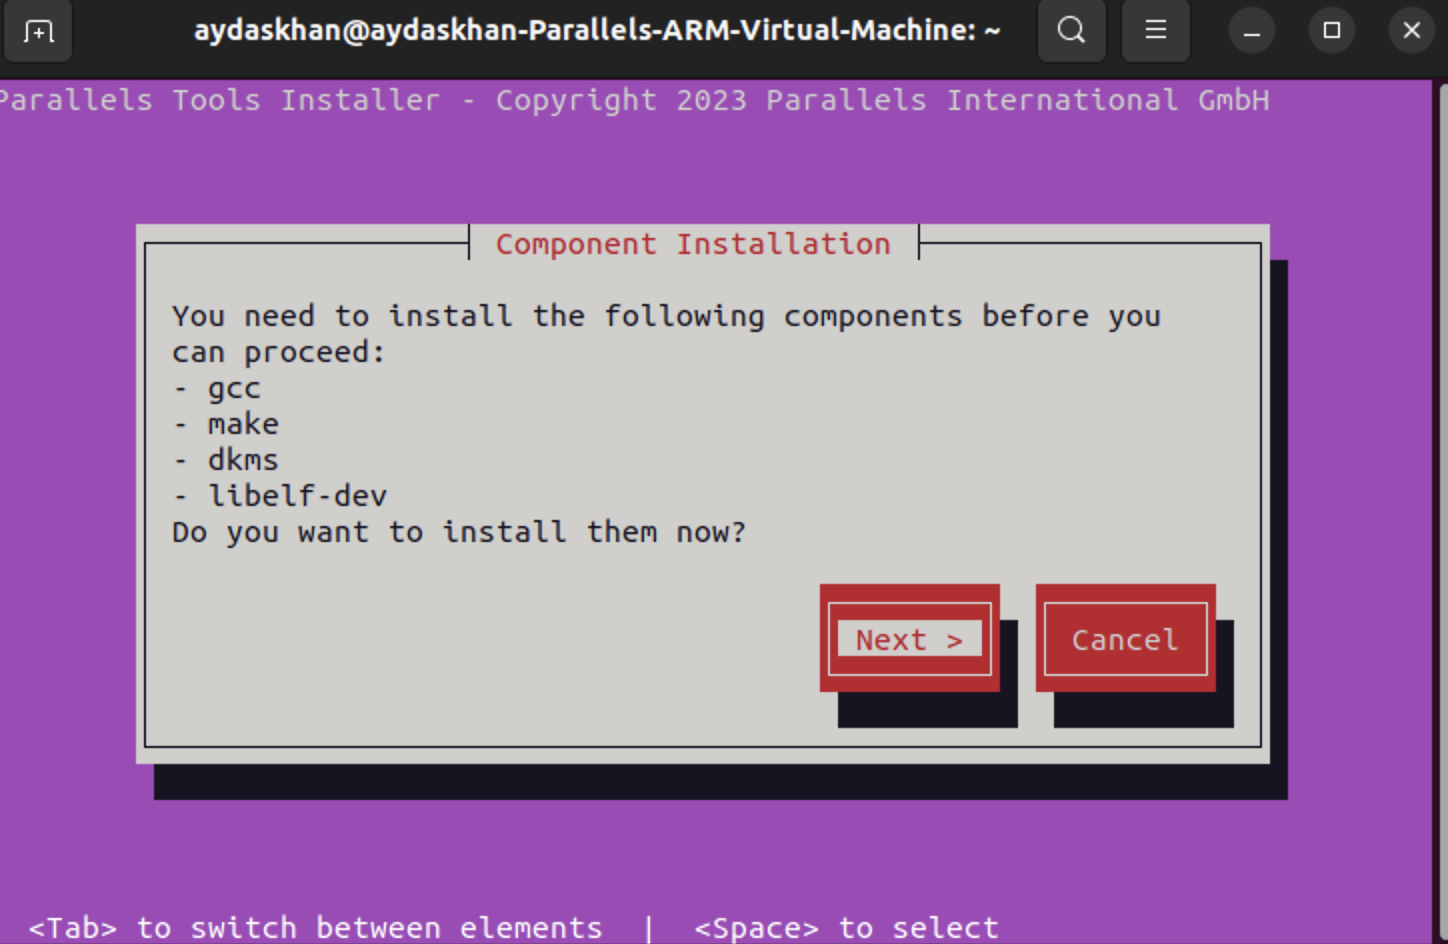
4. As a result, you will see Parallels Tools Installer window:
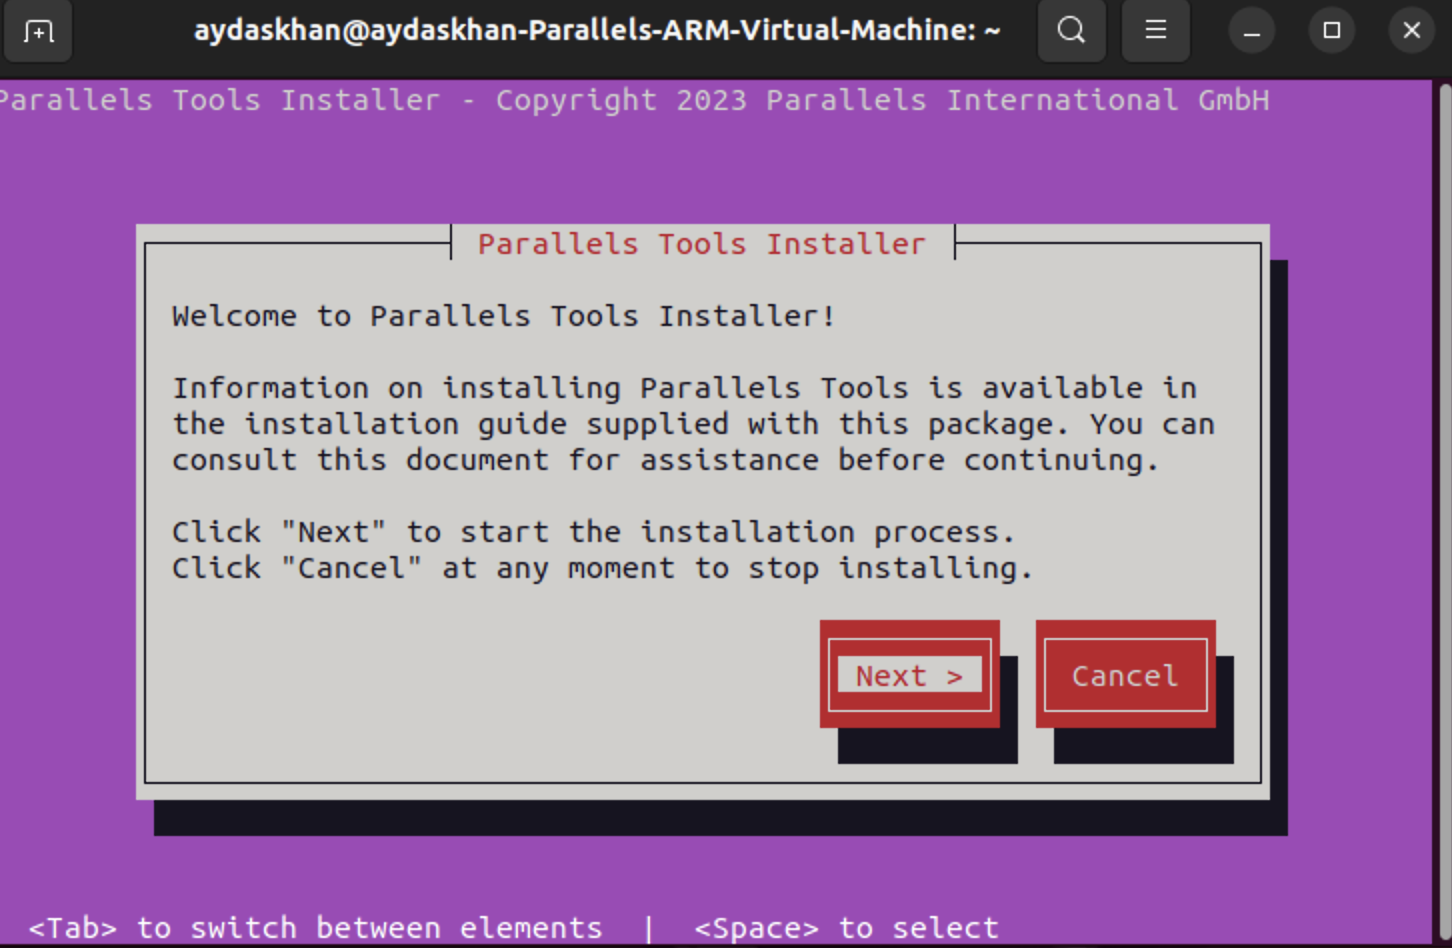
4.1. Proceed with installation.
4.2. After installation you need to Reboot Linux virtual machine.
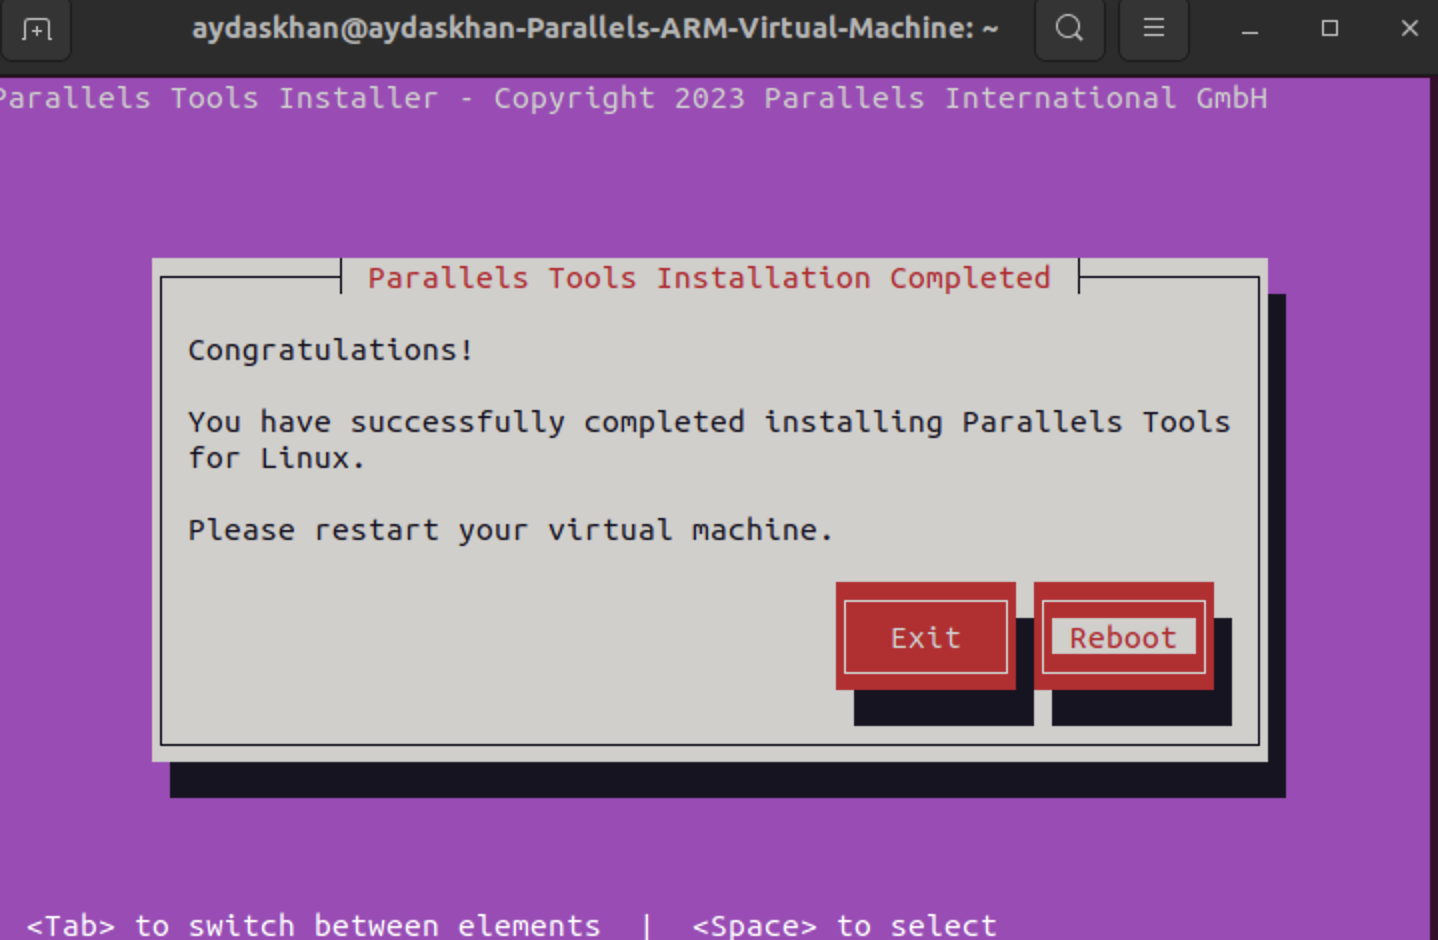
Once the system reboots, you should have all the Mac <> VM integration features available to you.
Was this article helpful?
Tell us how we can improve it.