Migration Summary
Parallels RAS Migration Tool for Citrix Virtual Apps and Desktops (also referred to as RAS Migration Tool in this document) operates in two key steps.
The first is to export the configuration from the existing Citrix solution into a format that can be used in Parallels RAS.
The second is to import it into an existing Parallels RAS environment.
The application settings migrated include:
• Display Name
• Application Path
• Description
• Working Directory
• Start Menu Folder
• Command Line Executable
• Application Type
• Application Icon
• Application User/Group Filtering rules*
* - Both Citrix CVAD/DaaS and RAS have multiple methods of filtering. Currently, User/Group filtering is migrated as this is the most prevalent method. Additional Filtering rule migration inclusions may be included in future versions of the tool
The full process for using RAS Migration Tool is summarized below:

Prerequisites
Parallels RAS Migration Tool for Citrix Virtual Apps and Desktops is available for the community from GitHub here.
Citrix Virtual Apps and Desktops versions & components
• Citrix Virtual Apps and Desktops (CVAD) 1912 CU6 or later
• CVAD PowerShell cmdlets
• Microsoft PowerShell v5.1
Parallels RAS versions & components
• Parallels RAS 19 or later
• Parallels RAS PowerShell 19 or later
• Microsoft .Net Framework 4.5
• Microsoft PowerShell v5.1
Export Citrix configuration
The first part of the migration process creates an XML settings file of the applications configured within the Citrix Farm and converts the Citrix settings to the equivalent Parallels RAS settings.
The process makes use of the CVAD PowerShell cmdlets. The cmdlets are installed when Citrix Studio is installed and can also be installed directly from the installation media.
Run the following PowerShell command from a host that has access to a Citrix Delivery Controller to export these settings:
Example:
If the -ddc parameter is not specified, the script will assume it is being run from a delivery controller and attempt to connect to the local host. The file applications.xml is saved to the folder at the specified path.
Install Parallels RAS components
If you are installing a new Parallels RAS environment, follow the guidance below to install the management components.
- Create the required components using a supported Windows operating system (check the Administrator's Guide for the version of Parallels RAS you are using here: https://www.parallels.com/products/ras/resources/.
- Download the Parallels RAS installer from https://www.parallels.com/products/ras/download/links/.
- Deploy Parallels RAS components following the installer steps.
- Configure a Parallels RAS Farm and activate it using your license key (a trial can also be used).
Installing Parallels RAS Agents
If you are deploying the Parallels RAS Agents to existing VMs (either the current Citrix Virtual Delivery Agents (VDAs) for testing, or new hosts based on the same template image currently in use by the VDAs), you can follow the simple wizard-driven process described in the Parallels RAS Administrator's Guide (open the administrator’s guide and look for "Add an RD Session Host."). Parallels RAS installs all the required agents and settings for you.
Part of the of the wizard-driven process allows you to assign hosts to groups. You should create a specific group for the imported hosts. This group can be selected once the applications have been imported to ensure that the correct application is re-launched on the appropriate host.
As soon as the Parallels RAS Agents are installed on the target hosts and their status is verified, the hosts are ready to accept connections.
Import the migrated configuration into Parallels RAS
Enure you have installed Parallels RAS ready to receive the migrated applications. For help with this, please see the admin guide here.
- Place the applications.xml file into the folder where you placed the RAS Migration Tool files.
- Launch PowerShell and navigate to the folder containing RAS Migration Tool.
- In the PowerShell console window, execute the PrepareImport.ps1 script as shown: ".\PrepareImport.ps1 -XmlPathApplications .\applications.xml"
- Running this script will generate an ImportToRas.ps1 script along with the application icons in an icons folder. ImportToRas.ps1 can be then modified to your needs if required. If the script is going be executed on a different host, the icons folder must be available there too.
- From a host that has the Parallels RAS PowerShell component installed, place both the ImportToRas.ps1 script and the icons folder in the same location and run the script as shown: ".\ImportToRas.ps1"
- When prompted, provide your Parallels RAS server (the Primary Connection Broker) hostname or IP address and administrator credentials.
Note: The minimum supported Parallels RAS version is 19.0.
Reconfigure any remaining settings.
For this version of RAS Migration Tool, only application settings are imported into Parallels RAS. Features such as Zones and Server configuration are not configured. The published applications are placed in the Default Site within Parallels RAS and will be usable following import, providing the applications are present on the VM in the same folder structure.
It is advisable to use a group to collate hosts of the same build together. This group can be selected by going to the Publishing category, selecting a published application, and switching to the Publish From tab.
Allow access to existing Citrix VDAs (optional test)
For a migration, we recommend that Parallels RAS is installed on a freshly built operating system. However, if you wish to test the Parallels RAS Agents in a non-production environment with hosts which are already acting as Citrix VDAs, some extra steps are needed to allow access to these hosts as Citrix restricts access to connections made by their broker by default.
1 Add non-admin users to the "Direct Access Users" group. When the Citrix VDA is installed on a machine, non-administrators can no longer remotely connect directly to the host without using the Citrix HDX Broker. A new local group called Direct Access Users is created on each VDA. Add your non-administrator users to this local group so they can connect directly to the machine.

2 Enable non-published applications to be launched
By default, Citrix limits the launching of applications to those initiated by the Citrix HDX Broker. A Group Policy setting can be changed to alter this. This can be set from Citrix Studio itself.
- Open Citrix Studio and navigate to Policies. On the top right, select Create Policy.
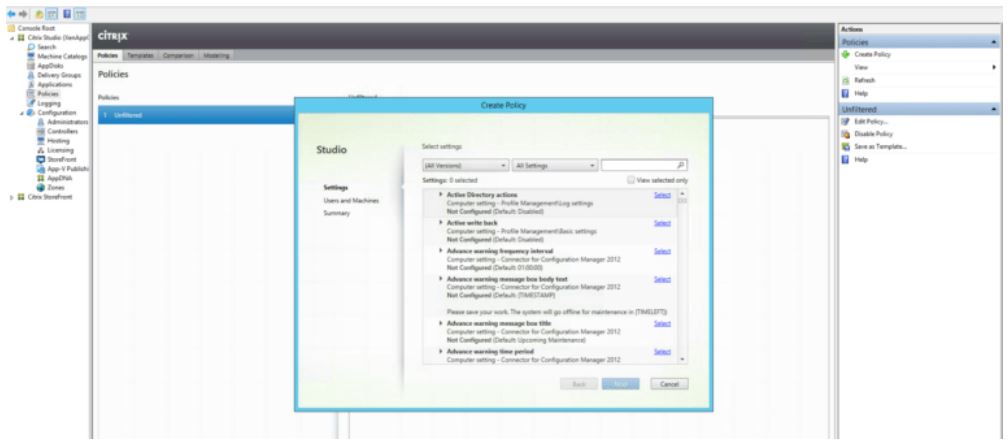
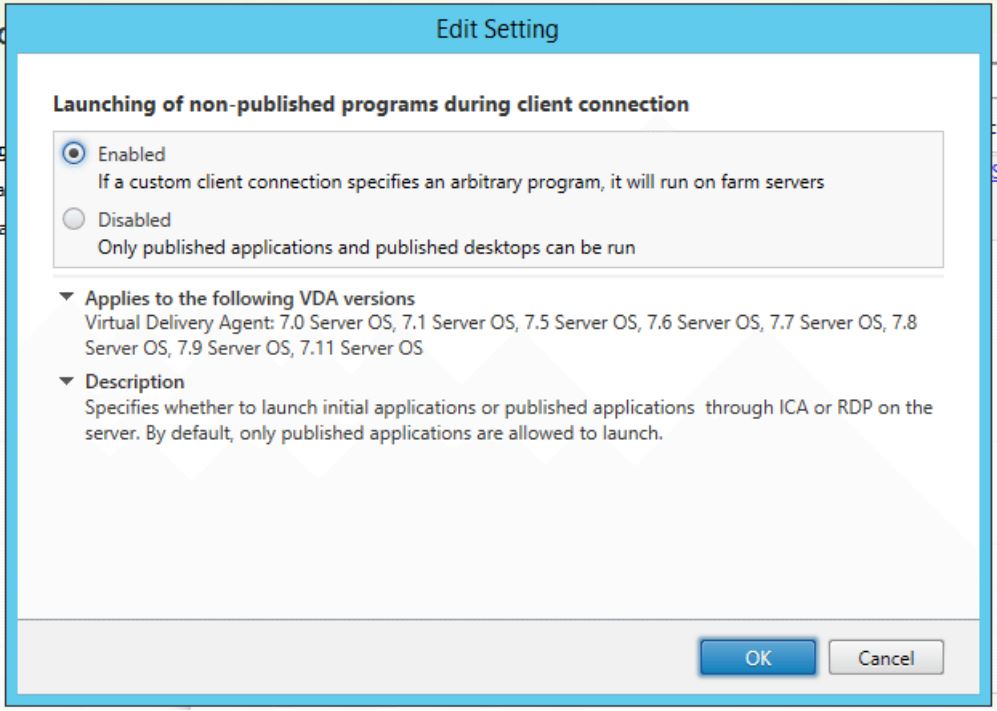
- In the Search field at the top, enter Launching of non-published programs during client connection and select this policy.
- Chose Enabled
- Name the Policy and select Enable Policy.
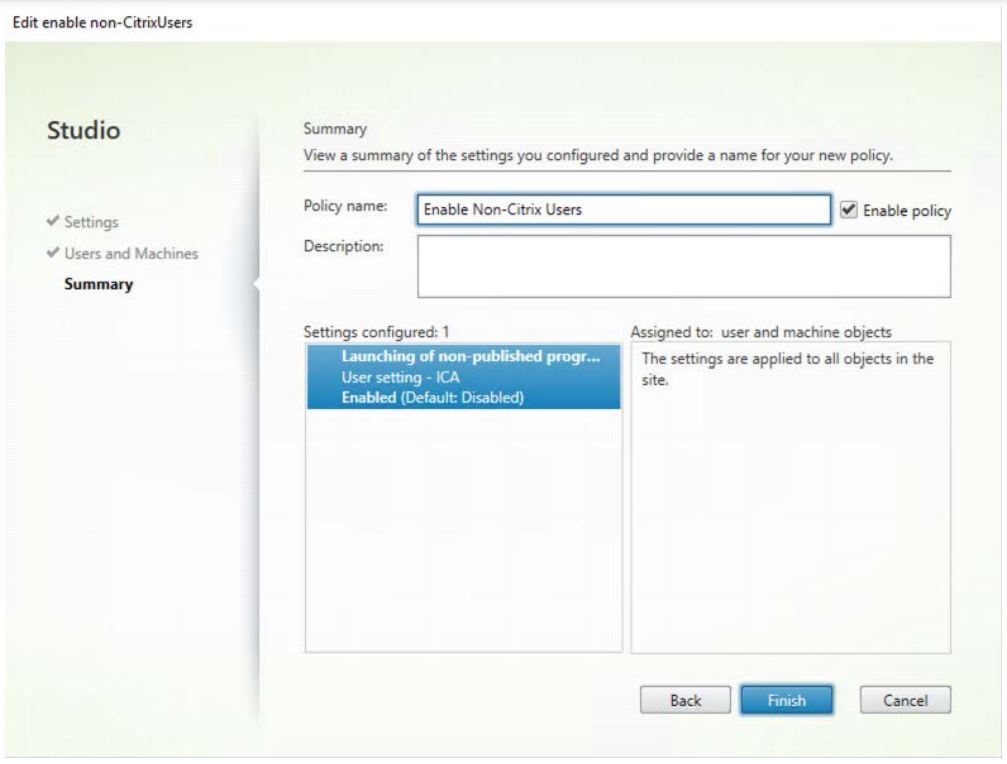
- Ensure the Policy takes precedence by selecting Higher Policy on the right-hand side. Then either wait until Group Policy updates or force the Policy to update by running gpudate /force.
Test migration
As soon as the Parallels RAS Agents are installed on the target hosts and their status is verified, the servers are ready to host RDP connections. The Agent state can be verified within the Parallels RAS Console, where the host will have a status of OK.
Using Parallels Client, connect to the Parallels RAS Secure Gateway and open one of the migrated applications to test.
Providing the applications are present on the host in the same folder structure as there were in the CVAD configuration, the published applications should now launch within Parallels RAS.
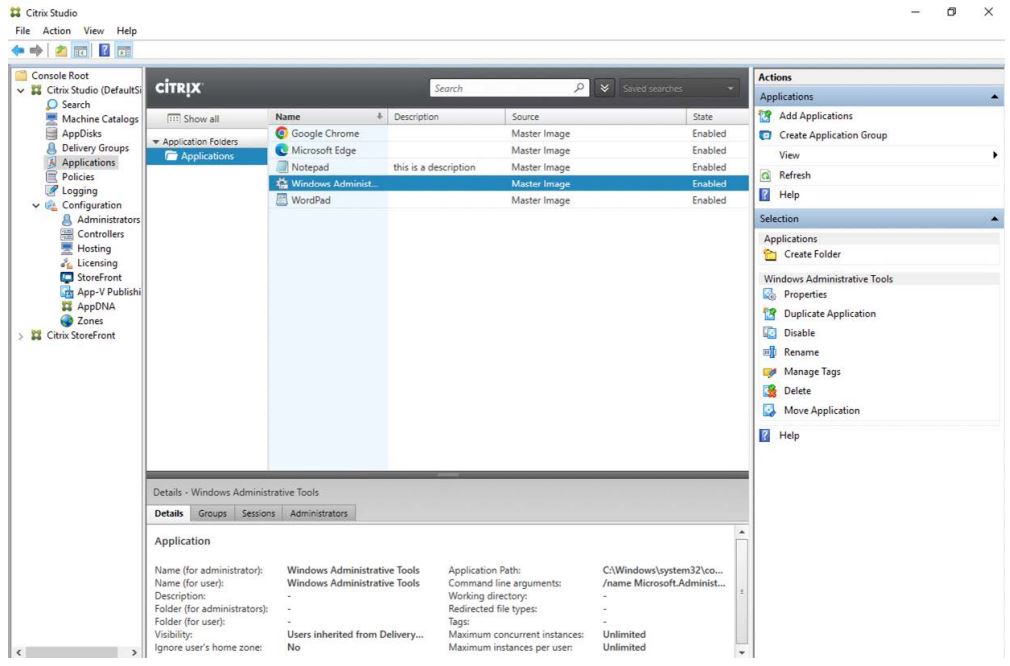
Citrix Studio console before migration
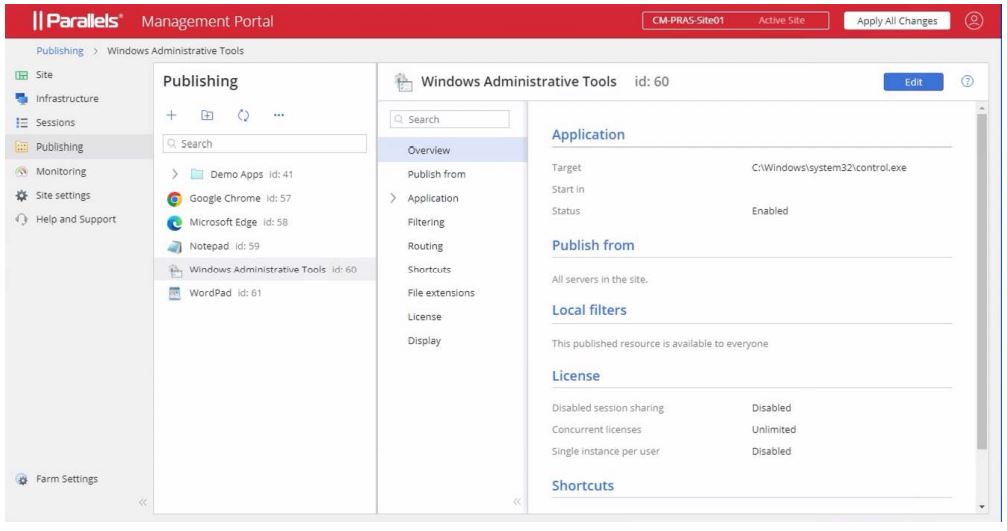
Parallels RAS Management Portal after migration
Uninstalling Citrix components
In general, uninstalling Citrix components should be carried out via the standard Windows tools. For more information Citrix documentation should be referenced. At the time of writing this documentation can be found here:
https://docs.citrix.com/en-us/citrix-virtual-apps-desktops/install-configure/remove.html
Was this article helpful?
Tell us how we can improve it.