Pre-requisites:
The following pre-requisites should be in place to join a Tenant to a Tenant Broker using PowerShell.
- Tenant Broker
- Farm which will be joining Tenant Broker as a Tenant
- RAS PowerShell module installed on the Farm
To view and download the new Parallels RAS PowerShell Guide version 2.0, visit Parallels RAS PowerShell
Joining a Tenant to a Tenant Broker using PowerShell
To join a Tenant to a Tenant Broker using PowerShell the following process should be followed:
1. Log in to the Tenant Broker.
2. In the RAS Console, navigate to Farm > Tenants.
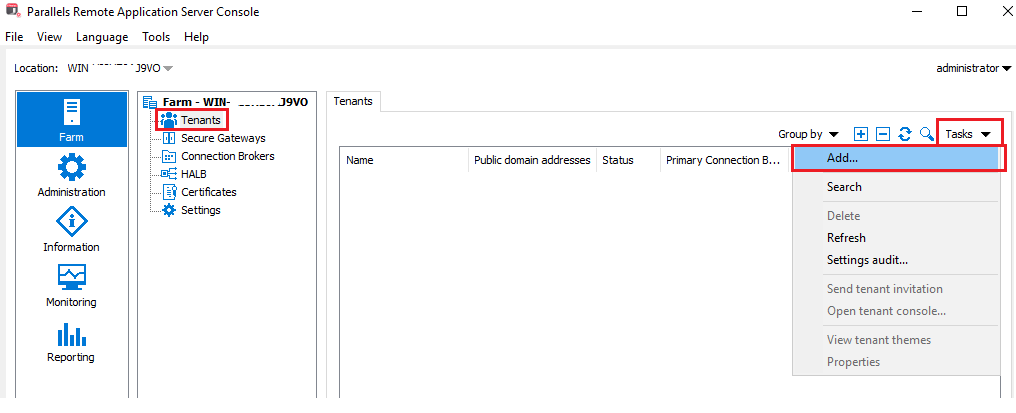
3. Click Tasks > Add.
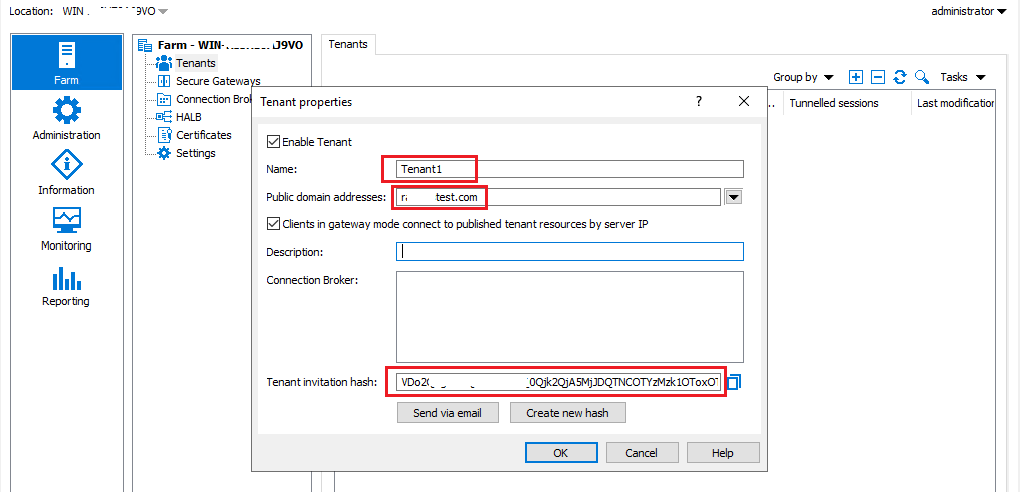
4. In the Tenant properties dialog, specify the following:
• Name: Type a Tenant name (this can be any name that you like).
• Public domain address: If you've already assigned a public domain address to the Tenant, specify it here. If not, you can leave it blank.
Note: The address is not required for the Tenant to join the Tenant Broker. However, without the address specified here, end users will not be able to connect to the Tenant, so you will need to come back and fill it in later. For details, see Assign a public domain address.
• Description: Type an optional description.
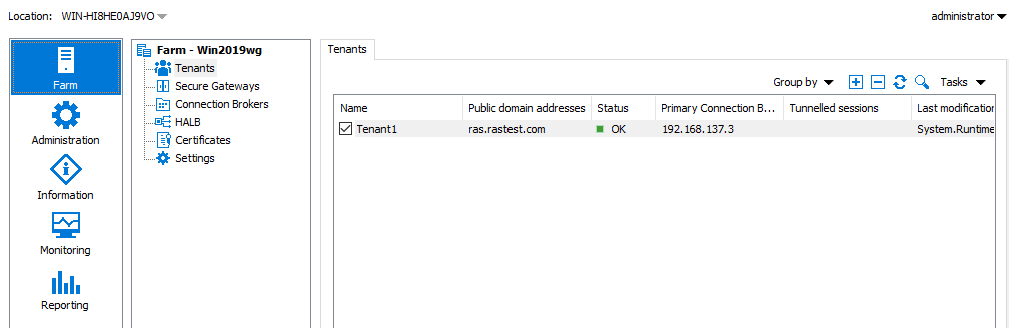
• Connection Brokers: This field is disabled and will be populated automatically when the Tenant joins the Tenant Broker. See more in Tenant configuration.
• Tenant invitation hash: This is the hash that the admin of the Tenant Farm will need to use to join the Tenant Broker. A hash is generated automatically when you open this dialog. To generate a new hash, click Create new hash.
5. Log in to the Farm which will be joining as a tenant.
6. Use PowerShell to perform the following commands:
- Import-Module RASAdmin
- New-RASSession -Server "tenant.company.dom"
- Invoke-RASTenantBroker -Join -HashKey "%TenantInvitationHash%" -TenantBroker "%TenantBrokerName%"
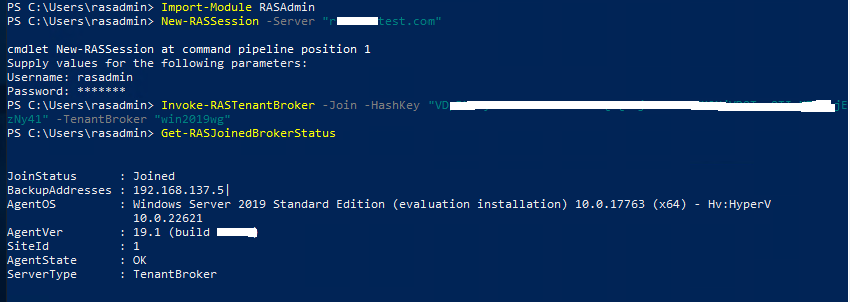
7. Once the Tenant joins Tenant Broker "Get-RASJoinedBrokerStatus" can be used to confirm the status.

For additional Parallels RAS documentation and resources, please visit https://www.parallels.com/products/ras/resources.
Was this article helpful?
Tell us how we can improve it.