Introduction
To be able to run the Parallels Configuration Manager Proxy (CM Proxy) Configuration Utility you will need to have a domain user with a set of permissions in different areas:
- DCOM Remote Activation permissions are required to enable communication of CM Proxy configuration utility with SMS Provider using DCOM.
- Full Administrator rights in SCCM are required to make changes in WMI objects in SCCM during CM Proxy configuration, like retrieving site information, registering CM Proxy certificates, etc.
- Specific permissions on the following containers in Active Directory:
- System/ParallelsServices - to create/modify/set permissions on Service Connection Point AD objects.
- ProgramData/Parallels - to create/modify/set permissions on AzMan (Authorization manager) store objects.
This article will provide you with a step-by-step guidance for preparing a domain user with necessary permissions to run the CM Proxy Configuration Utility.
Notes
- You can configure necessary permissions manually, as described below.
- Or you can use Parallels Mac Management Server Tools to automate this task.
Create a Domain User
The user configuring Parallels Configuration Manager Proxy must be a domain user. To create a domain user:
- On the computer running Active Directory, click Start > Administrative Tools > Server Manager:


- In the Server Manager window, navigate to Roles / Active Directory Domain Services / Active Directory Users and Computers /
<domain-name>. - Right-click Users and select New > User in the context menu:

- In the New Object - User dialog, type Full name, User logon name, and click Next:

- Type the password in Password and Confirm password fields and click Next:

- Click Finish.
Local Administrator Rights on the Computer Running the Parallels Configuration Manager Proxy
The user used for running Parallels Configuration Manager Proxy must have administrative rights on the computer where the Parallels Configuration Manager Proxy will be installed:
- Important note about doing this on a domain controller:
- Note that joining a user to the Administrators group on a Domain Controller gives that user Domain Admin privileges.
- The issue is that once a machine is a domain controller, it no longer has anything known as a local account. Any account created on that system is a domain account.
- That's why Parallels Configuration Manager Proxy should never be installed on a Domain Controller.
- Log into the computer that will run the Proxy, click Start > Computer Management console:

- In the Computer Management console navigate to Computer Management / System Tools / Local Users and Groups / Groups, select Administrators, right-click it, and then click Properties in the context menu:

- In the Administrators Properties dialog click Add.. button:

- Find the domain user which you have created for running the CM Proxy, and click OK button:

- Click OK button to close the dialog.
DCOM Remote Activation Permission
The user must have the DCOM Remote Activation permission:
- On the computer where the SMS Provider is installed, click Start > Administrative Tools > Component Services:


- In the Component Services window, navigate to Console Root / Component Services / Computers / My Computer / DCOM Config. Scroll down to Windows Management and Instrumentation, right-click it, and then click Properties in the context menu:

-
Click the Security tab. The Launch and Activation Permissions section will have either the Use Default or the Customize option selected depending on your server configuration. Set the DCOM Remote Activation permission for the user as follows:
- If the Customize option is selected,
- click the Edit button:

- click the Add... button:

- Find the domain user which you have created for running the CM Proxy, and click OK button:

- Grant the user Remote Activation permission:

- Click OK to save changes and close the properties dialog.
- The DCOM Remote Activation permissions are now configured. You can skip the remaining steps in this section (they describe the scenario where the Use Default option is selected in Windows Management and Instrumentation > Security).
- click the Edit button:
- If the Use Default option is selected, then you need to configure the Remote Activation permissions in the COM Security settings on this computer.
- Press Cancel button to close Windows Management and Instrumentation Properties dialog:

- In the Component Services window, navigate to Console Root / Component Services / Computers. Right-click My Computer and click Properties in the context menu:

- Click the COM Security tab. In the Launch and Activation Permissions section, click Edit Default:

- Click the Add... button.
- Find the domain user which you have created for running the CM Proxy, and click OK button:

- Grant the user Remote Activation permission:

- Click OK to close the Launch and Activation Permission dialog.
- Click OK to close the dialog.
- Press Cancel button to close Windows Management and Instrumentation Properties dialog:
Administrative Rights in SCCM
The user must have Full Administrator rights in Configuration Manager:
- Log into the computer running the Configuration Manager console.
- In the Configuration Manager console, navigate to Administration / Overview / Security.
- Right-click Administrative Users and click Add User or Group in the context menu:


- In the Add User or Group dialog, click Browse, find the domain user that you created earlier, and then click OK:


- The user will appear in the User or group name field in the Add User or Group dialog.
- Click the Add... button in the Assigned security roles section.
- In the Available security roles list, select Full Administrator and click OK:

- Click OK to close the Add User or Group dialog:


Permissions in Active Directory
The user configuring Parallels Configuration Manager Proxy musthave the necessary permissions in Active Directory. These permissions are required to create Parallels Mac Management-specific containers in AD and to manipulate data in these containers.
To grant the permissions:
-
Open ADSI Edit by clicking Start > Administrative Tools > ADSI Edit:


Permissions on System/ParallelsServices Container
- Check if the following container exists: DC=
<domain>/ DC=<com>/ CN=System / CN=ParallelsServices:

- If the ParallelsServices container doesn't exist:
- In this case this container will be created by the PMM configuration utility, so it will need to have the necessary permissions for doing this.
- In the ADSI Edit console, navigate to DC=
<domain>/ DC=<com>container. Scroll down to System, right-click it, and then click Properties in the context menu:

- In the System container properties dialog click Add... button:

- Find the domain user which you have created for running the CM Proxy Configuration Utility, and click OK button:

- Grant the user the Create All Child Objects and Read permissions on the CN=System container, then click Advanced button:

- In the Advanced Security Settings for System dialog, ensure the user is selected and click Edit button:

- In the Permission Entry for System dialog, choose This object and all descendant object in the Applies to combo-box, then click OK button:

- Click OK button in the Advanced Security Settings for System dialog:

- Click OK in the properties dialog to complete granting necessary permissions:

- If the ParallelsServices container exists, then it means it was created earlier, either by the PMM configuration utility, or manually. You need to ensure that the CM Proxy configuration utility will be able to work with this container:
- Make sure the user has following permissions, as described below:
- Read, Write, and Create All Child Objects permissions on ParallelsServices container.
- Full Control permission on the ParallelsServices / PmaConfigMgrProxy-
<site_code>container.
- In the ADSI Edit console, navigate to DC=
<domain>/ DC=<com>/ System container. Scroll down to ParallelsServices, right-click it, and then click Properties in the context menu:

- In the ParallelsServices container properties dialog click Add... button:

- Find the domain user which you have created for running the CM Proxy Configuration Utility, and click OK:

- Make sure the user have Read, Write, and Create All Child Objects permissions granted, then click OK to close the dialog:

- In the ADSI Edit console, navigate to DC=
<domain>/ DC=<com>/ CN=System / CN=ParallelsServices container. Scroll down to PmaConfigMgrProxy-<site_code>container, right-click it, and then click Properties in the context menu:

- Make sure the user have Full control permissions granted, then click OK to close the dialog:

- Make sure the user has following permissions, as described below:
- Now the user created for running the CM Proxy Configuration Utility has all the necessary permissions to work with System / ParallelsServices container.
Permissions on ProgramData/Parallels Container
- Check if the DC=
<domain>/ DC=<com>/ CN= Program Data / CN=Parallels container exists:

- If the Parallels container doesn't exist:
- In this case this container will be created by the PMM configuration utility, so it will need to have the necessary permissions for doing this.
- In the ADSI Edit console, navigate to DC=
<domain>/ DC=<com>container. Scroll down to Program Data, right-click it, and then click Properties in the context menu:

- In the Program Data container properties dialog click Add..:

- Find the domain user which you have created for running the CM Proxy Configuration Utility, and click OK:

- Grant the user the Create All Child Objects and Read permissions on the CN=Program Data container, then click Advanced button:

- In the Advanced Security Settings for Program Data dialog, ensure the user is selected and click Edit button:

- In the Permission Entry for Program Data dialog, choose This object and all descendant object in the Applies to combo-box, then click OK button:

- Click OK button in the Advanced Security Settings for System dialog:

- Click OK in the properties dialog to complete granting necessary permissions:

- If the CN=Parallels container exists:
- Check if the CN=Parallels / CN=Parallels Management Suite container exists:

- If the CN=Parallels / CN=Parallels Management Suite container doesn't exist:
- In the ADSI Edit console, navigate to DC=<domain> / DC=<com> / CN=Program Data container. Scroll down to Parallels, right-click it, and then click Properties in the context menu:

- In the Parallels container properties dialog click Add..:

- Find the domain user which you have created for running the CM Proxy Configuration Utility, and click OK:

- Grant the user the Create All Child Objects and Read permissions on CN=Parallels container, then click Advanced button:

- In the ADSI Edit console, navigate to DC=<domain> / DC=<com> / CN=Program Data container. Scroll down to Parallels, right-click it, and then click Properties in the context menu:
- If the CN=Parallels / CN=Parallels Management Suite container exists,
- In the ADSI Edit console, navigate to DC=<domain> / DC=<com> / CN=Program Data / CN=Parallels container. Scroll down to Parallels Management Suite, right-click it, and then click Properties in the context menu:

- In the Parallels Management Suite container properties dialog click Add..:

- Find the domain user which you have created for running the CM Proxy Configuration Utility, and click OK:

- Grant the user the Read, Write, and Create All Child Objects permissions on CN=Parallels Management Suite container, then click OK:

- In the ADSI Edit console, navigate to DC=<domain> / DC=<com> / CN=Program Data / CN=Parallels container. Scroll down to Parallels Management Suite, right-click it, and then click Properties in the context menu:
- Check if the CN=Parallels / CN=Parallels Management Suite container exists:
- Now the user created for running the CM Proxy Configuration Utility has all the necessary permissions to work with Program Data / Parallels container.
Permissions to Read/Write Service Principle Name
The user configuring Parallels Configuration Manager Proxy must have permissions to read/write Service Principle Name. These permissions are required for the RBAC functionality. The ParallelsConfiguration Manager Proxy service account must have a registered Service Principle Name (SPN) for Kerberos connections. By default (withsome exceptions) users are not permitted to register SPN to their own accounts.
To grant the permissions:
-
Open ADSI Edit by clicking Start > Administrative Tools > ADSI Edit:


- Locate the required object:
- If you specify a user as a service account during the configuration, you should locate this user object:

Note: The user object you select in this step must be the object of the user that will be used to run the service, not of the user that will be used to configure it. If you'll be using the same user to configure and to run the Parallels Configuration Manager Proxy service, then select the domain user object that you created in previous steps. - If you choose
LocalSystemas a service account during the configuration, you should locate the computer object you are running Proxy on:

Note: Following screenshots are presented for the case of the configuring necessary permissions for user account. For the other case the process will be the same.
- If you specify a user as a service account during the configuration, you should locate this user object:
- Right-click the object, select Properties in the context menu, and then click the Security tab in the user properties dialog:

- Add the user that will be configuring the Parallels Configuration Manager Proxy to the Group or user names list and then click the Advanced button:


- In the Advanced Security Settings dialog, select the user that you added to the list in the previous step and click the Edit button:

- In the Permission Entry dialog, click the Properties tab.
- In the Apply to drop-down list, select This object only:

-
In the Permissions list, select the following permissions:
- Read servicePrincipalName
- Write servicePrincipalName

- Click OK, then OK, and then OK again to close all dialogs.
MS SQL Server Permissions
The user configuring Parallels Configuration Manager Proxy must have necessary permissions in MS SQL Server. These permissions are needed to create and use a database storing the Parallels Mac Management data.
- Run SQL Server Management Studio by clicking Start > All Programs > Microsoft SQL Server Management Studio:

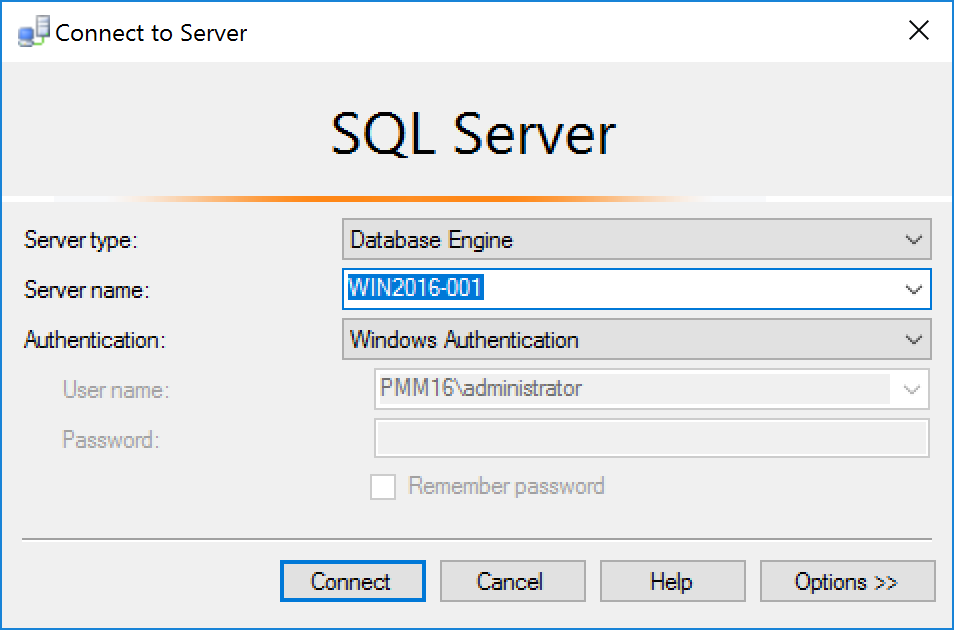
- Connect to the SQL server:
- Verify that the user that will be configuring the Parallels Configuration Manager Proxy exists in Security / Logins:

- If the user doesn't exist, add the user to the Logins list. To do so, right-click Logins and then click New Login:

- Select Windows authentication and specify the Login name as domain\username, or click Search to search for the user. Click OK when done:

- Assign the user to the dbcreator and securityadmin roles:
- Navigate to Security / Logins, right-click the user that will configure Parallels Configuration Manager Proxy, and then click Properties in the context menu.
- In the left pane, click Server Roles. In the right pane, select dbcreator and securityadmin server roles:

- Grant Permissions to the SCCM Database:
- In the left pane, click User Mapping.
- In the right pane, select the "CM_
<site_code>" database (select the Map checkbox) - Select the following roles in the Database role membershiplist:
- db_datareader
- db_owner

- Grant Permissions to the PMM Database:
- Note: If you have previously configured Parallels Mac Management Proxy on this site, then the Parallels Mac Management database should already exist in this SQL Server instance. To verify this, connect to the SQL Server and look for a database named "PMM_
<site_code>" (where<site_code>is your SCCM site code). If a database with such a name exists, then perform the steps below. If the database doesn't exist, skip to the next section. - In the left pane, click User Mapping.
-
In the right pane, select the "PMM_
<site_code>" database (select the Map checkbox) and then select the following roles in the Database role membershiplist:- db_datareader
- db_datawriter
- db_ddladmin
- db_owner
- public

- Note: If you have previously configured Parallels Mac Management Proxy on this site, then the Parallels Mac Management database should already exist in this SQL Server instance. To verify this, connect to the SQL Server and look for a database named "PMM_
- Click OK to apply changes and to close the dialog.
Administrative Rights in Authorization Manager
If the Parallels Configuration Manager Proxy has been configured previously by another user, and the Authorization Store exists, the user configuring the Proxy must be assigned to the Administrator role in Authorization Manager. To assign the user to the Administrator role:
- Start Microsoft Management Console (run mmc.exe).
- In the MMC, click File > Add/Remove Snap-in...
- Select Authorization Manager in the Available snap-ins list, click Add >, then click OK.
- Right-click Authorization Manager and then click Open Authorization Store...:

- Select Active Directory or Active Directory Application Mode (ADAM) and click Browse:

- Select CN=Authorization Store,CN=Parallels Management Suite,CN=Parallels,CN=Program Data, DC=
<domain>,DC=<com>.Click OK and OK again to close the Open Authorization Store dialogs:

- Expand Authorization Manager in the left pane, right-click Authorization Store, and then click Properties:

- Click the Security tab. In the Authorization Manager user role drop-down list, select Administrator, and click Add:

- Find the domain user which you have created for running the CM Proxy Configuration Utility, and click OK:

- Now user is added to the Users and groups that are assigned to this role list:

- Click OK to save the changes and close the dialog.
Was this article helpful?
Tell us how we can improve it.