Information
DumpPrinters utility is a troubleshooting tool which is designed to collect all the information about printers in order to troubleshoot issues related to printer redirection and incorrect printout.
When troubleshooting printer redirection issues tool should be executed on the client side only. For incorrect printout issues, tools should be executed on both: client side and in the remote session.
Usage - Client side
-
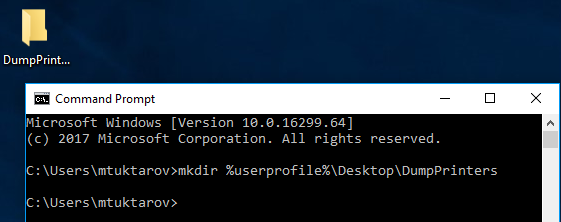
Start Command Prompt and execute
mkdir %userprofile%\Desktop\DumpPrintersAs a result DumpPrinters folder will be created on your Desktop:
-
Download DumpPrinters utility on the local machine and place it in the created DumpPrinters folder.
-
In the Command Prompt execute
%userprofile%\Desktop\DumpPrinters\DumpPrinters.exe --verbose --all --xml > %userprofile%\Desktop\DumpPrinters\local_all.xml
Note: if you are asked to collect information about specific printer, then use the command below:
%userprofile%\Desktop\DumpPrinters\DumpPrinters.exe --verbose --all --xml --printer-name="<printer_name>" > %userprofile%\Desktop\DumpPrinters\local_all.xml
where <printer_name> is the name of the printer. Note that tool supports regular expressions. For example, following commands are relevant to collect information about printer named Generic / Text Only:
%userprofile%\Desktop\DumpPrinters\DumpPrinters.exe --verbose --all --xml --printer-name=".+Text.+" > %userprofile%\Desktop\DumpPrinters\local_all.xml

%userprofile%\Desktop\DumpPrinters\DumpPrinters.exe --verbose --all --xml --printer-name=".+Only" > %userprofile%\Desktop\DumpPrinters\local_all.xml

%userprofile%\Desktop\DumpPrinters\DumpPrinters.exe --verbose --all --xml --printer-name="Generic.+" > %userprofile%\Desktop\DumpPrinters\local_all.xml

%userprofile%\Desktop\DumpPrinters\DumpPrinters.exe --verbose --all --xml --printer-name="Generic / Text Only" > %userprofile%\Desktop\DumpPrinters\local_all.xml
As a result local_all.xml file will be created in the DumpPrinters folder on your Desktop:

Open this file and make sure that it is not empty.
- Compress and send this file to Parallels Support team when it is requested.
Usage - Server side
-
For convenience publish Desktop of the destination resource (RD Session Host, PC Agent or Guest Agent):
-
Open Remote Application Server Console.
-
In the left pane navigate to Publishing and click on Add button.
-
Choose Desktop and publish the Desktop of required resource (RD Session Host, PC Agent or Guest Agent).
-
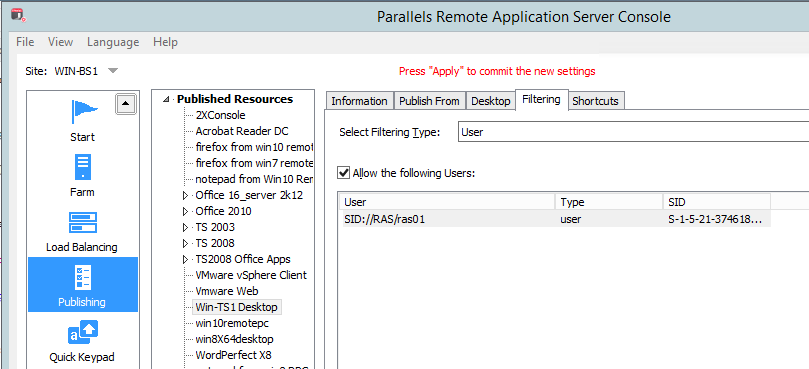
Once Desktop is published in the right pane switch to Filtering tab and add only user in question in order to prevent all other users from seeing this published Desktop:
-
Hit Apply button in the bottom-right corner to save the changes.
-
-
On the client side open Parallels Client and launch published Desktop.
-
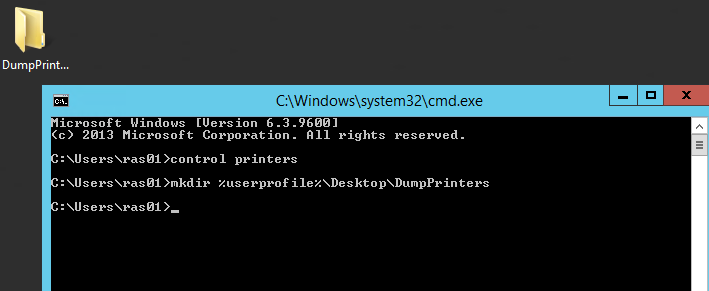
In the remote session start Command Prompt and execute:
control printersMake sure that required printer has been successfully redirected and is available to use.
-
Execute:
mkdir %userprofile%\Desktop\DumpPrintersAs a result DumpPrinters folder will be created on the published Desktop:
-
Download DumpPrinters utility and place it in the created DumpPrinters folder on the published Desktop.
-
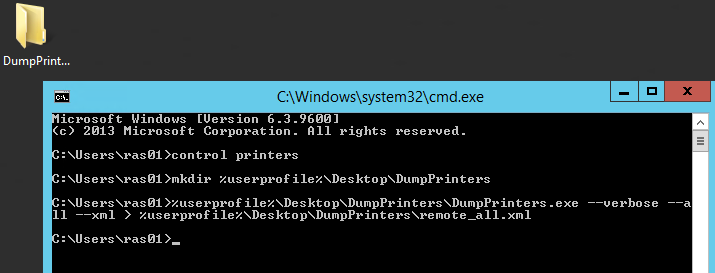
In the Command Prompt execute:
%userprofile%\Desktop\DumpPrinters\DumpPrinters.exe --verbose --all --xml > %userprofile%\Desktop\DumpPrinters\remote_all.xml
Note: if you are asked to collect information about specific printer, then use the command below:
%userprofile%\Desktop\DumpPrinters\DumpPrinters.exe --verbose --all --xml --printer-name="<printer_name>" > %userprofile%\Desktop\DumpPrinters\local_all.xml
where <printer_name> is the name of the printer. You may use regular expressions discussed below here as well. As a result remote_all file will be created in the DumpPrinters folder on the published Desktop:
Open this file and make sure that it is not empty.
-
Copy this file on the local Desktop.
-
Compress and send this file to Parallels Support team when it is requested.
Was this article helpful?
Tell us how we can improve it.