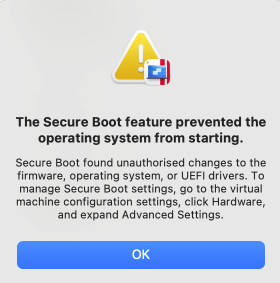
If you are encountering the message "The Secure Boot Feature prevented the operating system from starting" when attempting to launch your virtual machine:
This issue has been resolved in Parallels Desktop For Mac 26.3.3 and Parallels Desktop For Mac 20.4.2.
The issue has also been addressed in Parallels Desktop Apple Store version 1.26.3, which should be available from the App Store on your Mac or directly via the Parallels Desktop Application by right-clicking on the Parallels Desktop icon in the Mac Dock > Check for Updates while it is running. Please make sure to Shut Down any running virtual machines before proceeding.
If you encounter the error "The Secure Boot feature prevented the operating system from starting" when launching your Windows 11 virtual machine, please update Parallels Desktop to version 26.3.3.
Additionally, you can check the workaround options below:
Important:
If your Windows virtual machine uses BitLocker encryption, please ensure you have your BitLocker recovery key readily available before proceeding. After applying either workaround below, Windows may prompt for this key during startup. You can check how to locate your recovery key in this Microsoft article
Before you start: Create a snapshot.
Before making any changes, we recommend creating a snapshot to preserve your current virtual machine state:
1. Right-click the Parallels Desktop icon in your Mac dock and select "Control Center."
2. In Control Center, right-click your virtual machine and choose "Manage Snapshots..."
3. Click "New..." to create a snapshot.
4. Close the snapshot window when finished.
• For more details on snapshots or reverting to a previous state, refer to KB 5691.
Option 1: Remove and re-add the TPM chip
Note: If this resolves the issue, please do not proceed to Workaround 2.
1. Right-click the Parallels Desktop icon in your Mac dock and select "Control Center."
2. Click the gear/cog icon next to your virtual machine.

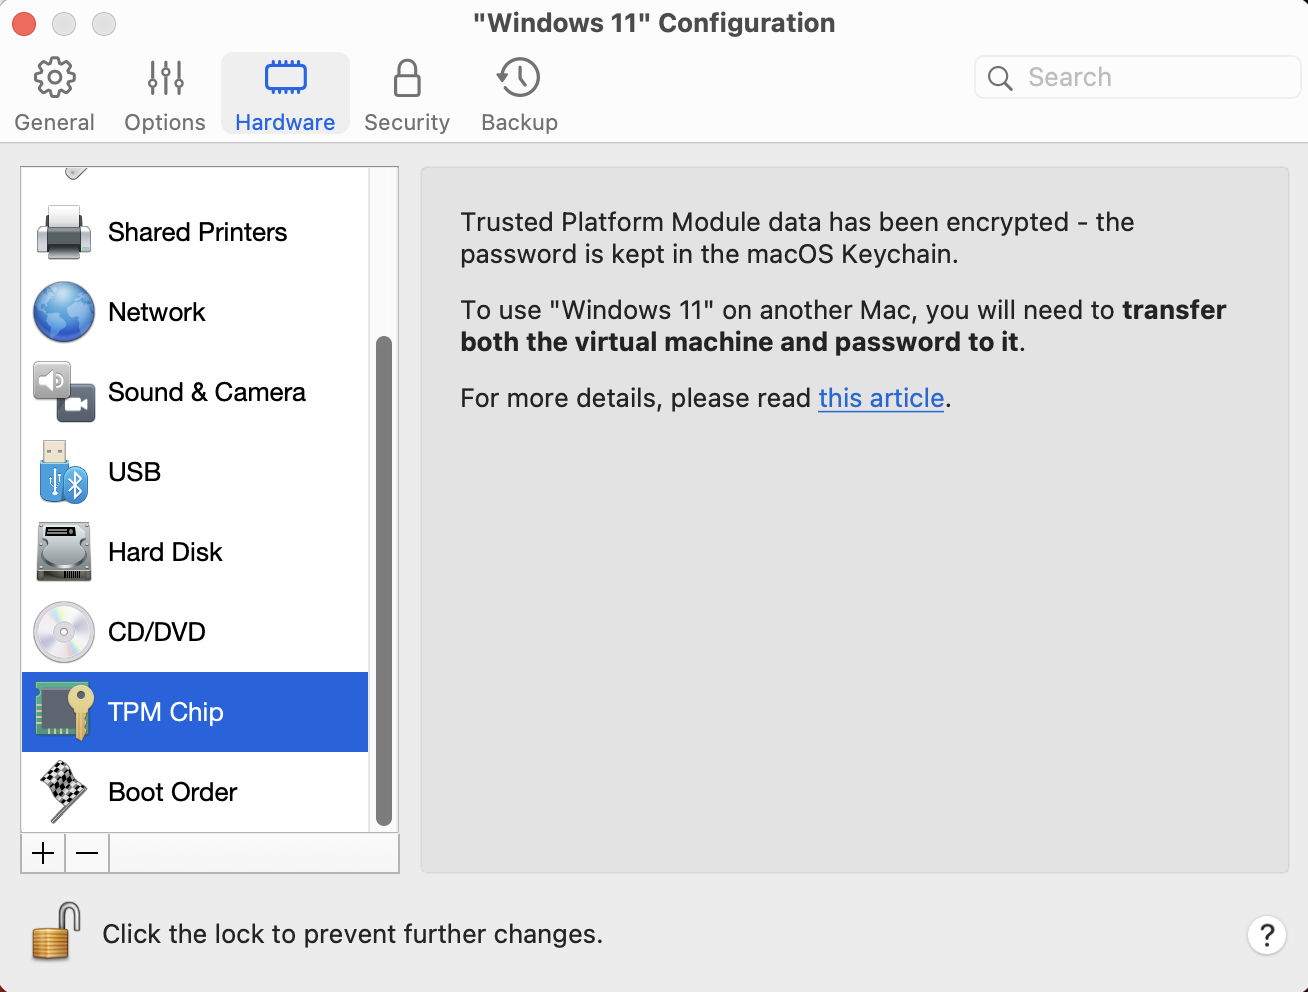
3. Select "Hardware."
4. Click "TPM Chip" in the left sidebar.
5. Click the "–" (minus) button at the bottom of the list to remove the TPM chip, then confirm by clicking "Remove."
6. Start the virtual machine. The virtual machine will Start but for better security, please proceed with the next steps.
7. Shut down the virtual machine completely.
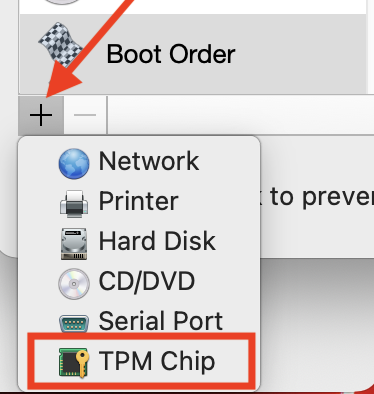
8. Return to "Hardware", click the "+" (plus) button, and select "TPM Chip" to re-add it.
9. Close the configuration window and start the virtual machine again.
Option 2: Disable Secure Boot via boot flag:
Note: Only proceed if Workaround 1 does not resolve the issue.
1. Right-click the Parallels Desktop icon in your Mac dock and select "Control Center."
2. Click the gear/cog icon next to your virtual machine.
3. Select "Hardware."
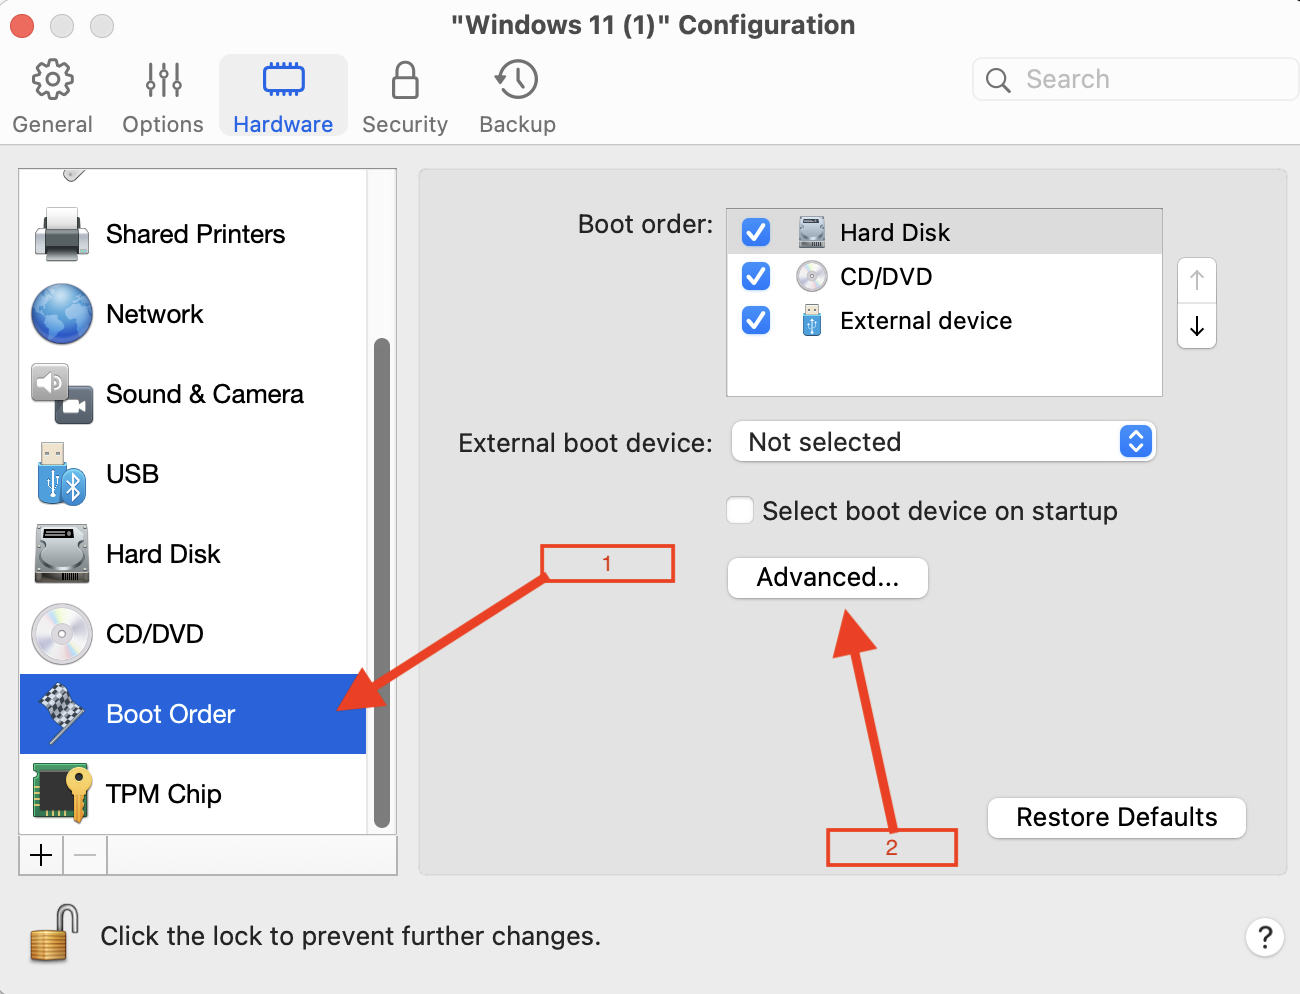
4. In the left sidebar, scroll down and click "Boot Order."
5. Click "Advanced..."
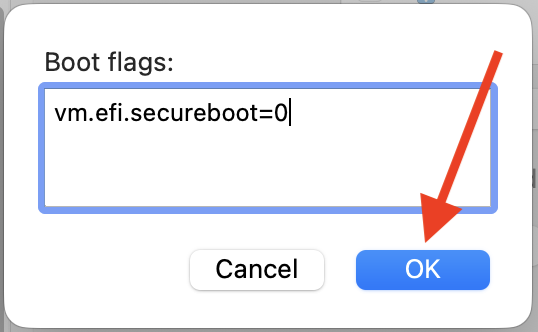
6. In the boot flags field, enter:
vm.efi.secureboot=0
7. Click "OK," then close the configuration window.
8. Start your virtual machine.
After applying either workaround, your virtual machine should start successfully.
If you continue to experience issues or have any questions, please let us know by opening a Support Ticket from your Parallels Account, refer to KB 6571.
Was this article helpful?
Tell us how we can improve it.