Information
Please note that Azure MFA Server on premises is not available for new deployments since July 1, 2019.
The below guide is a step by step configuration guide for Azure MFA which can be used as Second Level Authentication provider in Parallels RAS Environment deployed on Microsoft Azure on Infrastructure as a Service (IAAS).
Note: It is assumed that reader has a basic understanding of both Microsoft Azure and Parallels RAS. This guide will only focus on the basic configuration of Microsoft Azure MFA Server (on-premise) and configuration of Parallels Remote Application Server.
Pre-requisites and Assumptions
- At the moment we do support MFA Server on-premises only.
- An Azure account with Global Administrator role is required to download and activate MFA Server. Syncing with Azure AD (via AD Connect) or a custom DNS domain aren't required to set up an MFA Server which runs exclusively on-premises.
- Parallels RAS authenticates users with MFA Server using the RADIUS second level authentication provider. MFA Server thus needs to be configured to allow RADIUS client connections from the RAS server.
Document process flow
This article will take the reader through the following process to complete Azure MFA (RADIUS) configuration with Parallels RAS Second Level Authentication:
- Downloading and installing Azure MFA Server On-Premises
- Activating Azure MFA Server
- Configuring Azure MFA Server to support RADIUS
- Importing Users from Active Directory
- Validating configuration
- Configuring Parallels Remote Application Server
- Evaluation
Downloading and Installing Azure MFA Server On-Premises
1. Download the Azure Multi-Factor Authentication Server from the Azure portal:
- Sign in to Azure portal as a Global Administrator.
- On the left pane Azure Active Directory > MFA Server > Server settings.

- Select Download and follow the instructions on the download page to save the installer.
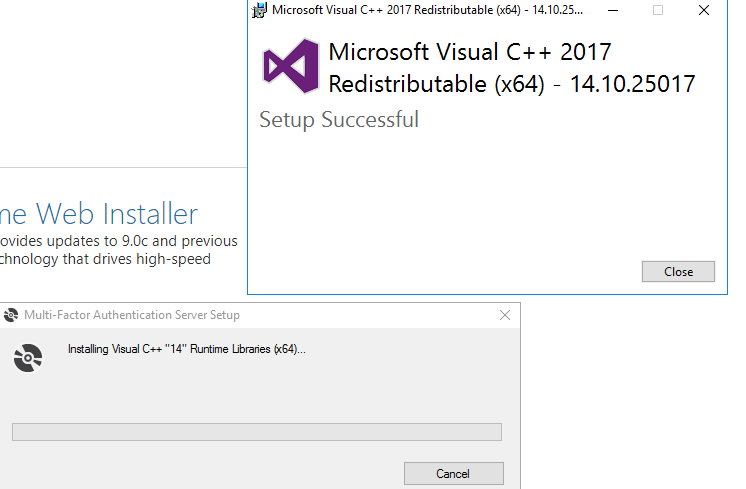
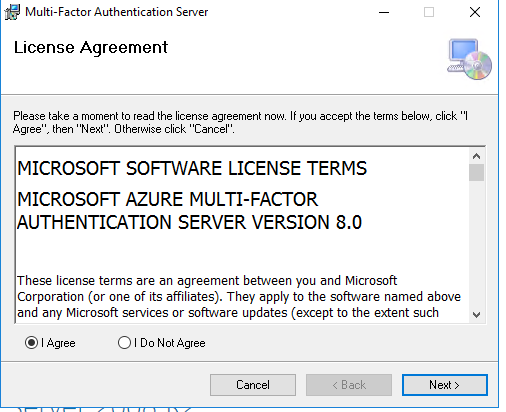
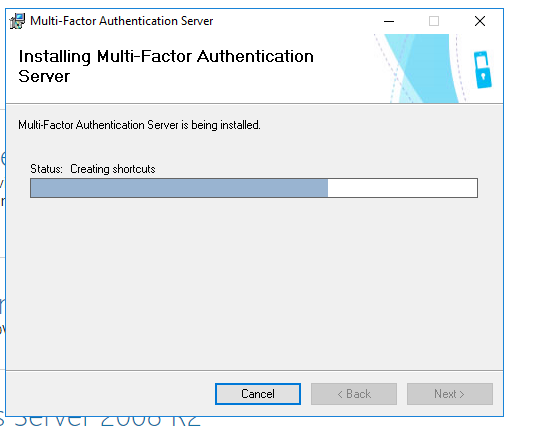
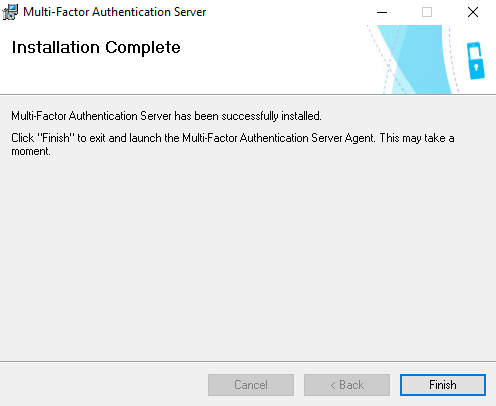
2. Run the installer, wait till it install packages (MS Visual C++, etc), accept EULA and proceed with the installation.
Activating Azure MFA Server
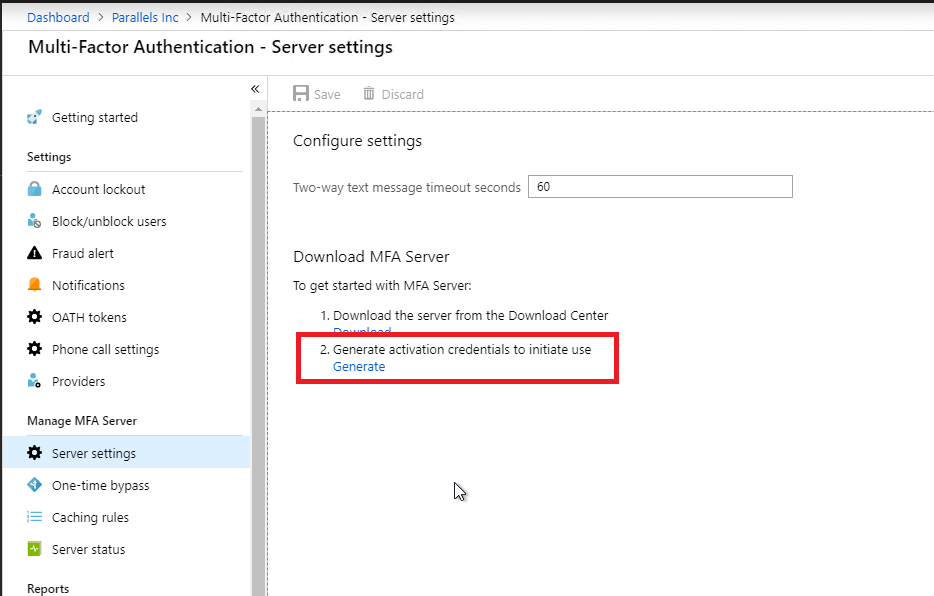
3. Generate credentials to activate Azure MFA Server on-premises
- Go back to Azure portal
- Switch to Azure Active Directory > MFA Server > Select Server settings
- Click on Generate Activation Credentials button.

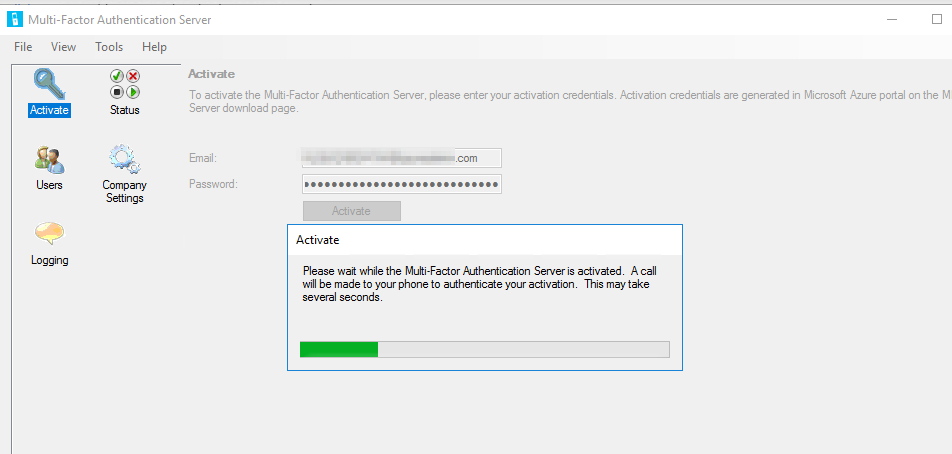
- Copy this information into the Azure MFA Server in the boxes provided and click Activate.
Configuring Azure MFA Server to support RADIUS
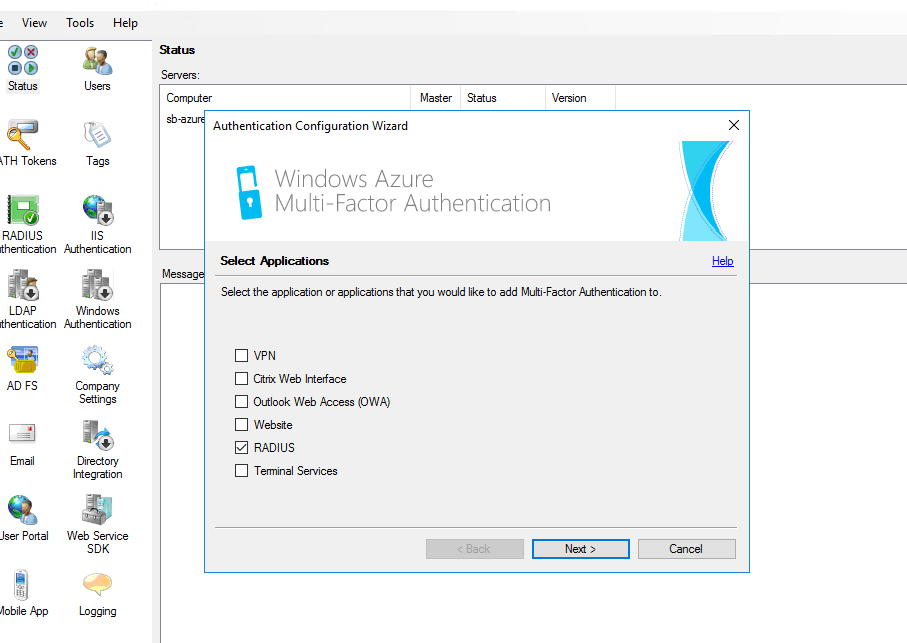
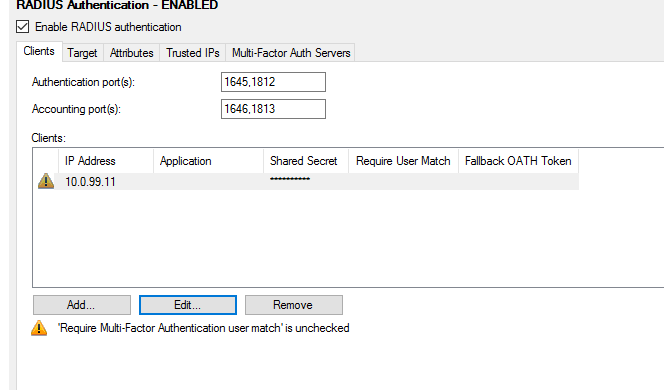
4. MFA Server has been activated. Now need to proceed with it's configuration:
- Click on Tools > Authentication Configuration Wizard > tick RADIUS checkbox
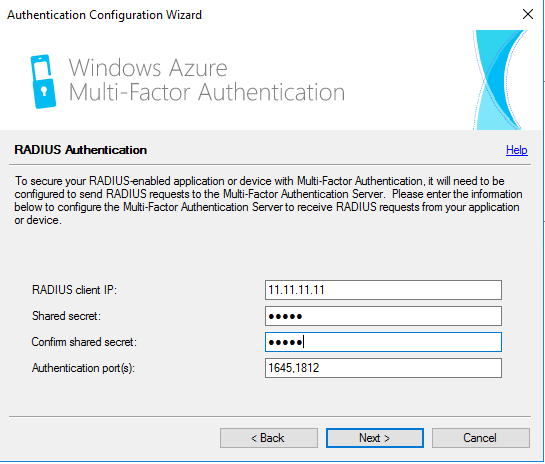
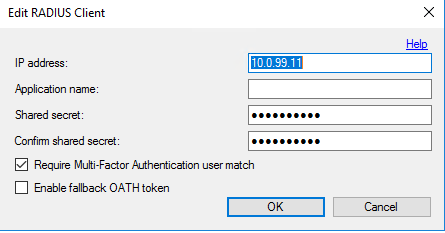
- Specify IP address of the Primary Connection Broker and shared secret.
- Leave the Application name blank and hit OK
- Set Authentication via > Windows domain

- Click Next and complete configuration.
NOTE: Once done, there will be an exclamation mark asking you to enable "Require Multi-Factor Authentication user match", please do so by clicking on Edit button and save the changes.
Importing Users From Active Directory
5. To import users, a Domain Administrator role is required.
- Users > Import from Active Directory > highlight needful users > Import
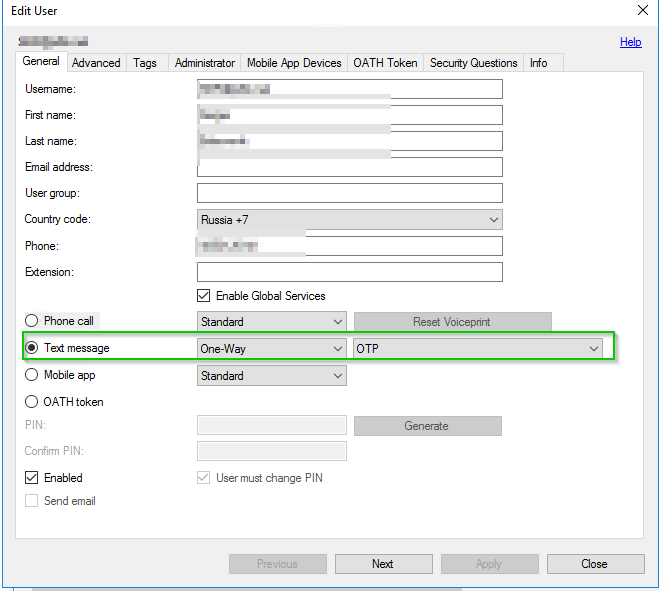
- Make sure that these users have a cell phone specified by clicking on Users > username > Edit
- Change default value from phone call to Text message
- Check "Enabled" checkbox and hit Close

Validating Configuration
6. To confirm that MFA Server configured properly:
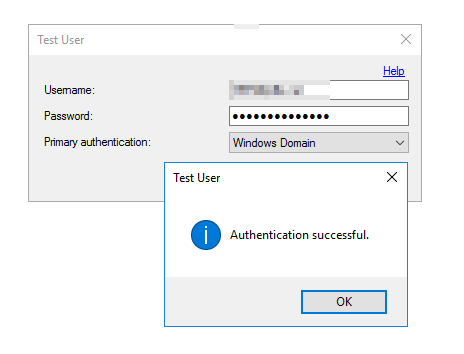
- Check that Multi-Factor Authentication works natively by specifying a user and hitting on Test button
- Check that Multi-Factor Authentication works with NTRadPing Test Utility
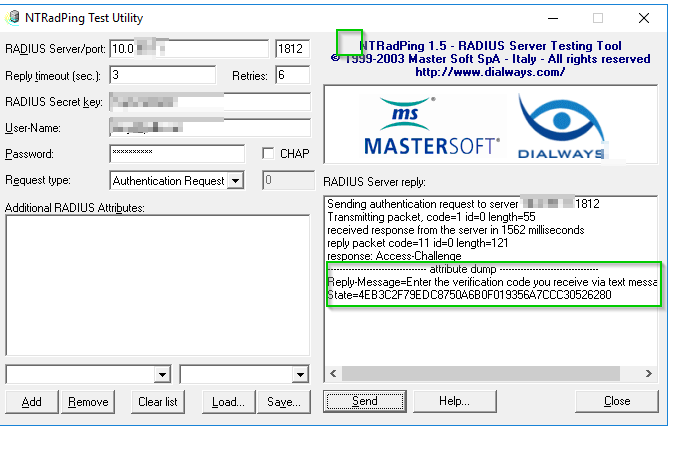
- Unzip the archive, run the utility and specify RADIUS server IP, port, and shared secret. Enter the username and password of a user you testing with and hit Send to start the test.
- An example of a successful result is Access-Challenge as on the screenshot below
Configuring Parallels Remote Application Server
7. Set up Second Level Authentication in RAS:
- In RAS Console, select Connection > Second Level authentication > choose Azure MFA (RADIUS) as provider > insert FQDN of MFA Server and secret key (must match shared secret you specified on step #4.)
- Increase timeout limit if for example you prefer authorization via phone call and hit Check Connection

- In RAS Console, select Connection > Authentication
- Uncheck Force clients to use NetBIOS credentials (otherwise, connections from Windows client might fail)

Evaluate
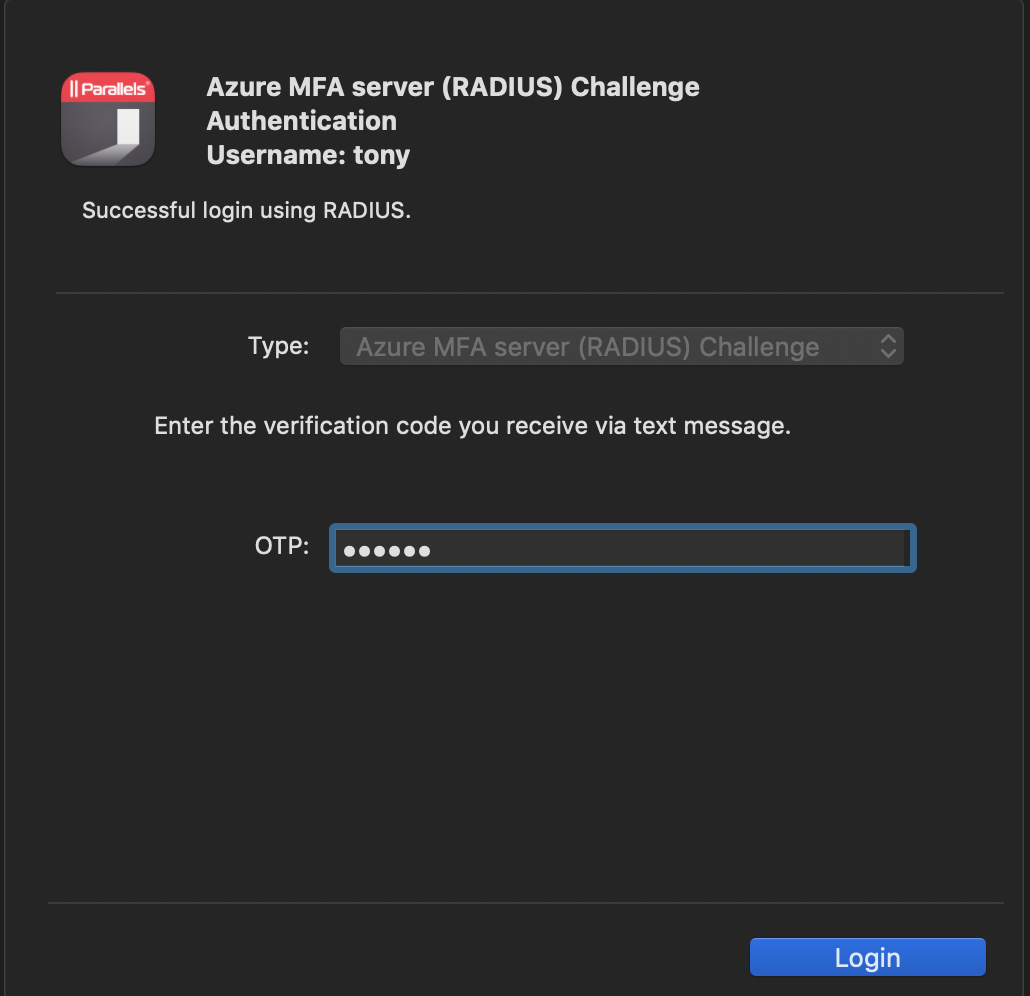
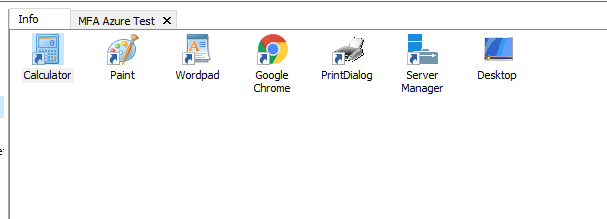
8. Test MFA via connecting to your Farm using Parallels Client. In case everything is correct, after inserting OTP you should see applications available for your user:
Was this article helpful?
Tell us how we can improve it.