Information
By using the MSI format, administrators can now deploy the Parallels Client remotely by using Group Policies or any other deployment tool that accepts the MSI format. Installing the Parallels Client on remote computers using the MSI is much easier and will reduce the chance of user error during the installation process.
Preparing MST file
- Download and install the Orca database editor
- Open Orca.
- Open the original MSI. File > Open > Browse to the MSI > Click Open.
- Start a new transform. Click on the top Transform menu, and select New Transform.
-
Make changes. Navigate to a table you want to edit, and modify values.
List of available settings listed the Parallels Client Guide
Example:
-
At the Property table we've set TUXGINA parameter to 1 in order to exclude Single Sign On component during the installation.

- Generate the transform file. Click on the top Transform menu, and select Generate Transform.
- Save the transform file. Enter in a name for the transform file, and click Save.
Attached is the example ot resulting MST file:
Create a distribution point
- Log on to the server as an Administrator user
- Create a shared network folder (this folder will contain the MSI and MST files)
-
Set permissions on this folder in order to allow access to the distribution package.

- Copy the Parallels Client MSI an MST files you prepared in the shared folder.
Create a Group Policy Object.
- Open Administrative Tools > Group Policy Management
- Right-click your domain name in the console tree and select the Create a GPO in this domain, and link it here
- Set the name for Group Policy and click OK.
- Highlight the policy > at the right pane check Scope tab > Security Filtering
- Select to which groups, users or computer the policy will be applied.
Pushing the installation
Parallels recommends that administrators assign the applications to COMPUTERS. The main reason is that the application is actually installed the next time the computer reboots.
When assigning to users, the application is not installed until the user actually clicks on the icons created for the application.
- Right on the policy you've just created > Edit
- Go to Computer Configuration > Policies > Software Settings > Software Installation
- Right-click Software Installation > New > Package
- In the Open dialog type the full UNC path of the shared package you want to assign > click on the Open button.
-
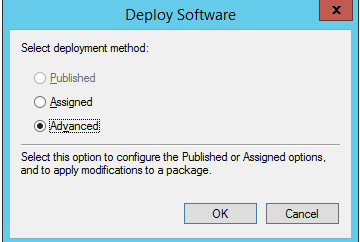
click on Advanced and then click OK (the package will be added to the right pane of the "Group Policy" window)

-
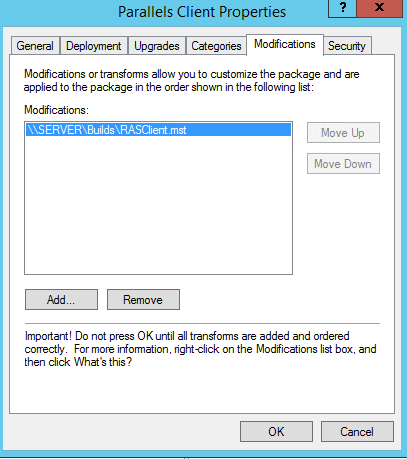
Right click on the added package > Properties > Modifications tab > Add > select MST file you prepared and click OK

Was this article helpful?
Tell us how we can improve it.