If you're running a virtual machine on your Mac using Parallels Desktop, you may experience some performance issues that can make the virtual machine run slower than you'd like. Fortunately, there are several steps you can take to improve your virtual machine's performance.
Virtual machine performance is directly related to a computer's hardware resources. It is also very important to allocate even shares of hardware resources between the host operating system (macOS) and guest (virtual machine) according to the recommended system requirements of both systems.
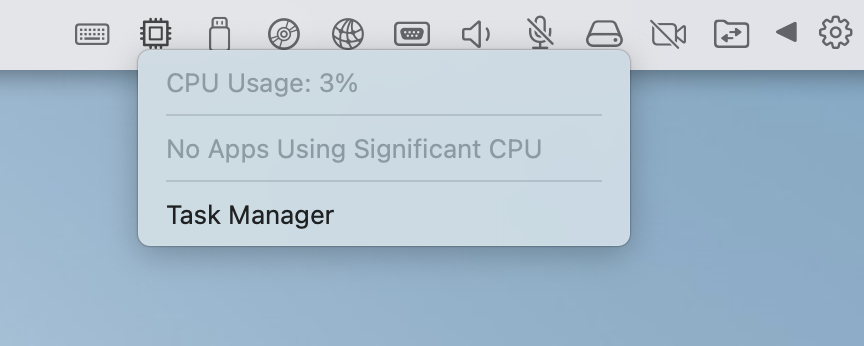
Note: Parallels Desktop for Mac has a cool feature: CPU Usage Monitor. Look at the virtual machine's window tray, and the CPU Usage Monitor will light up in red when CPU usage in Windows is above 70%. Click on CPU Usage monitor to see what processes in Windows use the computer's CPU. Clicking on a process name will open Windows Task Manager, showing the selected process:
The computer's performance mostly depends on several hardware components: CPU, RAM, and hard disk. While the CPU cannot be replaced at hand, most Mac computers are enabled for RAM and hard disk upgrades.
Checking Software Settings
macOS
- Make sure that you have ample free disk space on your startup disk. Visit this article for more details: KB 123553.
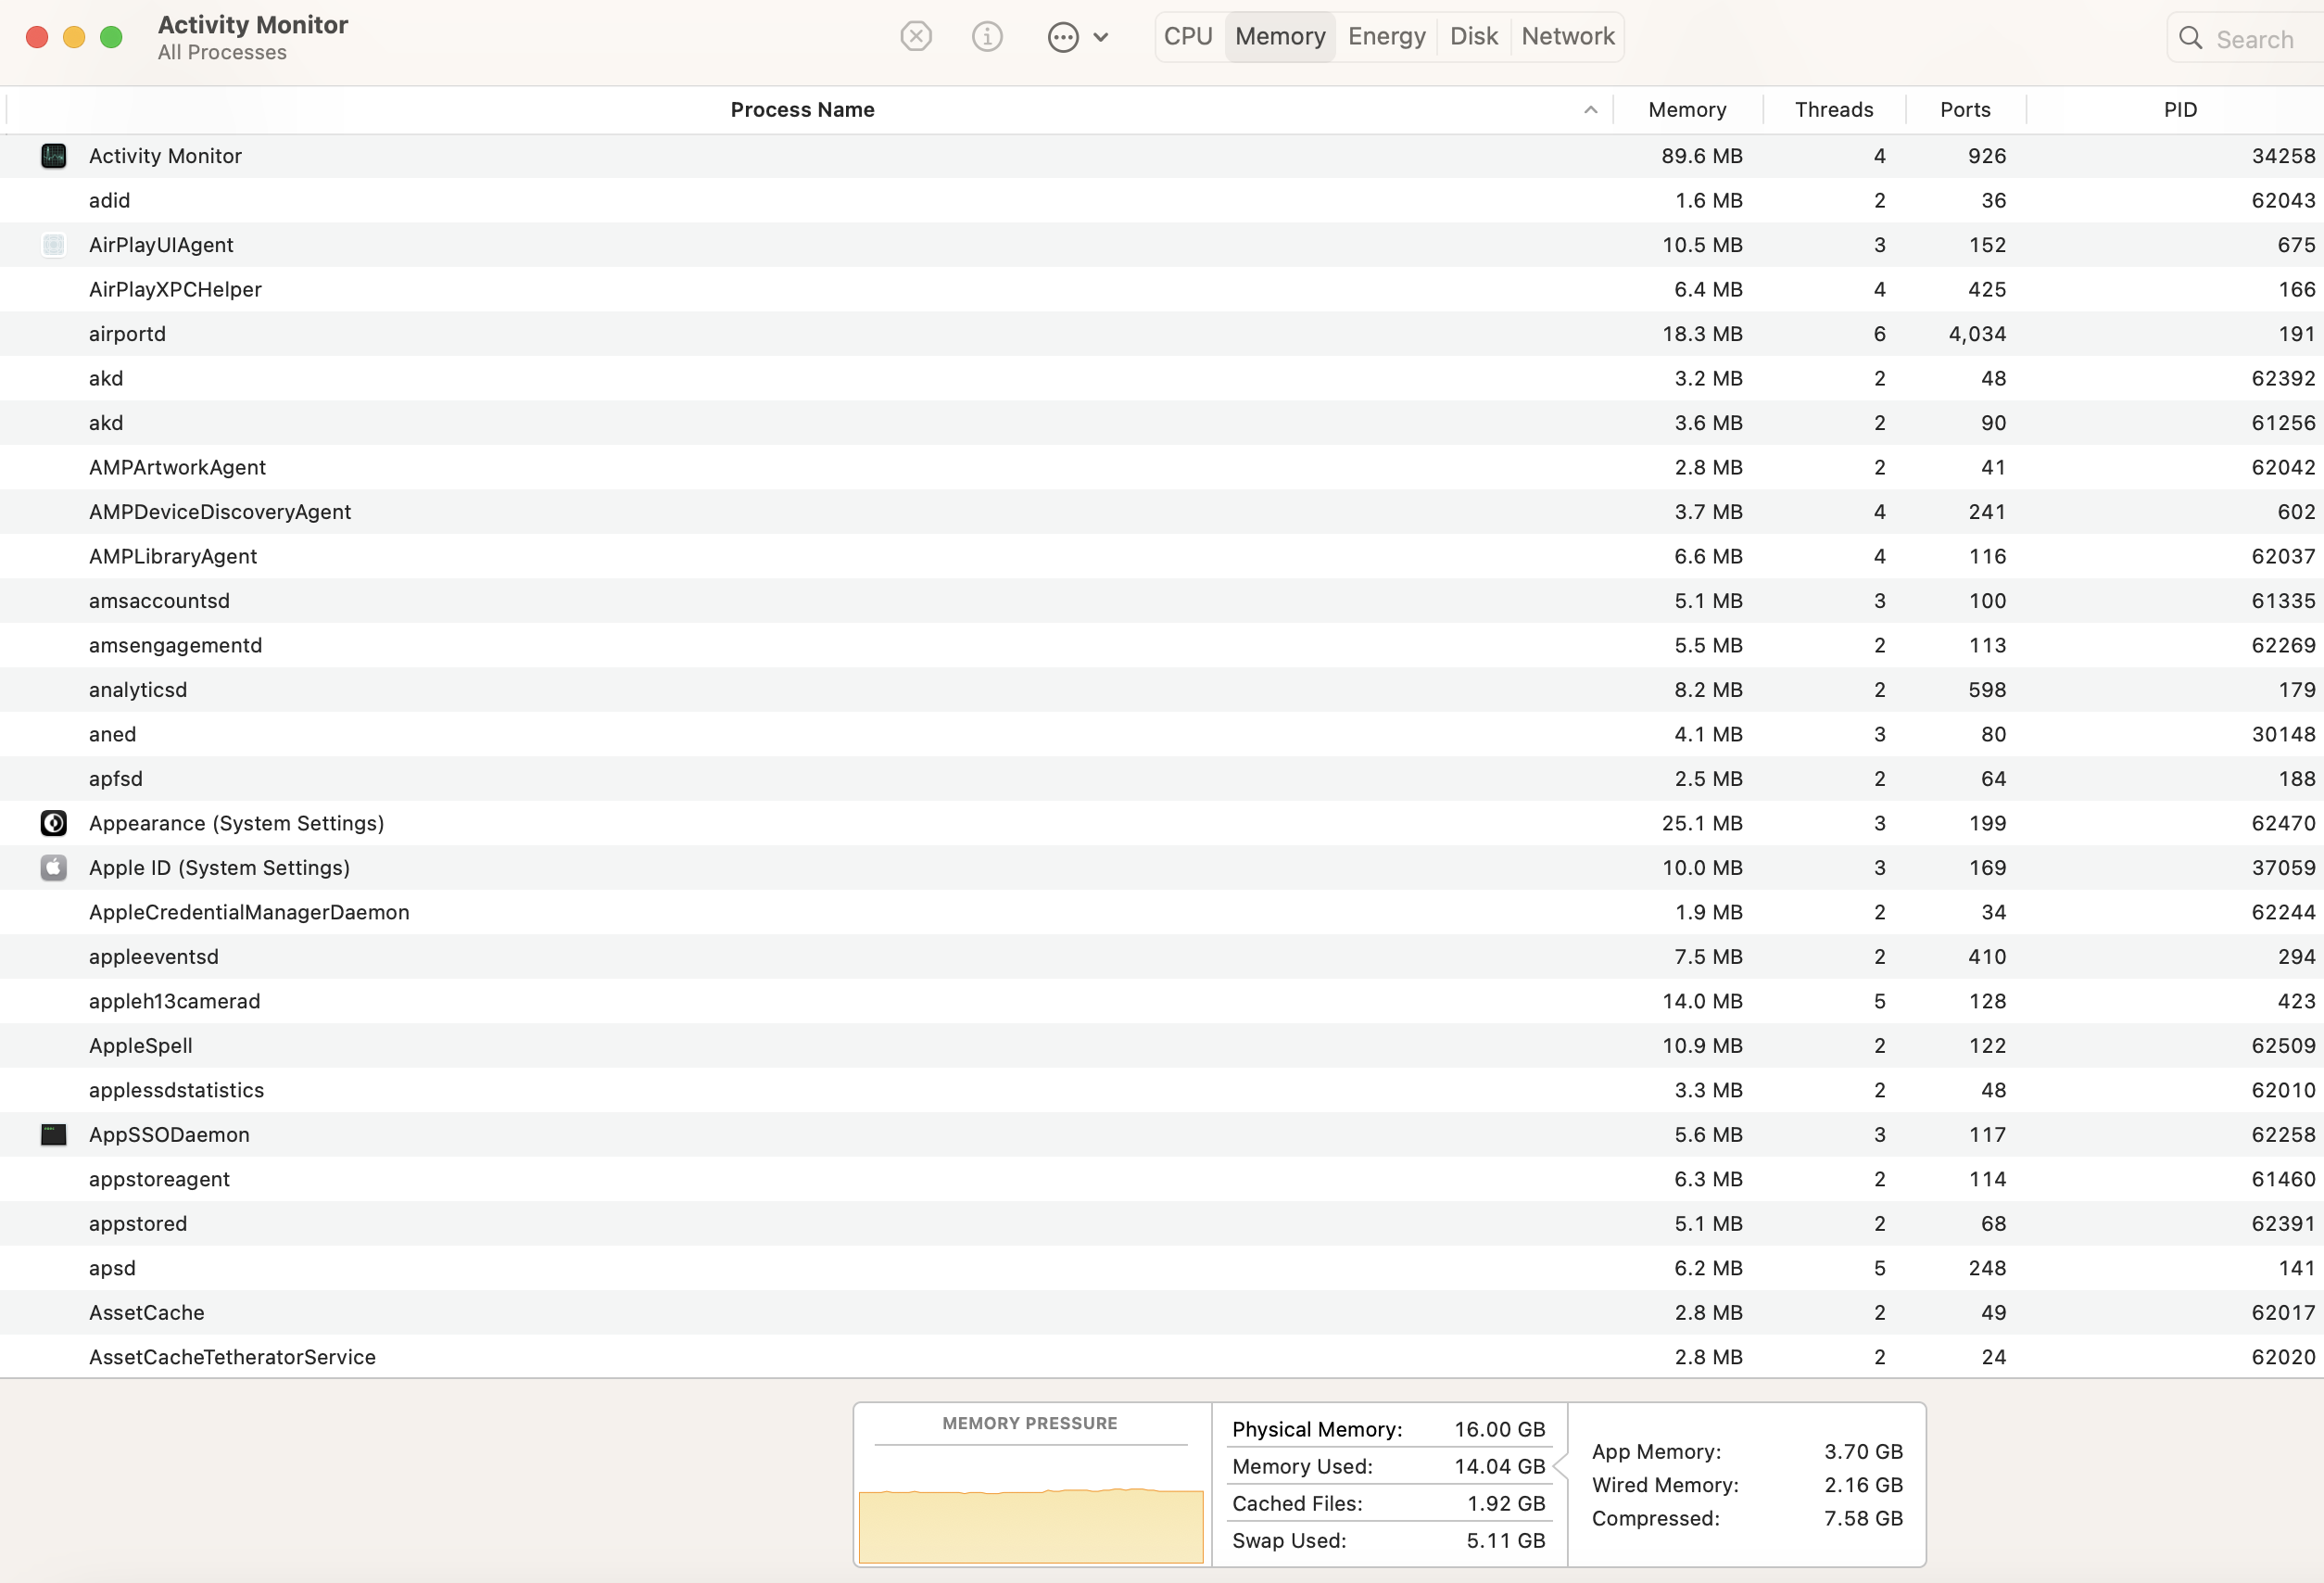
- Use Activity Monitor to check what unwanted applications consume a high percentage of system resources (CPU and Memory).
- Make sure Time Machine is not performing a backup while you’re running the virtual machine. The backup process may slow down overall system performance.
Parallels Desktop Preferences
-
Make sure you're using the latest build for your Parallels Desktop version:
- On the macOS menu bar, click the Parallels Desktop icon > Check for Updates... Download and install the updates if available.
- Store your virtual machine within your Mac SSD (internal storage). Running a virtual machine from an external USB disk or NAS may significantly lower virtual machine performance.
- Be careful running several virtual machines at once - each virtual machine consumes a considerable amount of resources and may slow down overall computer performance.
- Try disabling antivirus programs installed on the Mac host. Alternatively, you may add the Parallels Desktop/virtual machine location to your antivirus whitelist to mark it as good and trustworthy software.
Virtual Machine Configuration
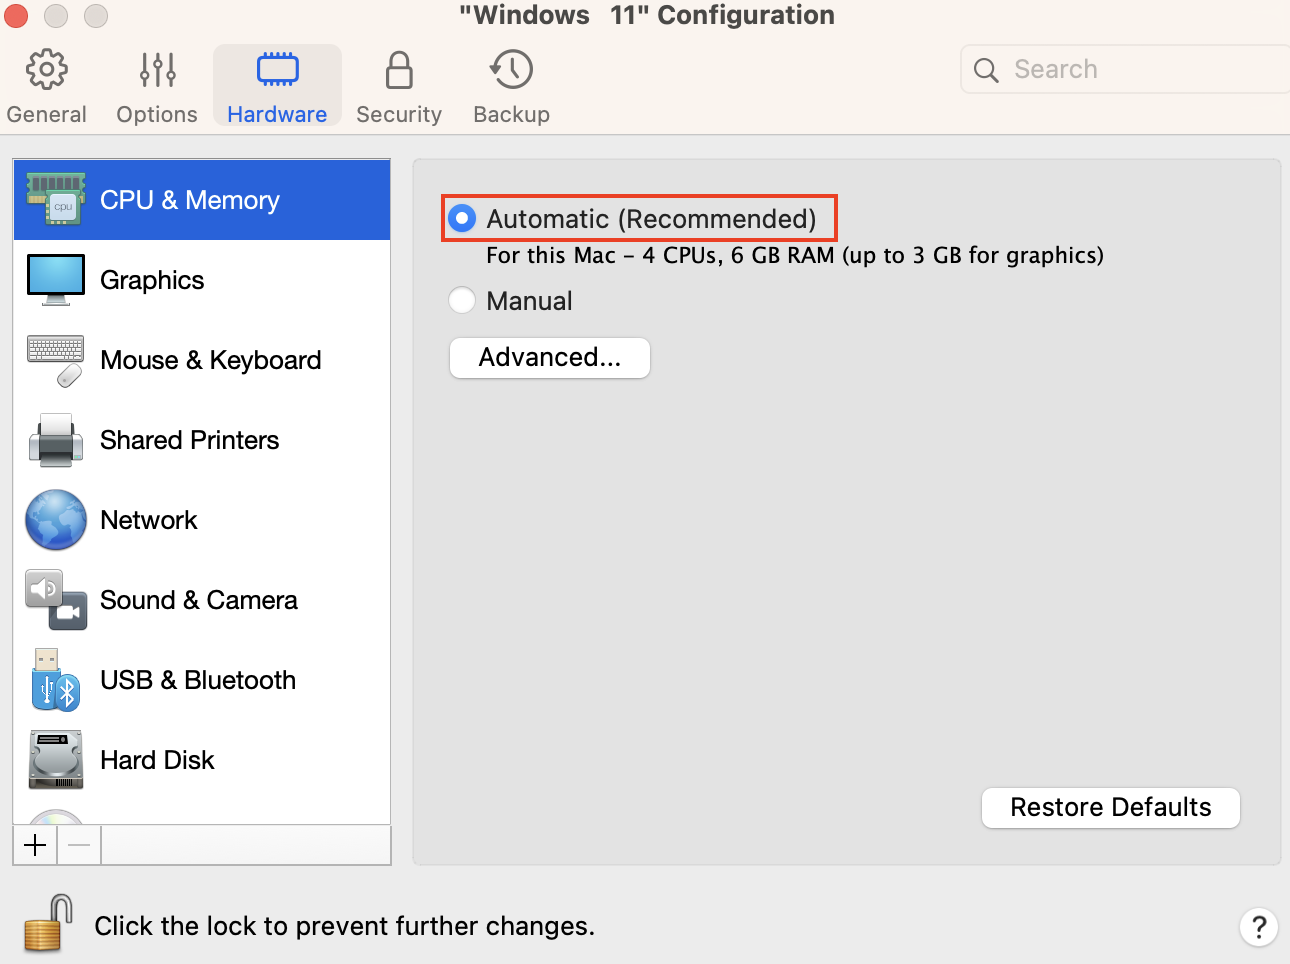
Note: starting with Parallels Desktop 17, we advise using the Automatic Resource Manager feature. Parallels Desktop 17 evaluates your Mac hardware before starting a virtual machine to allocate as many resources as needed to provide a better out-of-the-box experience (OOBE) for our users. When deploying a virtual machine to various different Mac hardware, this new feature helps to ensure that your users will get the best possible experience with Windows on their Macs.
Make sure you have set this option by opening the virtual machine configuration > Hardware > CPU & Memory > select Automatic (Recommended).
If you want to manually adjust the number of CPUs and the amount of memory assigned to the virtual machine, perform the steps below:
- Shut down your virtual machine (Actions > Shut down) > open its configuration > switch to Hardware tab > CPU & Memory > Manual > make sure that the number of processors (CPUs) and the amount of memory do not exceed the recommended values. In most cases, half of the total CPUs will provide optimal performance. Assigning more than half of the CPUs to the virtual machine may cause performance degradation for both Mac and virtual machine.
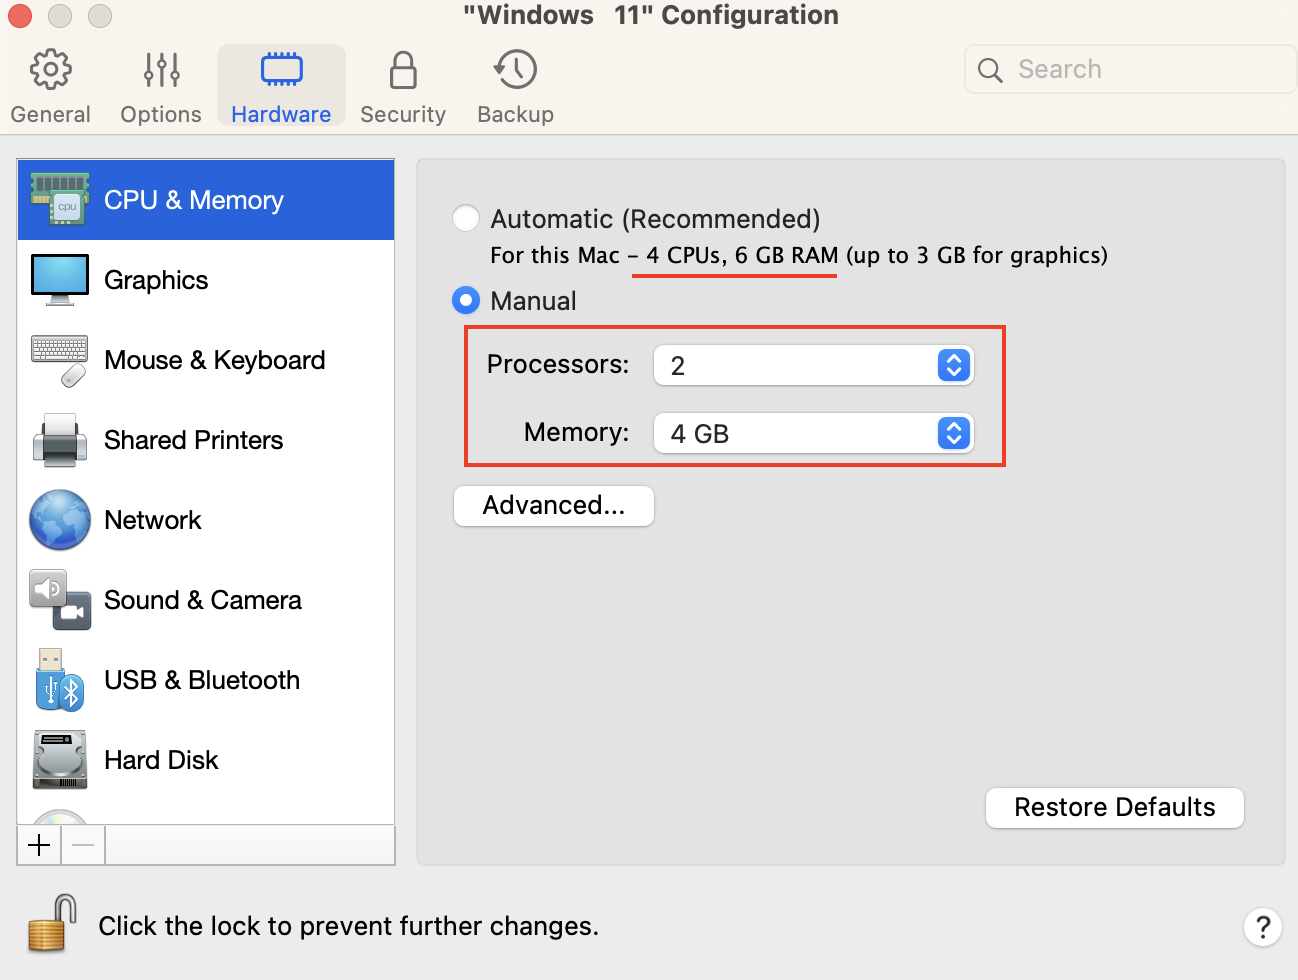
In Parallels Desktop for Mac computers with Apple silicon, system memory is used for graphics to provide the best experience working with virtual machines. More details can be found in KB 125351.
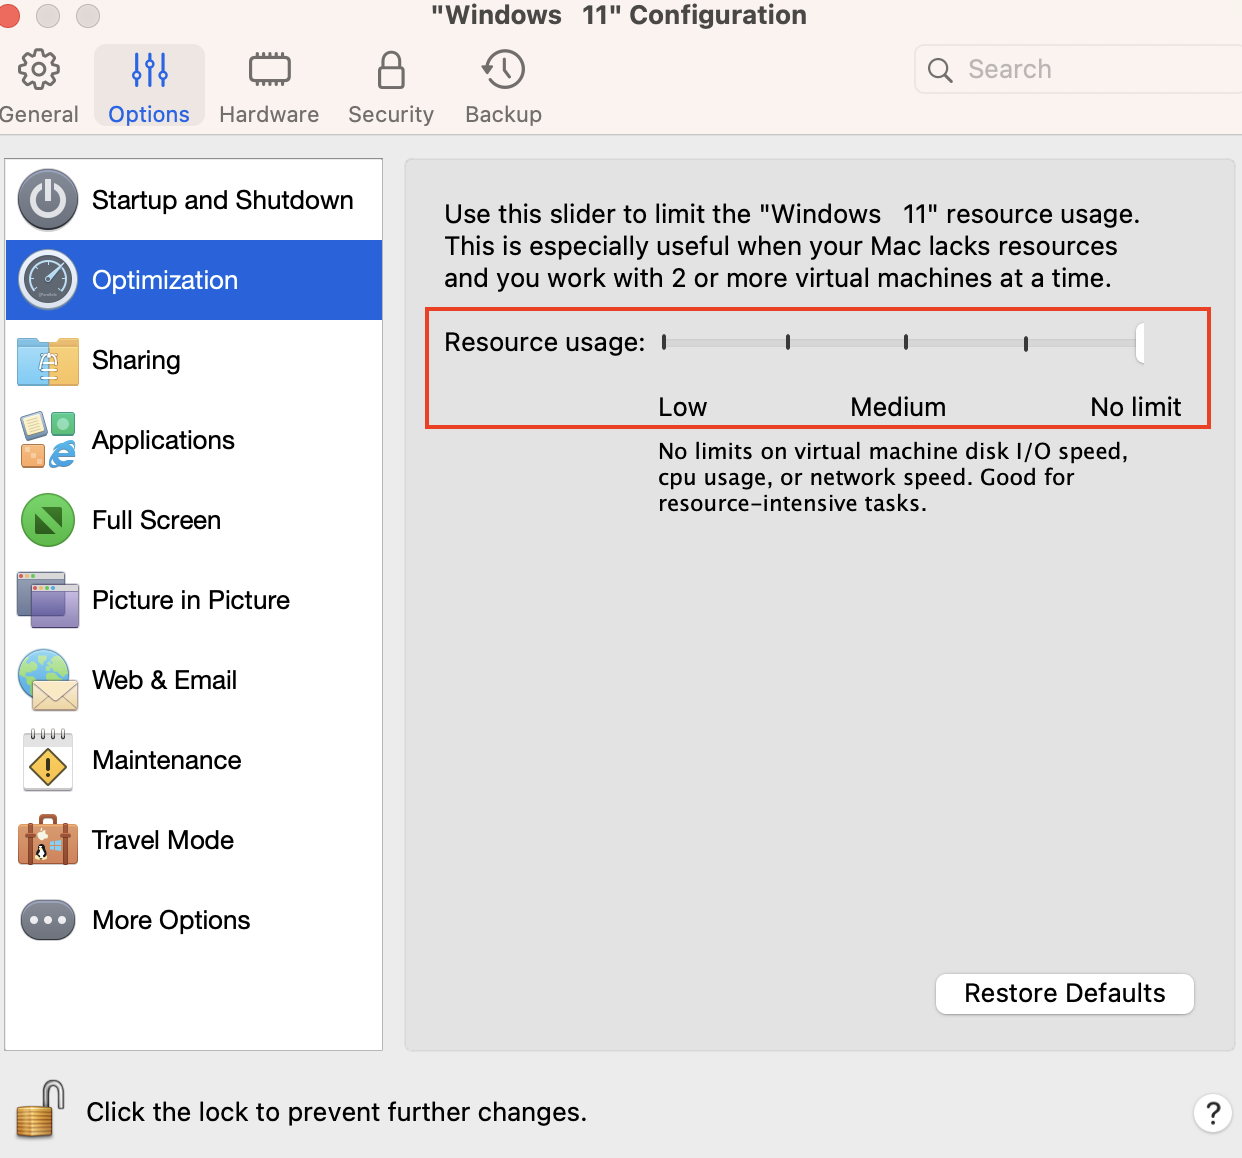
3. Under Options > Optimization set Resource usage to No limit.
4. If your Mac uses an HDD or a Fusion Drive (not an SSD), make sure that the TRIM option is disabled: go to Hardware > Hard Disk > Advanced... > uncheck Enable TRIM option.
5. Start your virtual machine and test its performance.
Possible solutions for Windows virtual machines
- Install all pending Windows updates. Then perform a restart of the virtual machine two or three times to fully apply changes.
-
Users who rarely make use of their virtual machines may encounter slowness and other performance issues after starting a virtual machine if it hasn't been used for a long time. Our recommendation is for users to wait for some time to enable Windows to complete necessary internal jobs and other required maintenance tasks. If Windows still exhibits slow performance, check Task Manager as described below to find out the reason for high CPU consumption.
The virtual machine's CPU consumption directly depends on guest operating system usage. If you notice that your virtual machine consumes a high amount of CPU resources, check the CPU consumption in the guest operating system in Task Manager (right-click on Windows taskbar > Task Manager):
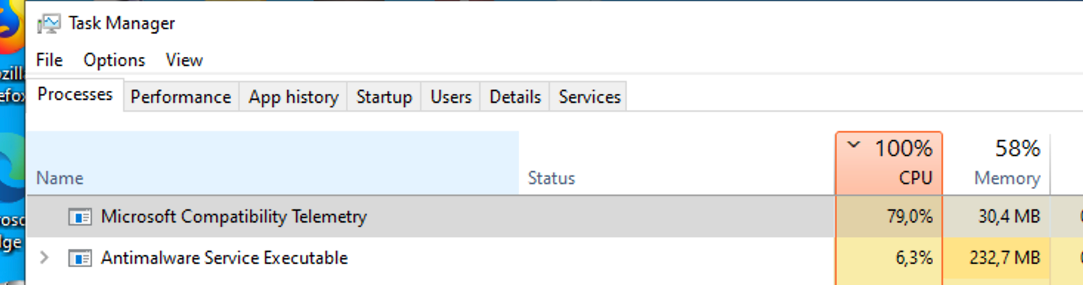
Once you determine the Windows program process responsible for consuming a sufficient amount of CPU, you may refer to the software manufacturer's knowledge base to find more information about the process and the consequence of disabling the process. You can take a snapshot (Actions > Take a snapshot) of the virtual machine to stay on the safe side and disable the top process, e.g. you can follow the steps from this article to disable the Microsoft Compatibility Telemetry service shown in the screenshot above. For some types of software, like video or photo editing, CAD, or video games, high CPU usage is a common operating condition.
- Try to run a clean boot to exclude possible third-party application influence.
Note: in step 3, keep Parallels services enabled. - Try checking for errors present in the Windows virtual hard drive as described in KB115549.
Optional
Perform defragmentation on your Windows virtual hard drive as described here.
Upgrading Your Mac with a Solid State Drive
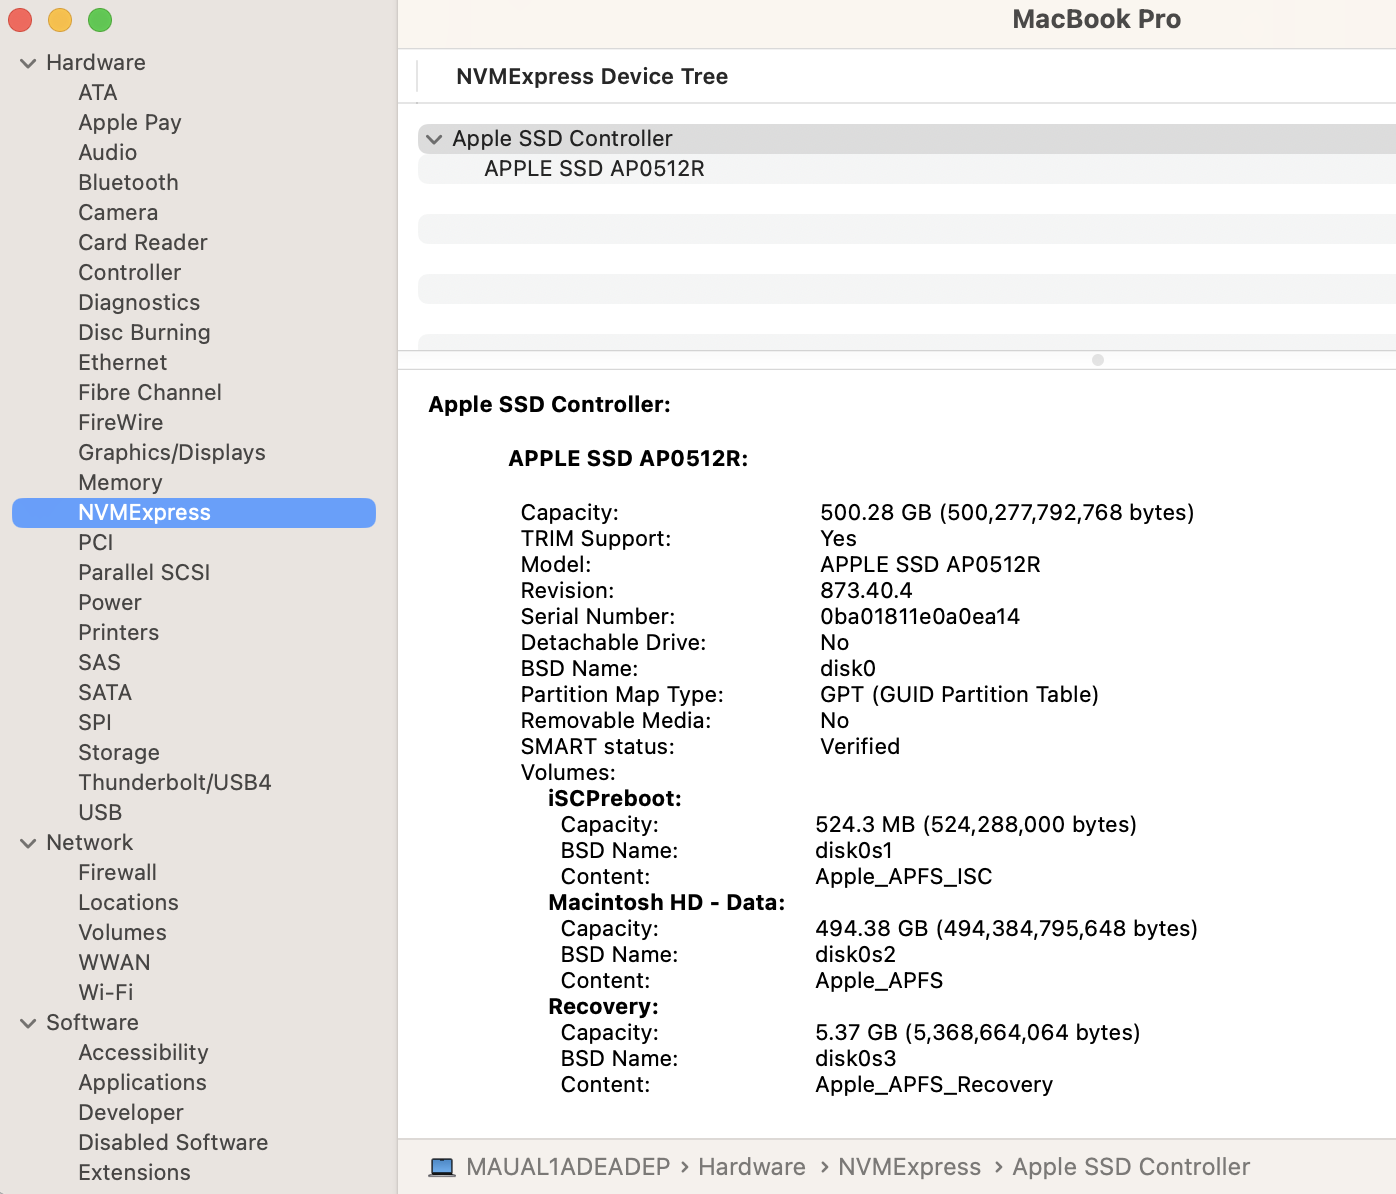
If your Mac uses a hard disk drive (HDD), it is highly recommended to replace the drive with a solid-state drive (SSD). This is the #1 recommendation for all Mac users which gives a significant performance boost to Mac 2-3 times more than HDDs. Contact your local Apple Authorised Service Provider to get assistance with your disk replacement.
TIP: you can check your Mac's drive type at the 'System Information' report (click > About this Mac > System Report... > Hardware > SATA/SATA Express/NVMExpress)
Upgrading Your Mac with Better Memory Modules (RAM)
If you notice in Activity Monitor that your memory pressure is up to the maximum, it's time to check if your Mac allows you to perform a RAM replacement with higher module capacity.
Visit these articles for more details:
Was this article helpful?
Tell us how we can improve it.