For successful completion of this guide, one of the steps is to publish resources from a Remote Desktop Server. As a result, a server running Windows 2003 with terminal services or 2008+ using RDS services with available RDS CALs is required.
More information on setting up Remote Desktop Services can be found at Microsoft TechNet.
Note: Window Server 2003 is no longer supported starting with Parallels® Remote Application Server (RAS) v17.0. See here.
One of the fundamental features of Parallels RAS is the ability to publish seamless applications individually to your users. This means users will only see the applications you give them access to and not a full terminal service desktop.
The Parallels RAS Console is where you manage Parallels RAS. Use the console to publish an application or a desktop, add a terminal server or a VDI host to the farm, backup the Parallels RAS configuration, and make other configuration changes.
Parallels RAS console layout
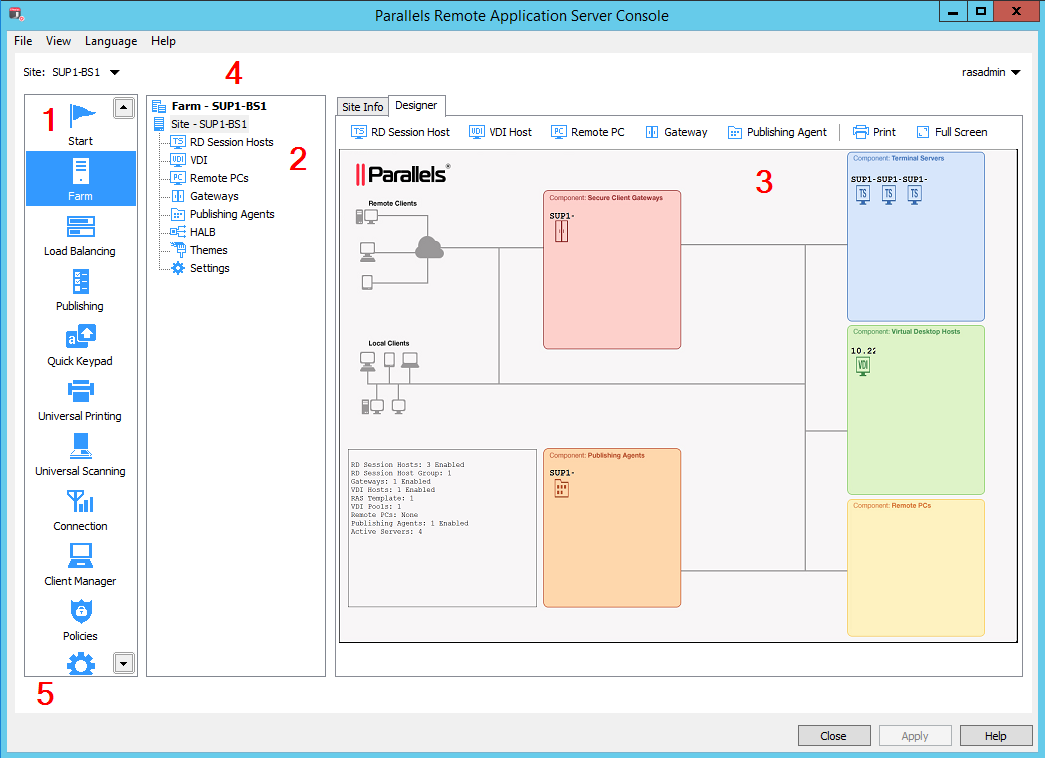
The Parallels RAS Console consists of the following sections:
- This section lists categories. Selecting a category will populate the right pane with elements relevant to this category.
- This section becomes available only for the Farm and the Publishing categories. The navigation tree allows you to browse through the objects related to that category.
- This section displays the selected object or category properties, such as servers in a farm or published application properties.
- This information bar displays the site you are currently logged into and the user account being used for the connection. Please also note the Press Apply to commit the new settings message in the middle (in red). This message is displayed when you make changes to one or more objects/items, but do not commit them to Parallels RAS. Click the Apply button (at the bottom of the screen) to commit the changes. If there are no currently pending changes, the message is not displayed.
- The information bar at the bottom of the screen is used to display the most recent console notification (if one is available).
Setting up a simple RAS environment
To set up a Parallels RAS environment:
- Log into the Parallels RAS Console.
-
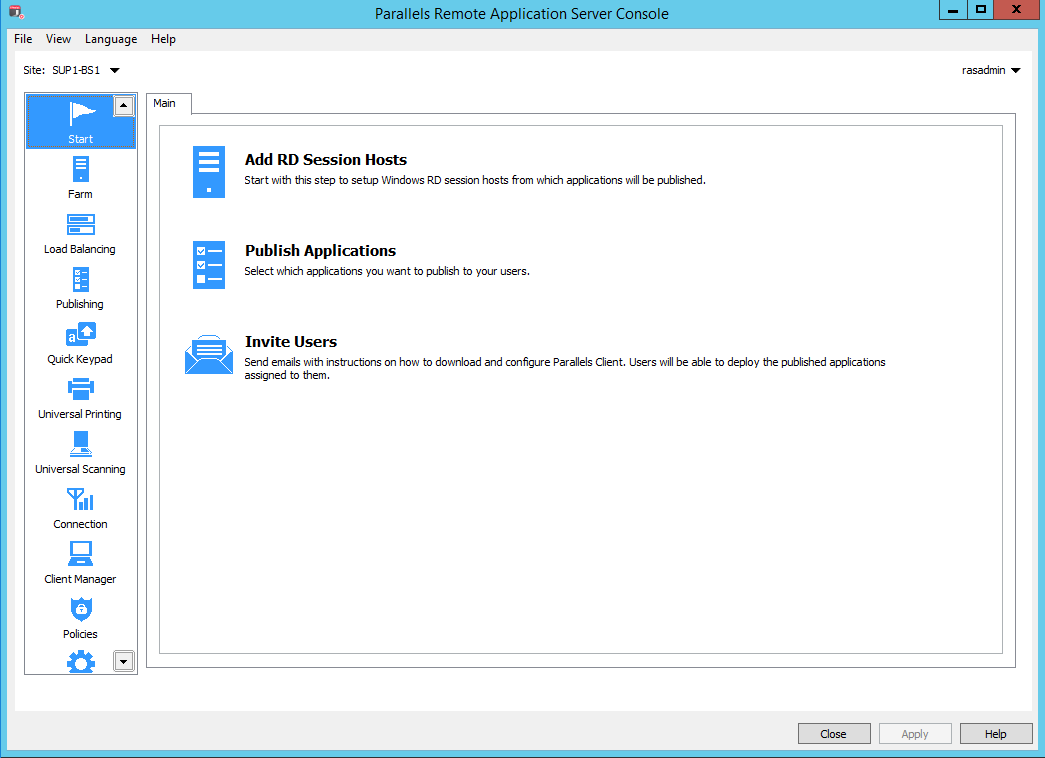
In the console, select the Start category. This category gives you access to three wizards that you can use to easily perform essential tasks, such as adding RDSH servers, publishing applications, and inviting users to use those applications.
Adding a RD Session Host
To add a RD Session Host:
- Click the Add RD Session Hosts item.
- On the first page, select the local server in the list or type server hostname/IP in the search box at the bottom of the page and then click the plus-sign icon.
- Click Next.
- On the next page, you can specify whether the firewall should be configured on the server and whether the RDS role should be installed (and some other options). Keep the default values and click Next.
- On the next page specify users/groups that should be added to Remote Desktop Users group.
- Review the settings and click Next.
- The Install RAS Terminal Server Agent dialog box opens. When the Terminal Server Agent is installed on the server, click Done to close the dialog box.
- Click Finish to close the wizard.
If you would like to verify that RD Session Host has been added to the site, click the Farm category (below the Start category) and then click RD Session Hosts in the navigation tree (the middle pane). The server should now be included in the list. The Agent State column may display a warning message. If it does, reboot the server. The Agent State column should now say, Agent OK which means that your RD Session Host is fully operational.
Publishing an Application
Now that you have an RD Session Host, you need to publish an application that it make available to the users.
To publish an application:
-
Click the Publish Applications item.
Note: If you see a message box saying that there are no servers available, make sure that you added the server as a RD Session Host to the site and then restarted it.
- The Publish Applications wizard opens.
- On the first page, select the server(s) from which the application should be published. For the purpose of this tutorial, select the Individual Servers option and then select the local server in the list.
- Click Next.
-
On the next page, navigate to Parallels / Parallels RAS and select the Parallels RAS Console application (or any other application that you want to publish).
The Show applications not available on all target servers option becomes enabled when you select more than one server on the previous wizard page. If the option is cleared (default), the directory tree will contain applications that are available on each and every server that you selected. If the option is selected, the tree will contain applications that may be available on some server(s), but not on others.
- Click Next. Review the summary information and click Next again.
- Click Finish when ready.
- To verify that the application has been published, select the Publishing category and see that the Parallels RAS Console application is present in the Published Resources list (the middle pane).
Inviting Users
Your Parallels RAS environment is now fully operational. You have an RD Session Host and a published application. All you need to do now is invite your users to install the Parallels Client software on their devices, which will enable them to use the published application.
To invite users:
- Click the Invite Users item. The Invite Users wizard opens.
-
If you haven't configured anything yet in your Parallels RAS installation, the first wizard page will prompt you to configure a mailbox for sending notifications to your users.
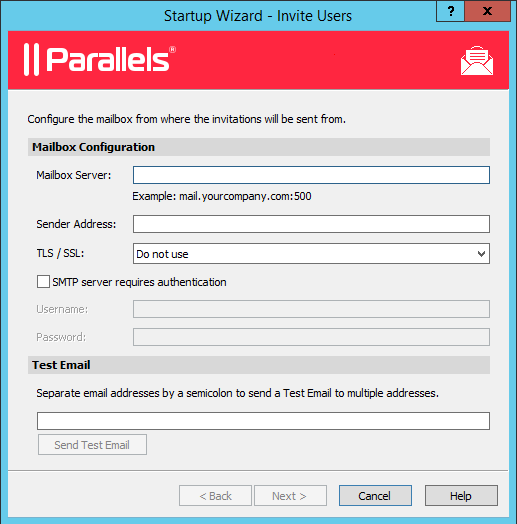
- Enter your outgoing mail server name and sender address (e.g. your email address). Choose whether to use the TLS/SSL protocol and whether your SMTP server requires authentication (provide the username and password if it does). You can also send a test email to test your outgoing mail server settings.
- Click Next.
-
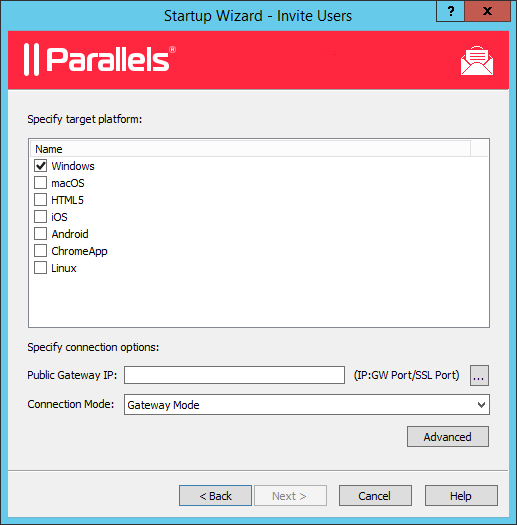
On the next page of the wizard, specify target devices and connection options:
- In the target devices list, select the types of devices to send an invitation to. Each target device of a particular type will receive an email with instructions on how to download, install, and configure the Parallels Client software on that device type.
- In the Public Gateway IP field, specify the Parallels RAS Secure Client Gateway domain name or IP address. Please note that this can be a public IP address in order to reach the system from a remote user. You can click the [...] button to select a gateway from the list.
- In the Connection Mode drop-down list, select the Parallels RAS Secure Client Gateway connection mode. Please note that SSL modes require the gateway to have SSL configured.
- Click Next.
- On the next page, specify the email recipients. Click the [...] button to select users or groups.
- Review the invitation email template displayed in the lower pane. You can modify the template if needed. The template uses the following variables:
- %RECIPIENT% - Recipient username.
- %SENDER% - Sender email address that you specified in the first step of this wizard when you specified the outgoing email server settings.
- %INSTRUCTIONS% - Includes a script for automatic configuration of Parallels Client and a link that will run it.
- %MANUALINSTRUCTIONS% - Includes instructions for manual configuration of Parallels Client. Click the Preview button to preview the email message.
- Click Next, review the settings that you specified, and click Next again to send the invitation email to the selected users.
Was this article helpful?
Tell us how we can improve it.